Workspace Management
1. Get Started With a New Workspace
When you open Binadox for the first time, you are prompted to create a workspace.
A Workspace is a place where you organize the process of monitoring and cost optimization for various cloud and subscription services.
In your Binadox account, you may create multiple workspaces and organize required levels of access for your employees based on the tasks they accomplish.
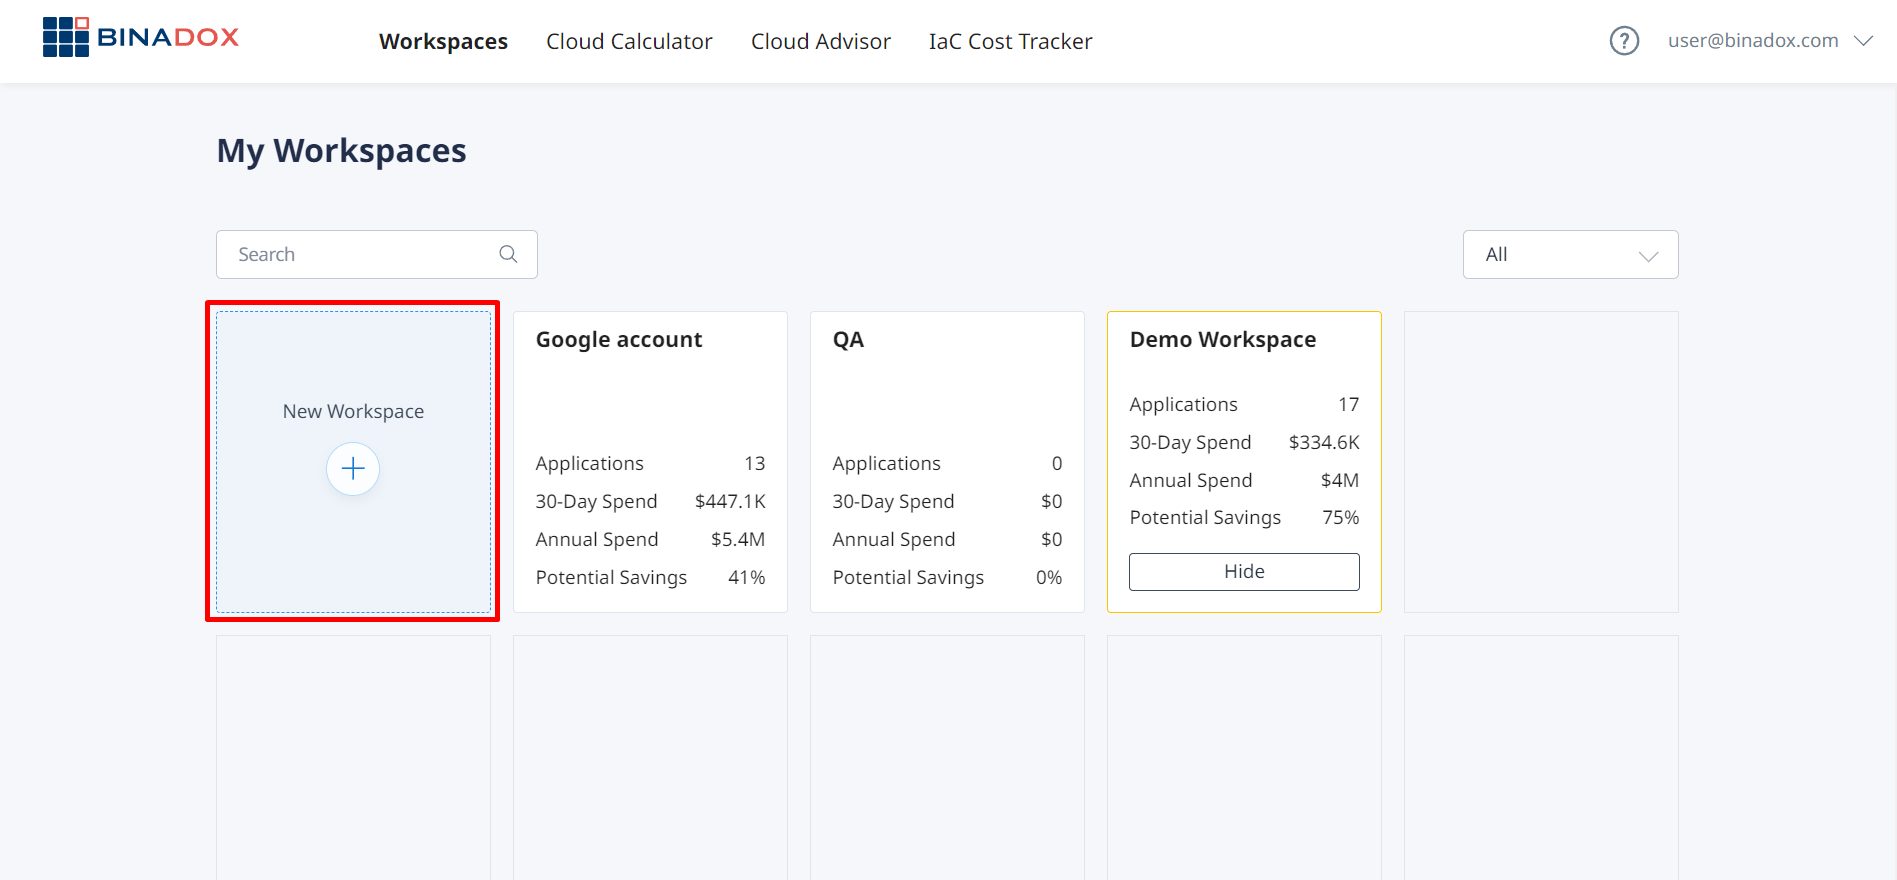
1. To create your first Workspace on Binadox, go to the My Workspaces home page, click the New Workspace button.
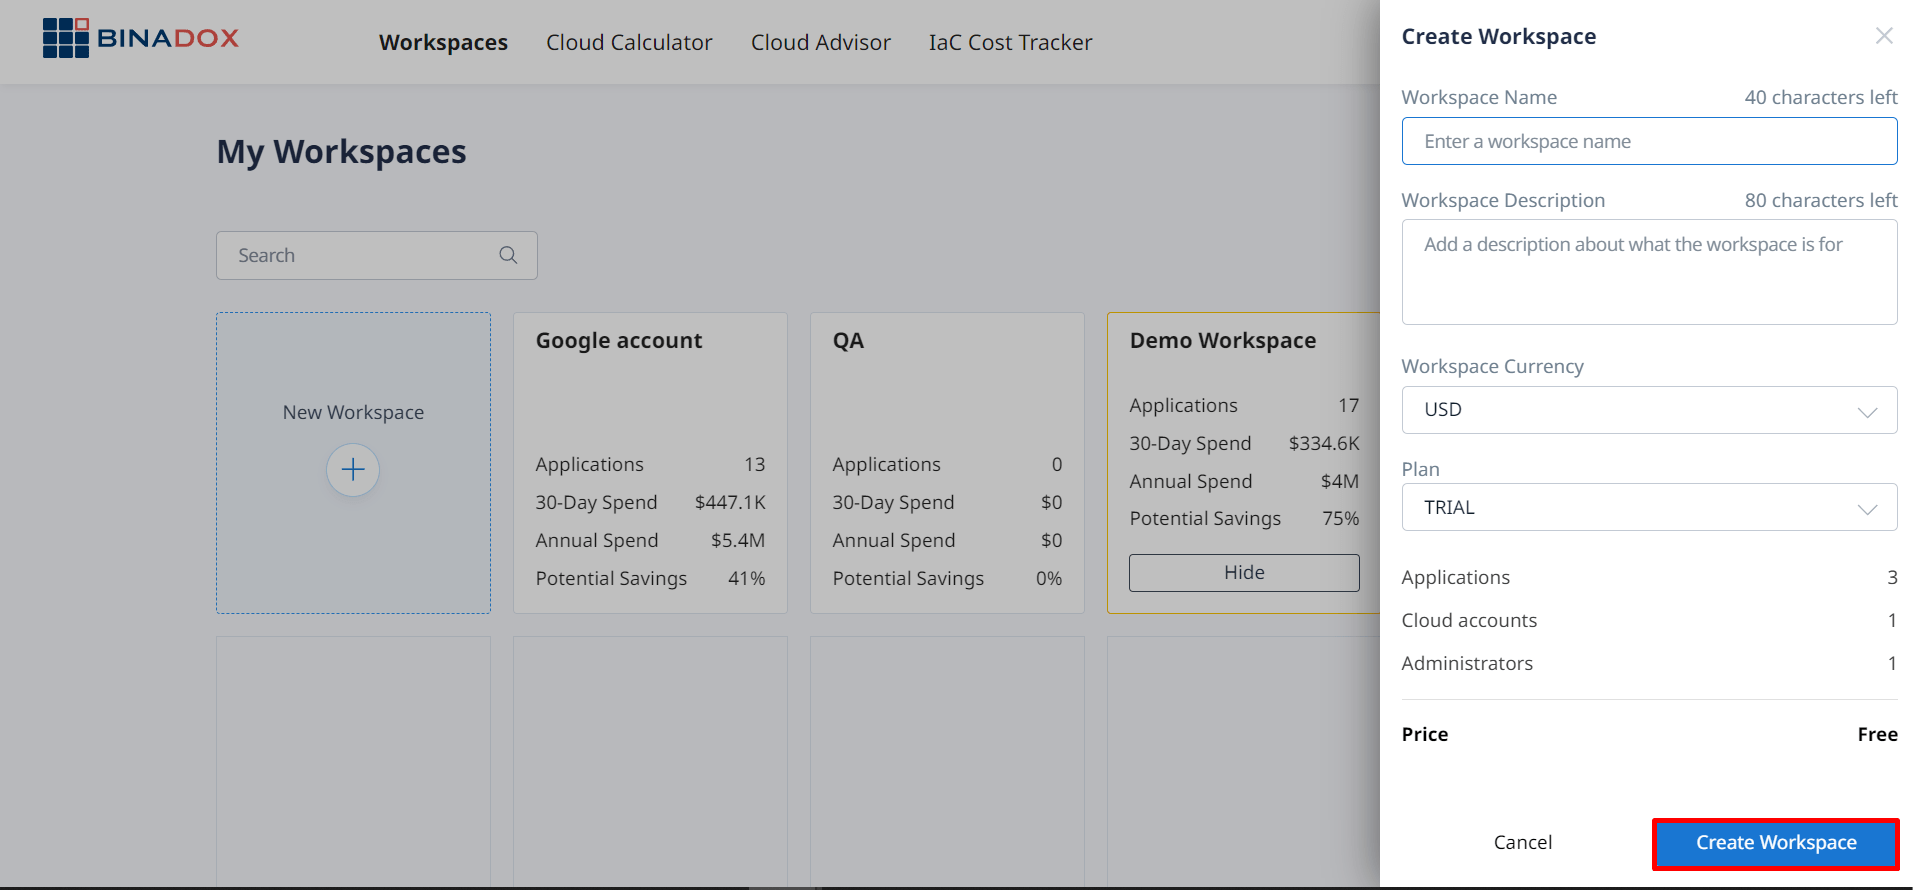
2. Enter a Workspace name, write a short description (optionally), and select a payment plan. Click Create Workspace. You will be redirected to the payment gateway to make a payment. After the transaction is complete, you will be notified that the payment has been successfully made and you will be able to get started.
1.1 Demo Workspace
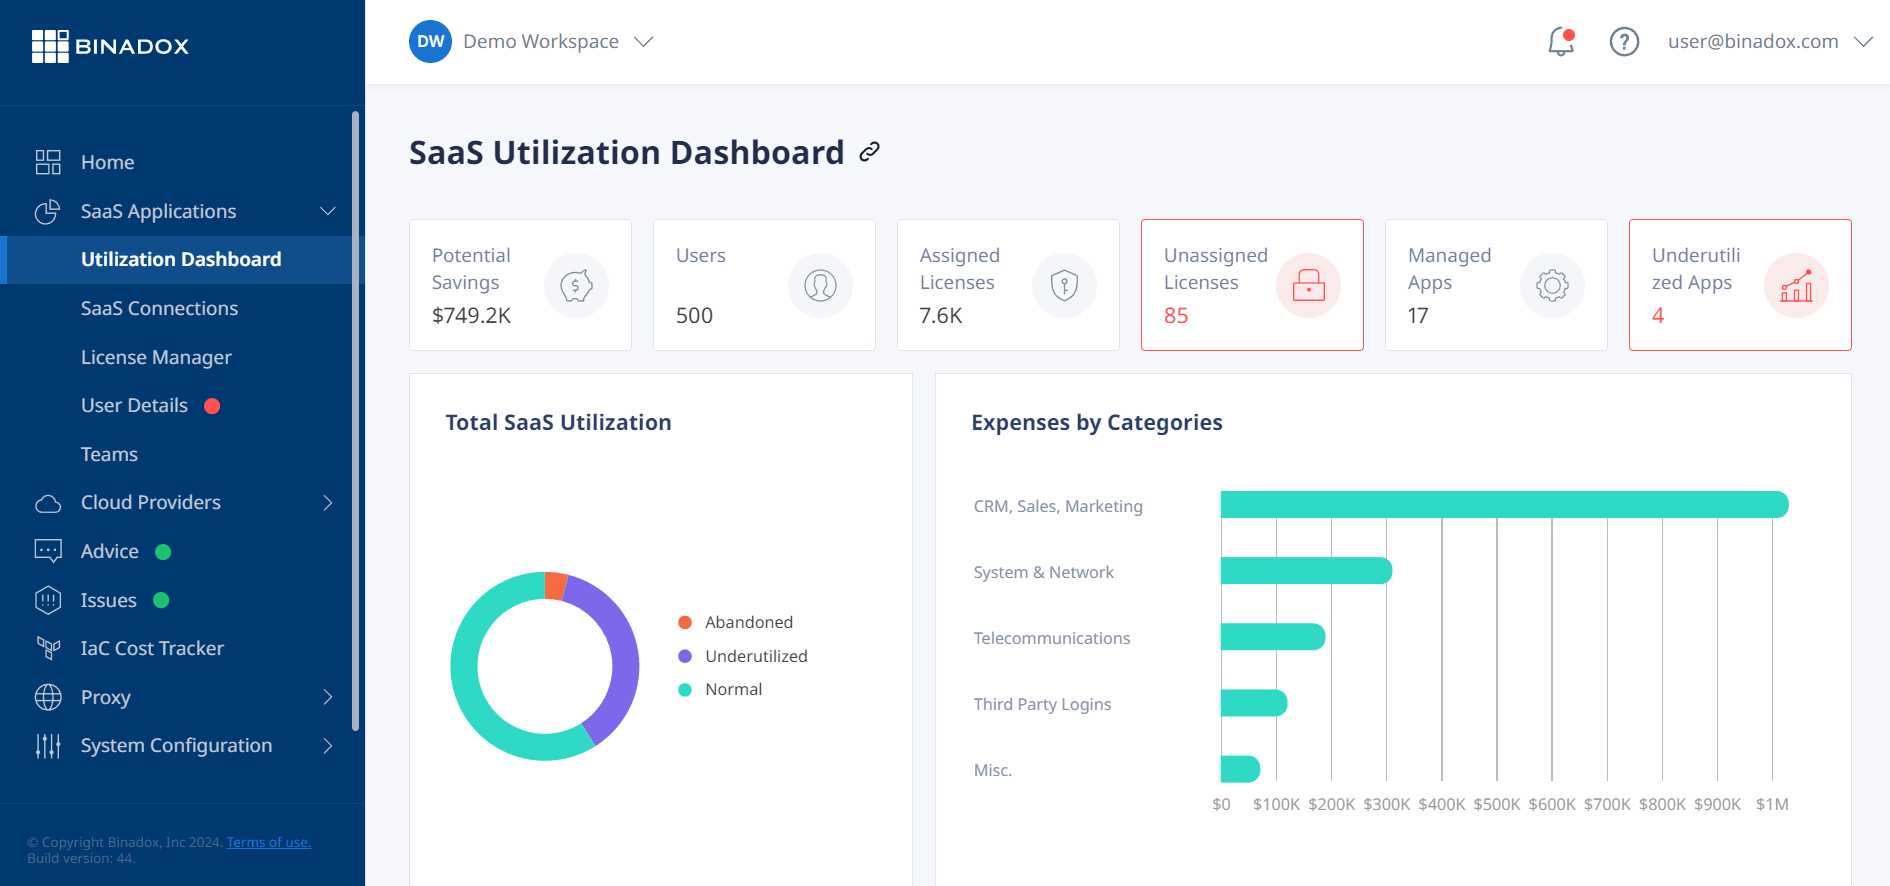
A Demo Workspace was developed to help you to get acquainted with Binadox. It provides you with read-only access to dashboards with pre-loaded metrics and graphs that you would see after connecting your applications and cloud services with Binadox.
Proceed to the Demo Workspace to get familiar with the user interface and see Binadox features in action.
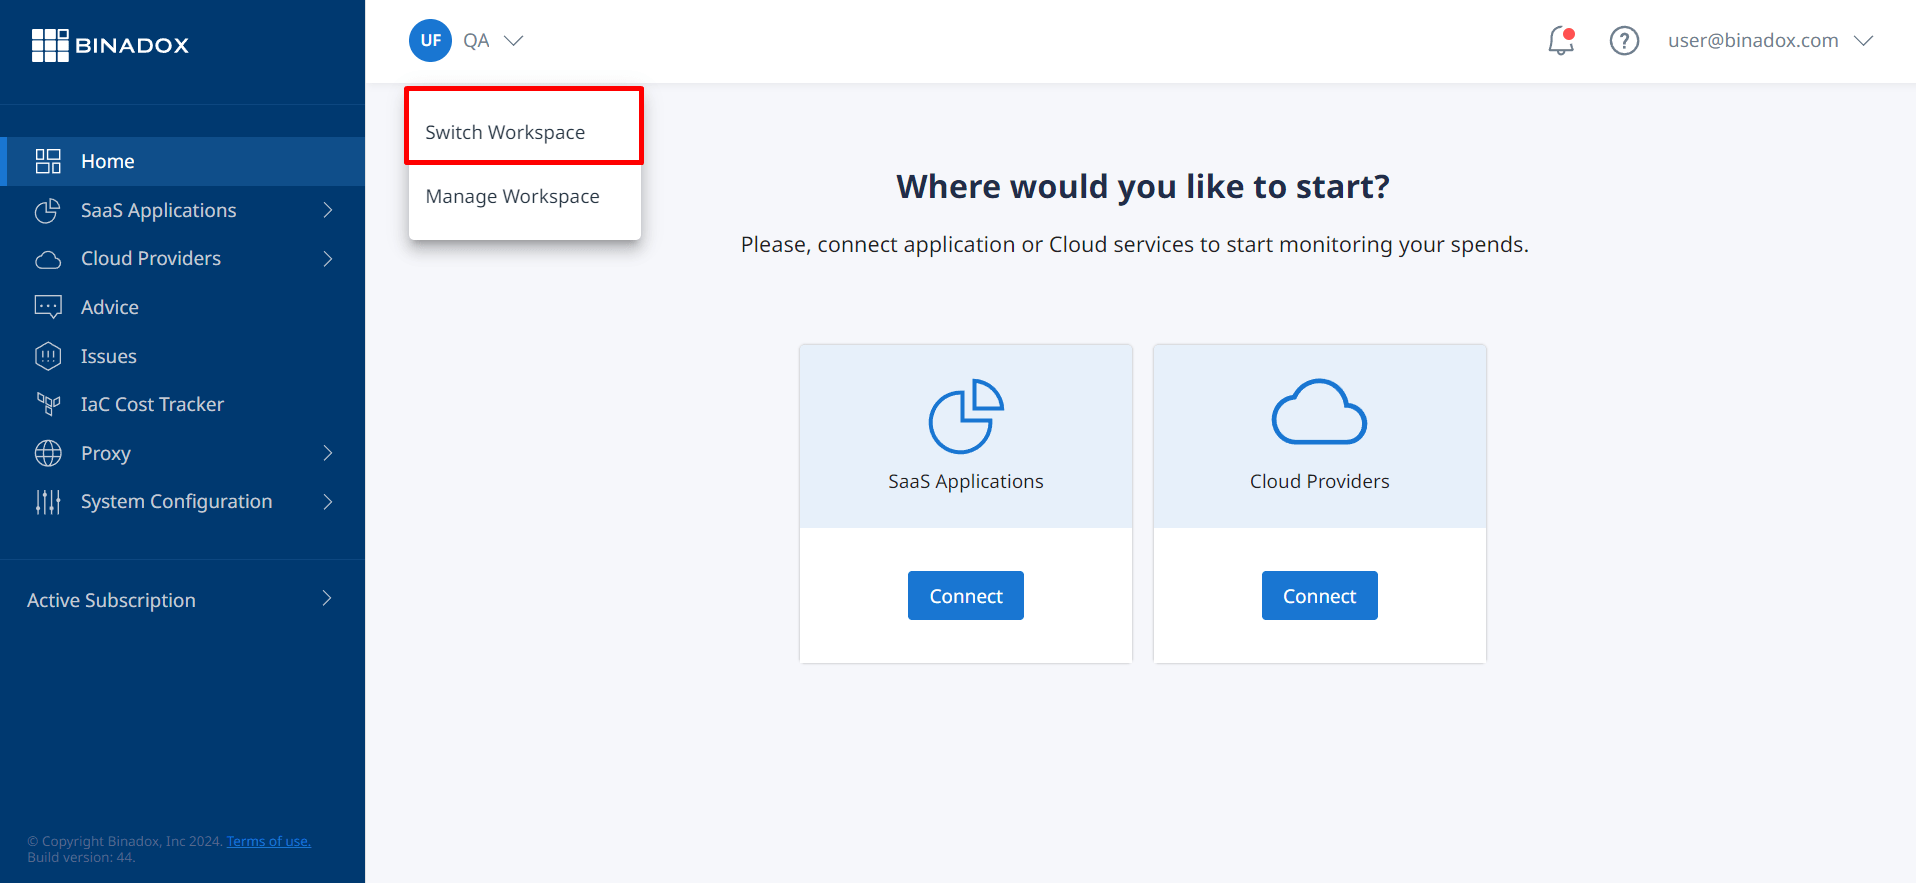
1.2 Switching Between Workspaces
To switch between Workspaces you need to click on the workspace icon in the top left corner. Select Switch Workspace in the drop-down list. After doing this you will be redirected to the My Workspaces home page. Here you can choose and open the required workspace.
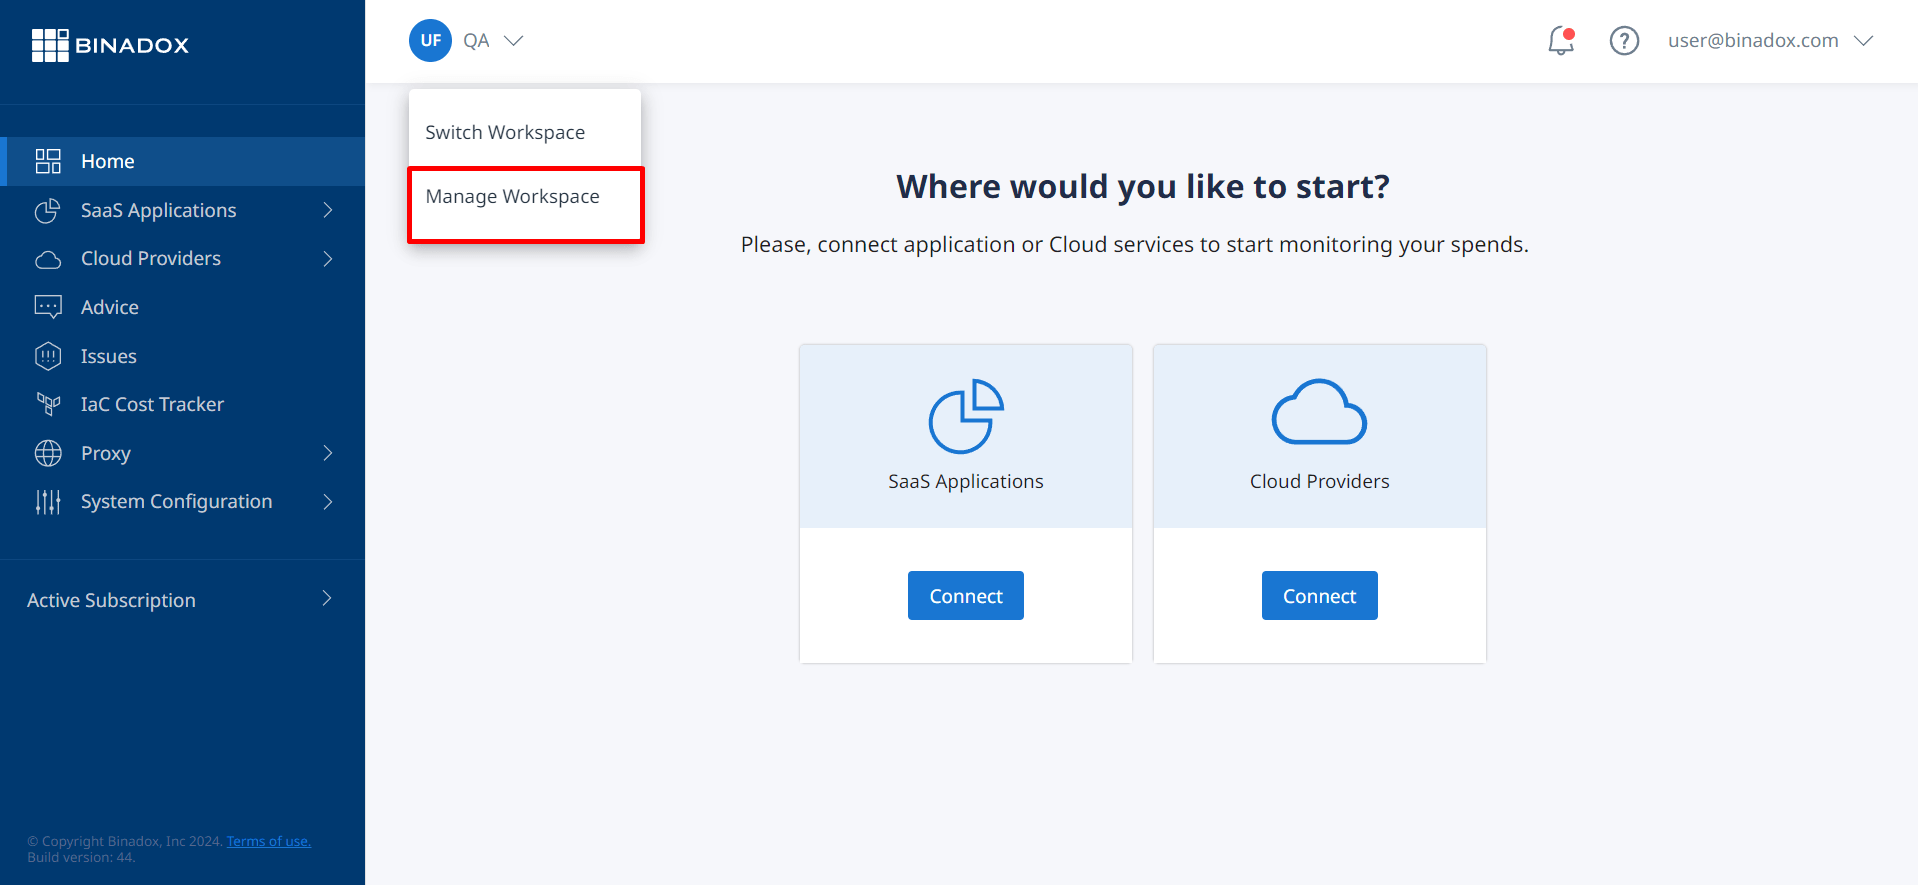
1.3 Managing a Workspace
Permissions:
Admin permissions are required to manage a Workspace.
From Workspace Settings, you can customize your Workspace details, upgrade your current subscription, manage Workspace members.
To customize a workspace, click on the workspace icon in the top left corner. Select Manage Workspace in the drop-down list.
1.3.1 Workspace Roles and Permissions
An administrator assigns roles for each user within a Workspace. The role defines permissions to view or manage specific workspace data. A Binadox user may have different roles in different workspaces.
The following workspace roles are available in Binadox:
| Permissions | Read-Only | Standard | Admin |
| View graphs and metrics, automatic recommendations on potential savings and usage optimization, upcoming renewal dates of connected applications with related information. | ✔ | ✔ | ✔ |
| Connect applications and cloud environments, set budgets, customize alerts, change system configurations. | ✔ | ✔ | |
| Manage the Workspace (view, add, remove workspace members and change their roles, delete the workspace), update subscription details. | ✔ |
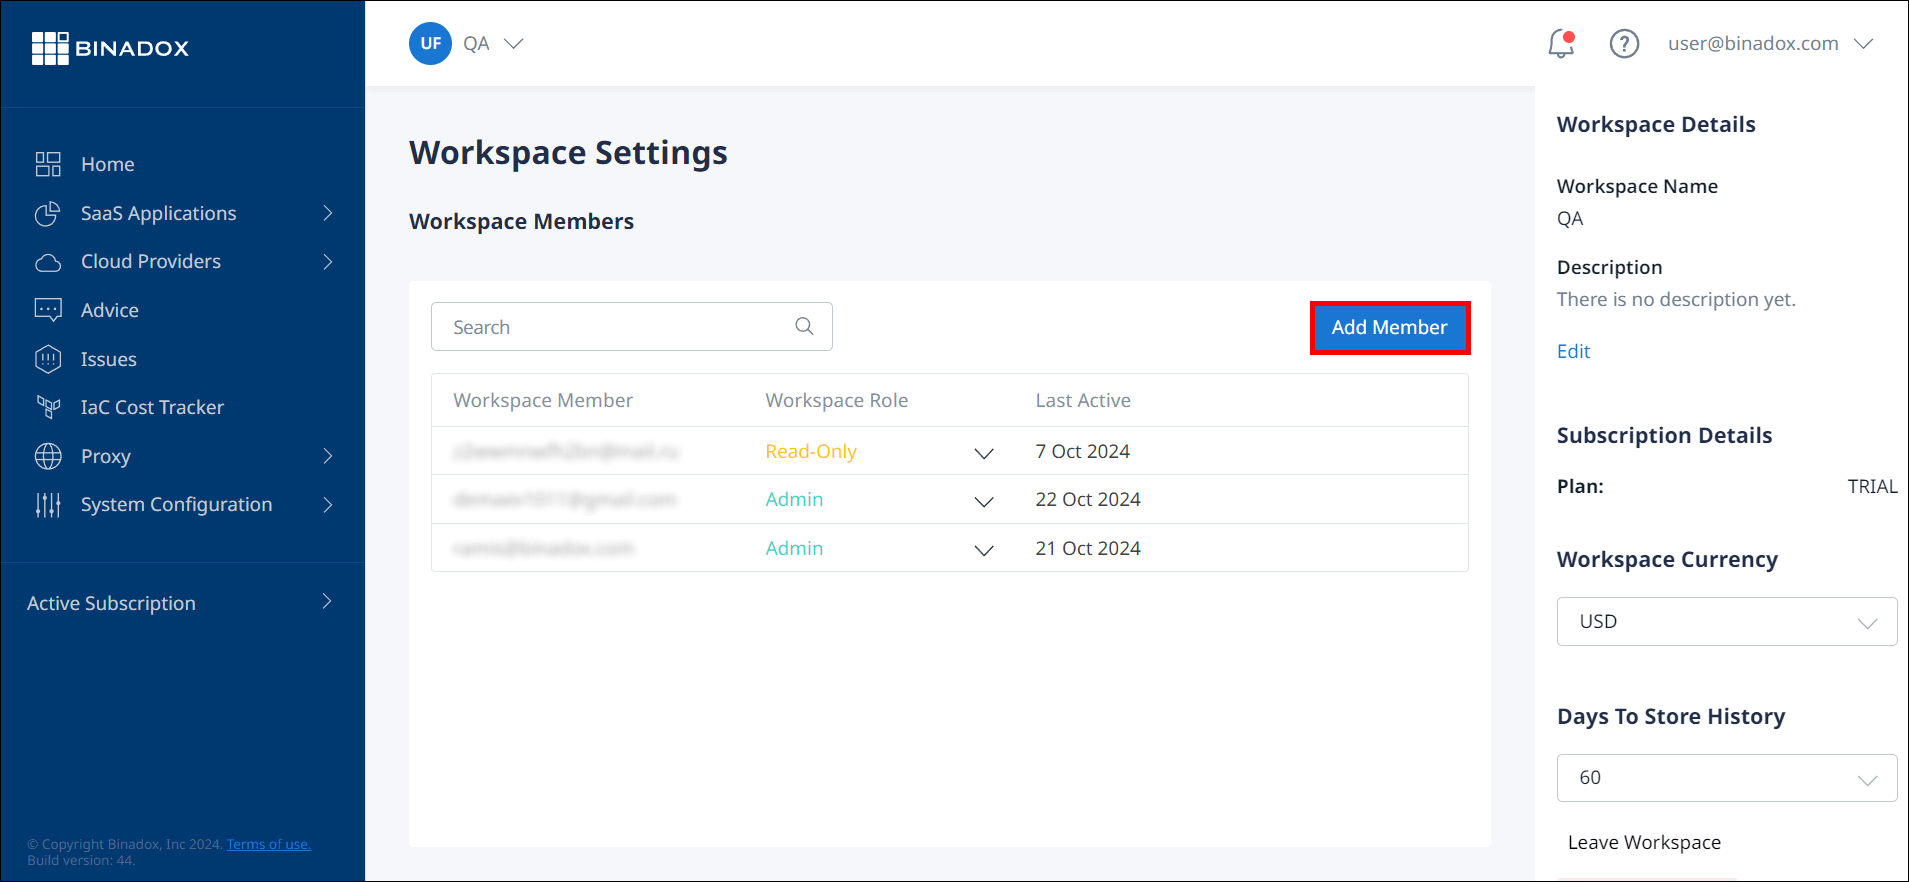
1.3.2 Inviting New Members
Permissions:
Admin permissions are required to invite members to a workspace.
To share a workspace with your co-workers or external specialists you need to invite them to your Workspace.
Please follow the instruction to invite a user to a Workspace:
1. Click on the workspace icon in the top left corner. Select Manage Workspace from the drop-down list;
2. From Workspace Settings, click on the Add Member button;
3. In the Add a New Member window, enter an email address of a person you want to invite;
4. Select a Workspace role defining the required level of permissions;
5. Click Send Invite.
1.3.3 Accepting a Workspace Invitation
To join a workspace you need to check your mailbox for an email invitation.
The followings steps are required to accept a Workspace Invitation:
1. Open the invite email sent by an Admin;
2. Click on the Accept Invite button;
3. Log into your existing account;
4. Find the shared workspace in the My Workspaces list on the home page.
NOTE: If a user does not have an account, he/she will be redirected to the sign-up form.
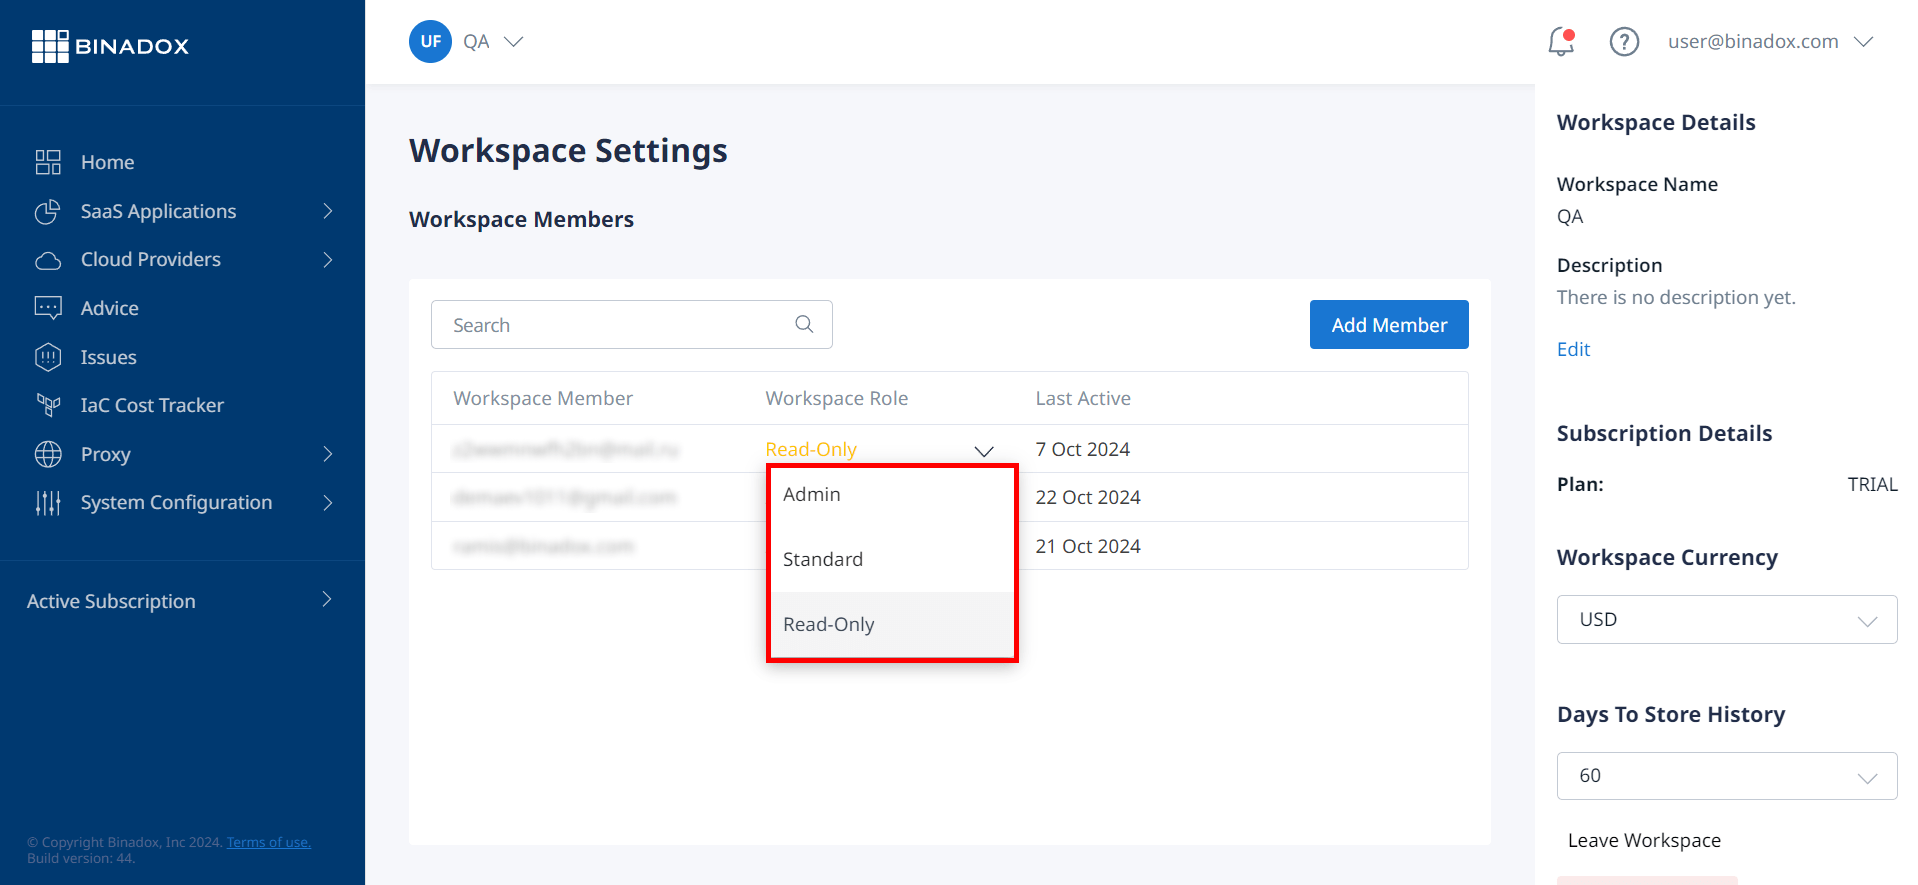
1.3.4 Changing Workspace Roles
Permissions:
Admin permissions are required to change the role of a workspace member.
1. To change a member’s role within a Workspace, click on the Workspace icon in the top left corner. Select Manage Workspace in the drop-down list.
2. From Workspace Settings, find the member whose role you want to change. The current role is indicated next to his name in the Workspace Role column. To see the permissions he/she has, hover the mouse pointer over the workspace role.
3. To change a workspace role, click on it. Select the required role in the dropdown list.
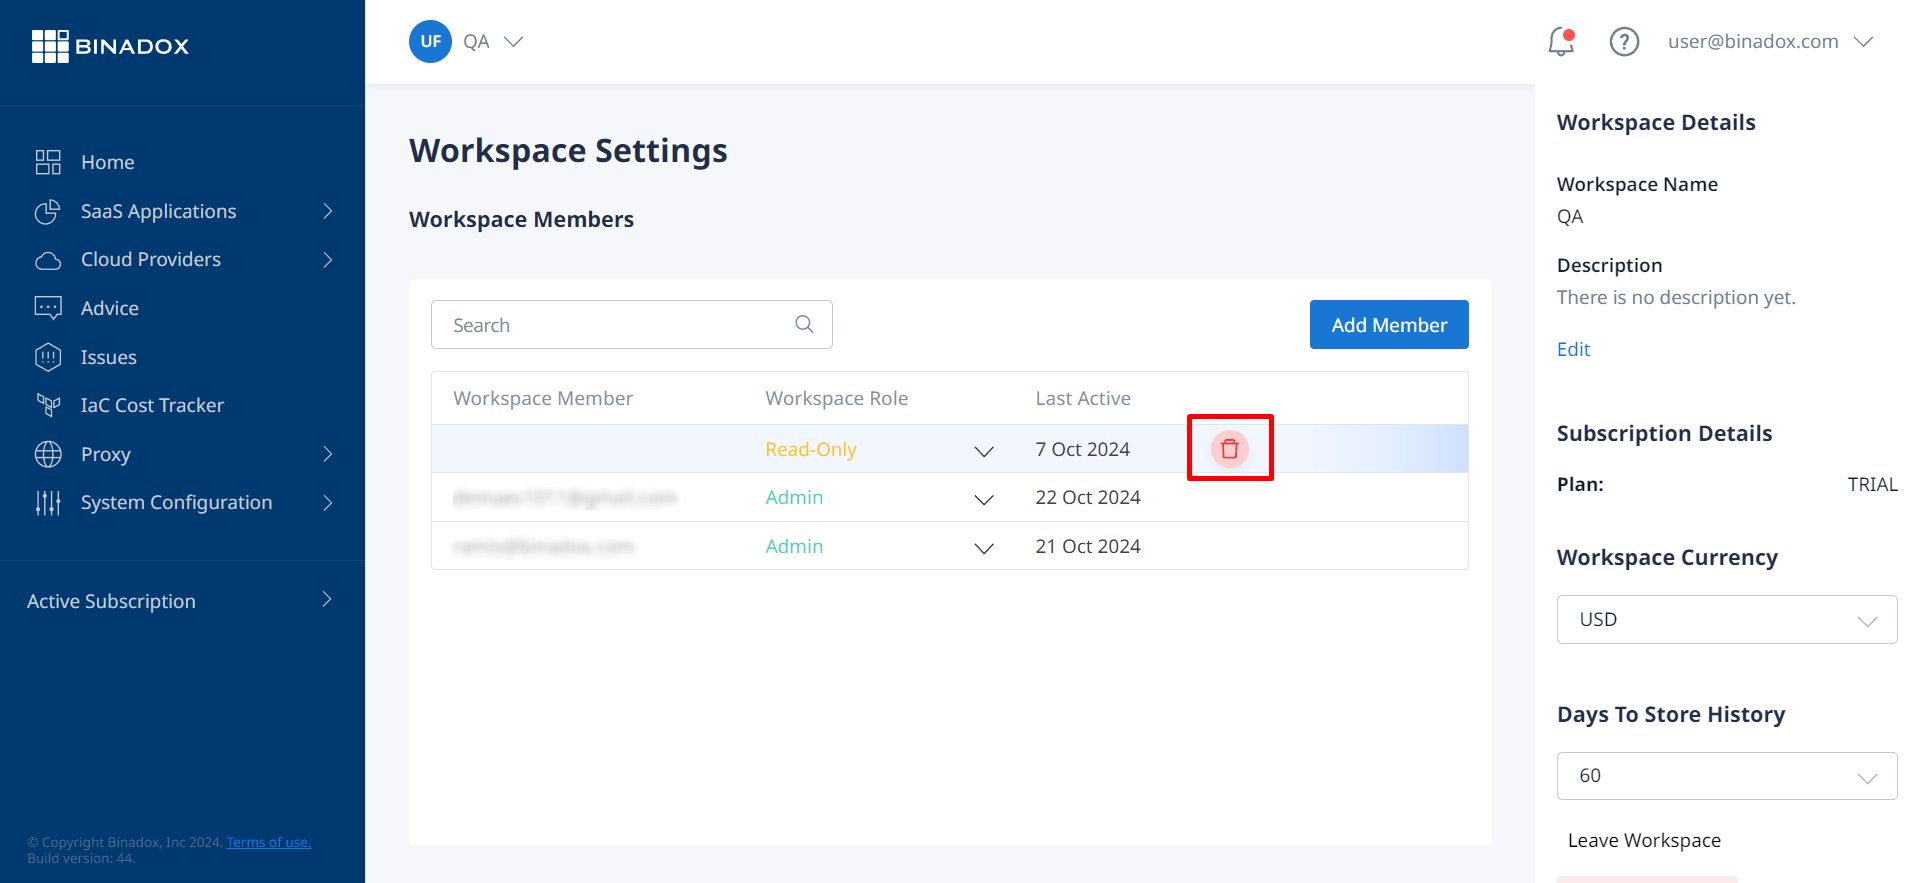
1.3.5 Deleting a Workspace Member
Permissions:
Admin permissions are required to delete the user from a Workspace.
1. To remove the user from a Workspace, click on the Workspace icon in the top left corner. Select Manage Workspace in the drop-down list.
2. From Workspace Settings, find the member you want to delete. Click on the Delete button next to his/her name.
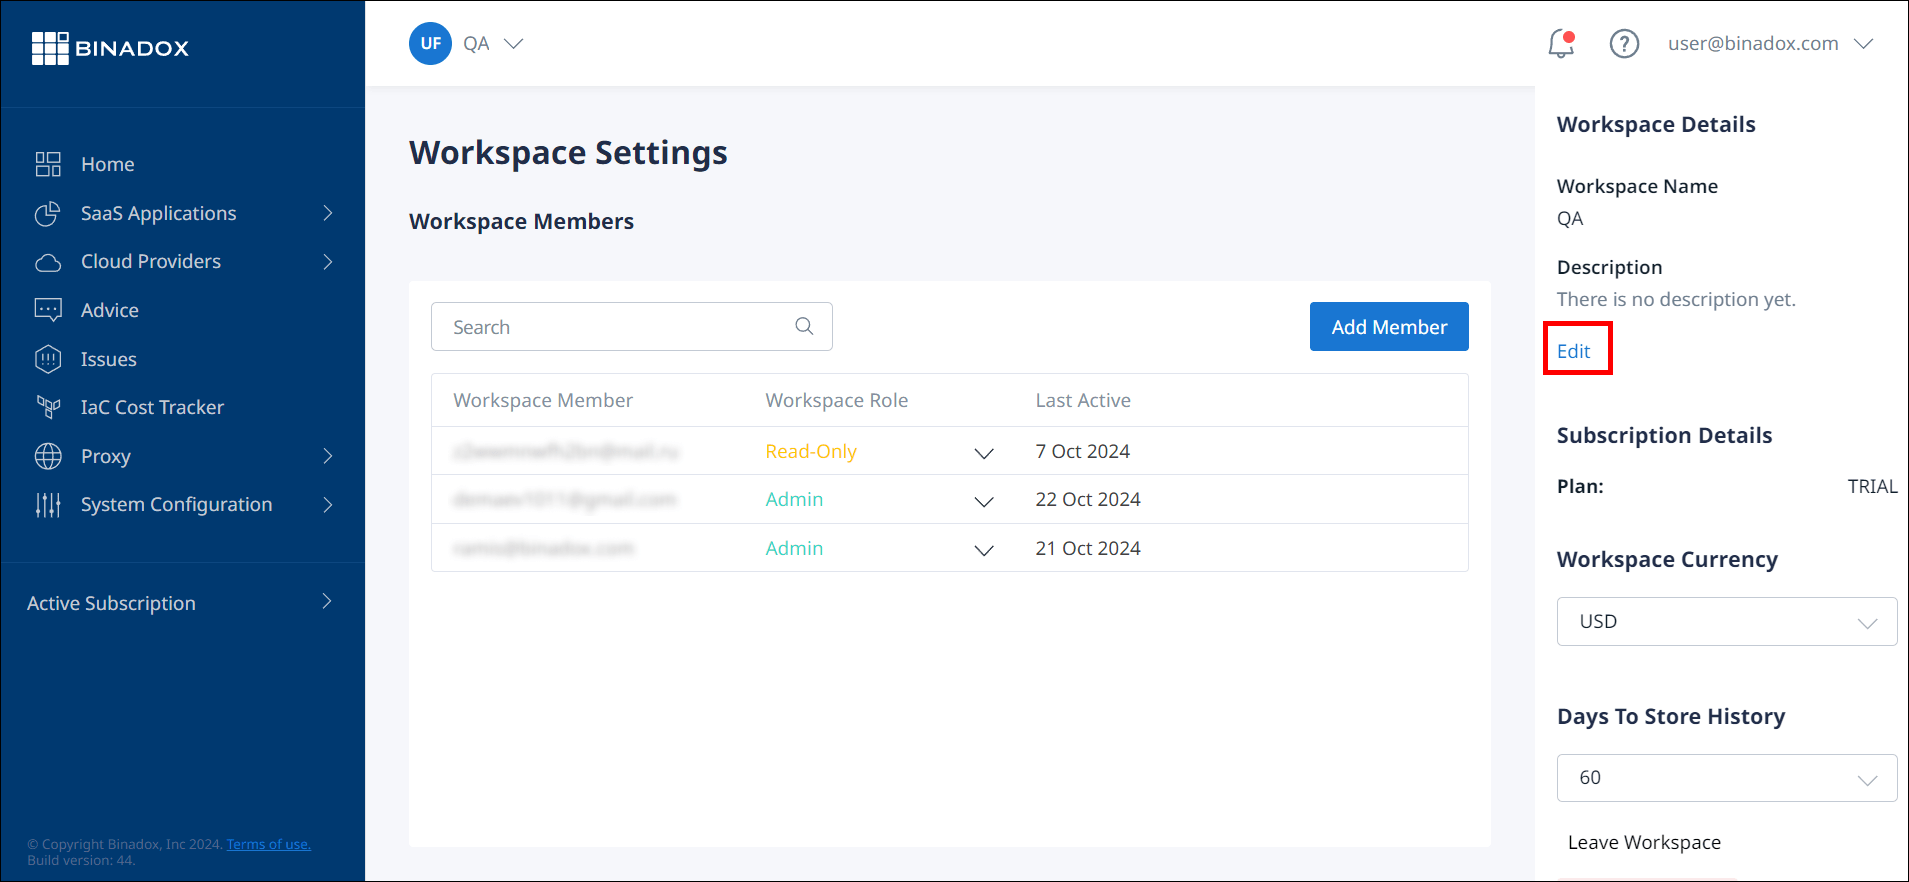
1.3.6 Changing a Workspace Name and Description
Permissions:
Admin permissions are required to rename a workspace or add a description.
You can change a workspace name or add a description anytime, if necessary.
1. Сlick on the workspace icon in the top left corner. Select Manage Workspace in the drop-down list.
2. In the Workspace Details section, click Edit to change a workspace name or add a description.
3. Make all required changes and click Save.
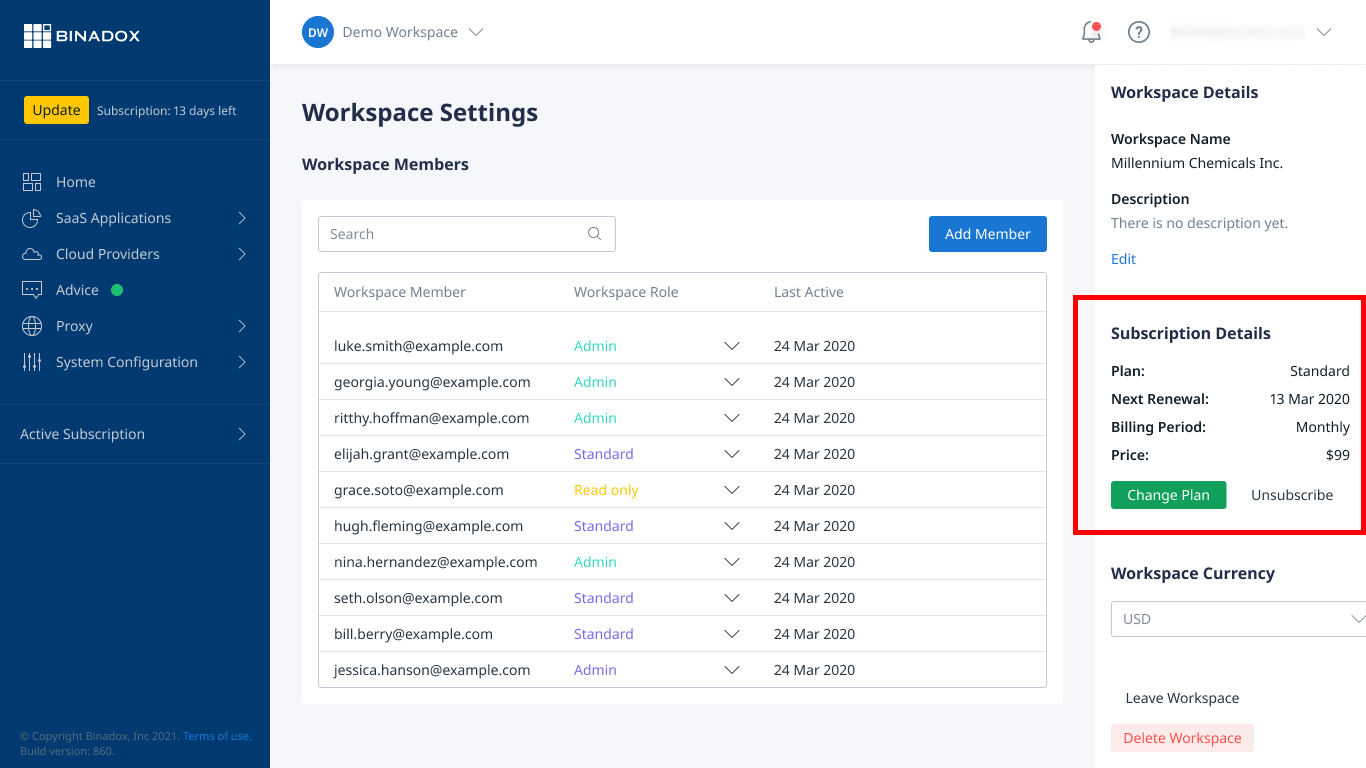
1.3.7 Updating Subscription Details
Permissions:
Admin permissions are required to update subscription details.
Your subscription is automatically renewed on a recurring basis unless you decide to unsubscribe.
From the Subscription Details section, click Change Plan to upgrade or downgrade your current payment plan.
To change the payment plan or cancel your subscription, сlick on the workspace icon in the top left corner. Select Manage Workspace in the drop-down list.
NOTE: You can change your active subscription at any time during your billing period. You will receive a prorated charge or be entitled to a prorated refund depending on the price of a new payment plan. A new plan will start from the upgrade date.
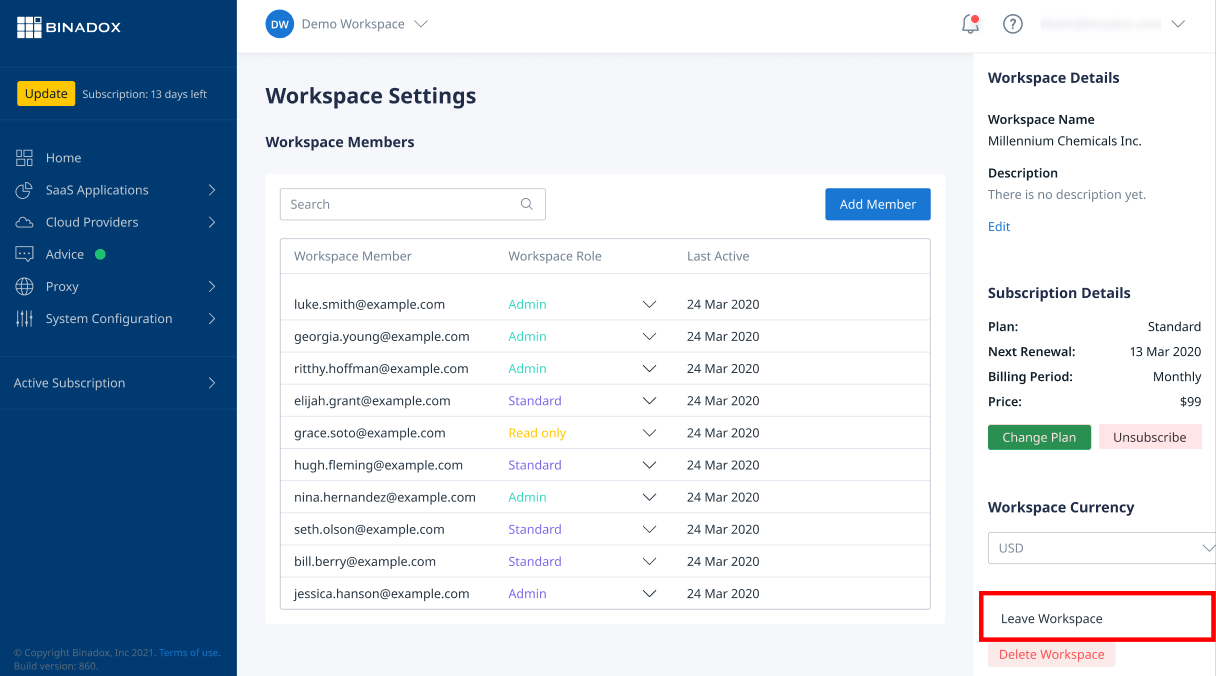
1.3.8 Leaving a Workspace
Permissions:
If you are the only administrator in the workspace, you will have to transfer your admin rights to another user before leaving it.
1. To leave a Workspace, click on the workspace card on the My Workspaces home page to enter this workspace.
2. Click on the workspace icon in the top left corner. Select Leave Workspace in the drop-down list.
3. In the dialogue box, click Leave Workspace to confirm.
NOTE: You will no longer have access to the workspace and all data associated with it until you are invited to the workspace again by a workspace administrator.
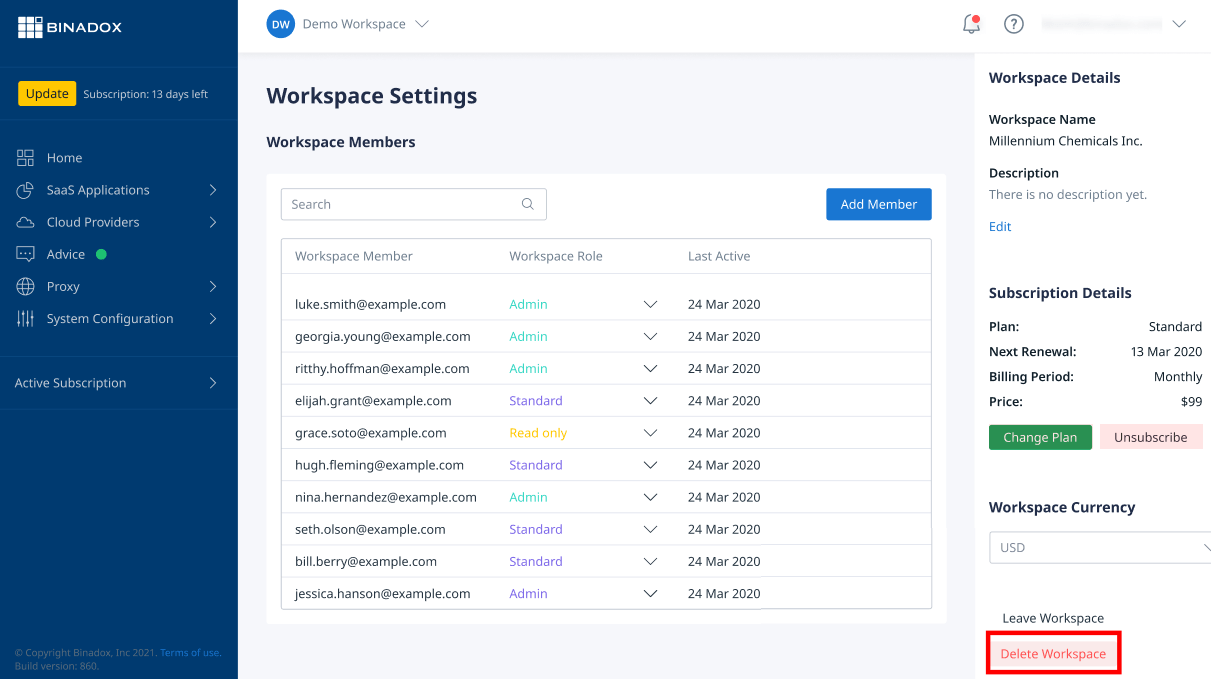
1.4 Deleting a Workspace
Permissions:
Admin permissions are required to delete a Workspace. A workspace with an active subscription that is shared with other members cannot be deleted. Remove all the members first. A workspace with an expired subscription cannot be deleted if you are not the only admin. In this case, please contact Customer Support for assistance.
1. To delete a workspace, сlick on the workspace icon in the top left corner. Select Manage Workspace in the drop-down list.
2. From Workspace Settings, click on the Delete Workspace button.
3. In the dialogue box, click Delete Workspace to confirm.
NOTE: Deleting a workspace will permanently delete all data within it. This cannot be undone. Your subscription will be canceled.