Dynamics 365 Integration
Overview
This guide provides information on how to integrate Microsoft Dynamics 365 with the Binadox (cloud monitoring and cost optimization platform). Microsoft Dynamics 365 is a suite of business applications for enterprise resource planning and customer relationship management.
To connect Dynamics 365 to Binadox you will need the following parameters: the Web API endpoint, the Application (client) ID, and the Client Secret Value. Next, we will tell you how to get them.
1. Register Binadox with Microsoft Entra ID
1. Sign in to the Microsoft Azure Portal as a global administrator using the credentials of your Microsoft tenant that has the subscription to Microsoft 365 you wish to use for Binadox.
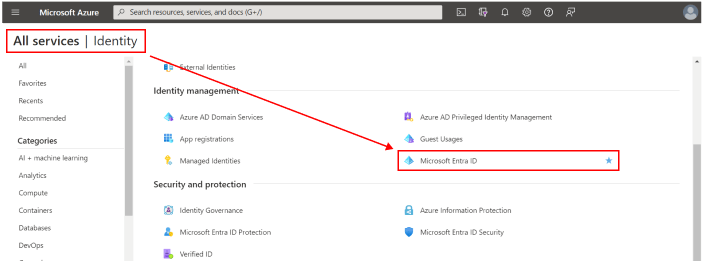
2. In the navigation pane, click All services > Identity > Microsoft Entra ID. Use the search bar, if necessary.
Advice:
For your convenience, click on the star icon near the Microsoft Entra ID service name to add it to the Favorites category in the navigation pane.
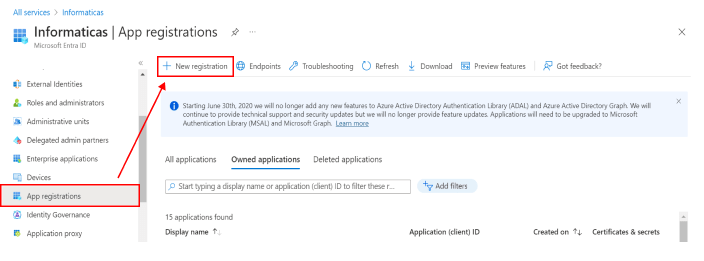
3. Go to the App registrations section and click the New registration button.
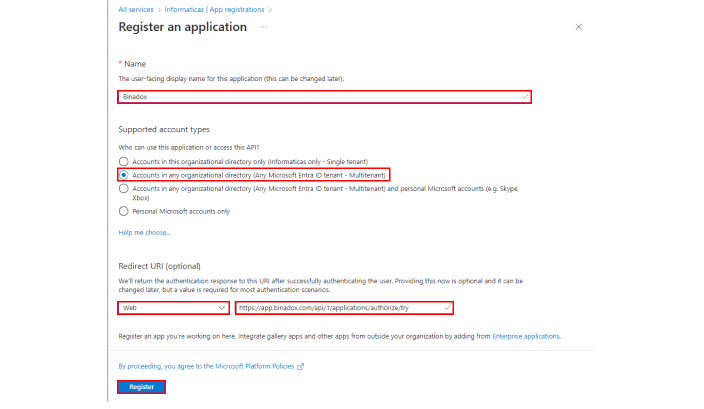
4. Fill in the following fields in the registration form:
- Enter an application name in the Name field (e.g. Binadox).
- Select the Accounts in any organizational directory checkbox in the Supported account types field.
- In the Redirect URI (optional) section, select Web in the drop-down list. Enter the following URL:
https://app.binadox.com/api/1/applications/authorize/try - Click the Register button to complete the registration.
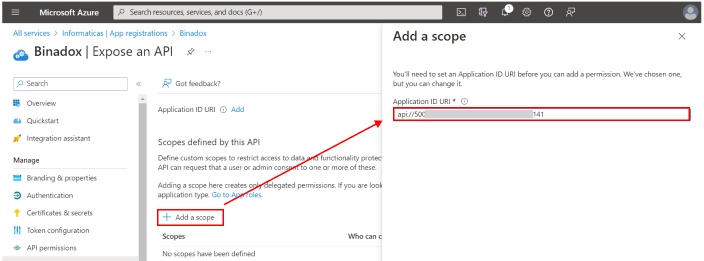
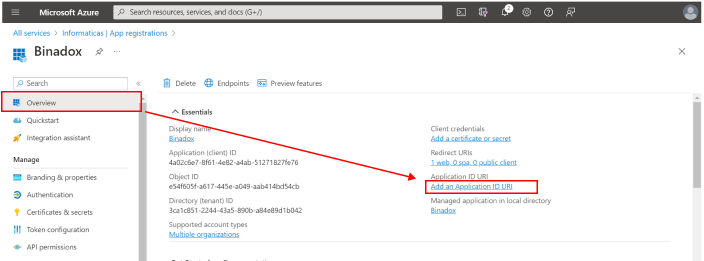
5. On the Overview page, click Add an Application ID URI. You will be redirected to the Expose an API page. Click on the +Add a scope button. Set the Application ID URI value.
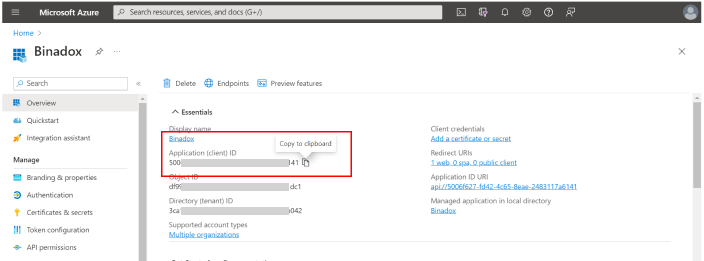
6. Hover the mouse pointer over the Application (client) ID and click on the Copy to clipboard icon to save the value. This will be needed to specify in your application’s authentication code or app.config file.
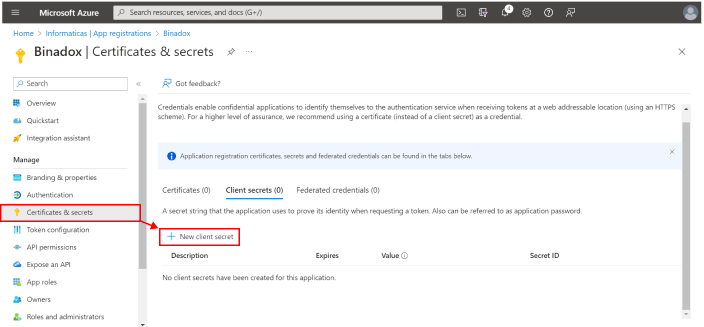
7. In the navigation pane, select Certificates & secrets. Click the New client secret button.
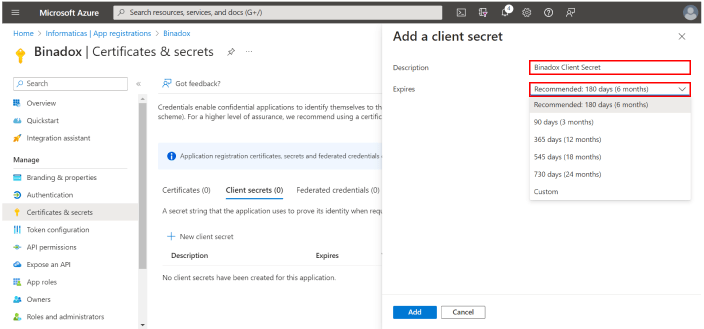
8. In the appeared Add a client secret window, set the Description and select the needed period in the drop-down list. Click the Add button.
9. Hover the mouse pointer over the Value and click on the Copy to clipboard icon to save the value.
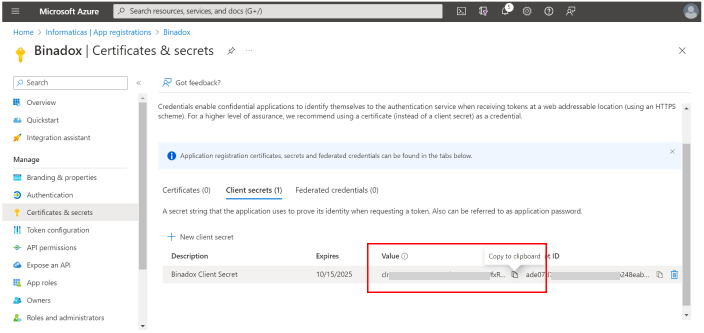
IMPORTANT:
Client secret values cannot be viewed, except for immediately after creation. Be sure to save the secret when created before leaving the page.
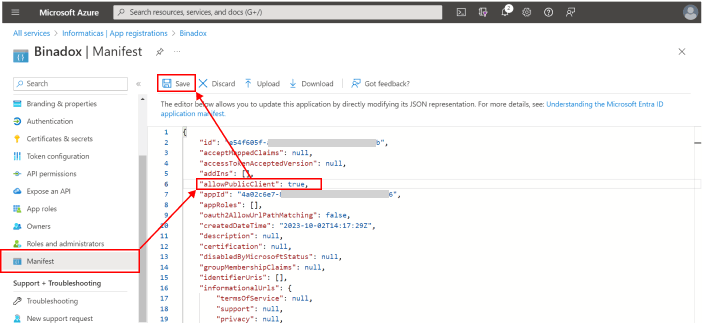
10. In the navigation pane, choose Manifest. Set the allowPublicClient property to true. Click Save.
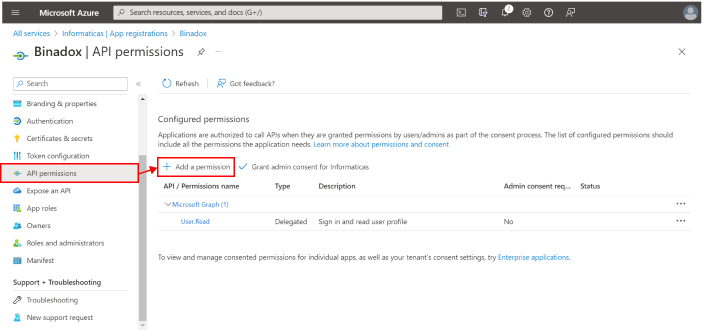
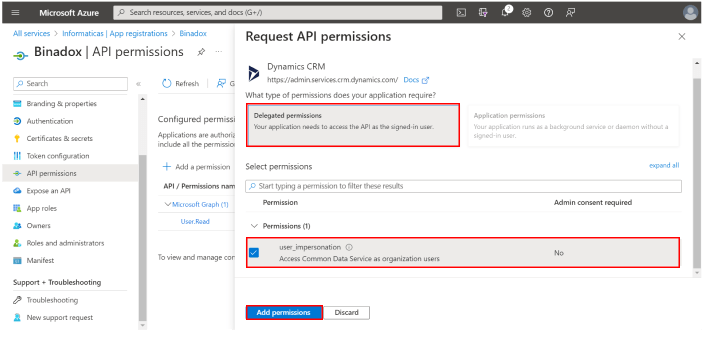
11. Go to the API permissions section and click the Add a permission button.
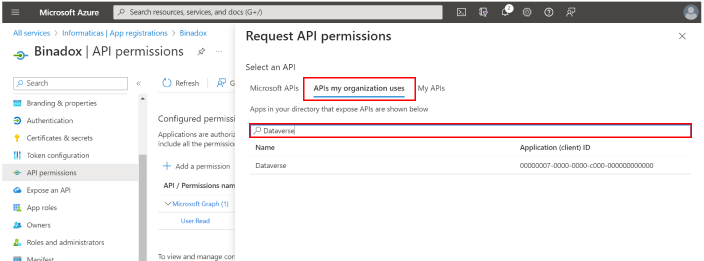
12. Select the APIs my organization uses tab. Search for Dataverse and choose it.
If “Dataverse” is not found, search for “Common Data Service”. To quickly locate it, type in its name in the search bar.
13. Select Delegated permissions. Check the user_impersonation checkbox in the Select permissions field. Click Add permissions.
This completes the registration of your application in Microsoft Entra ID.
2. Get the base URL of the Web API endpoint
Power Apps is a platform, that provides a rapid development environment to build custom apps for your business needs.
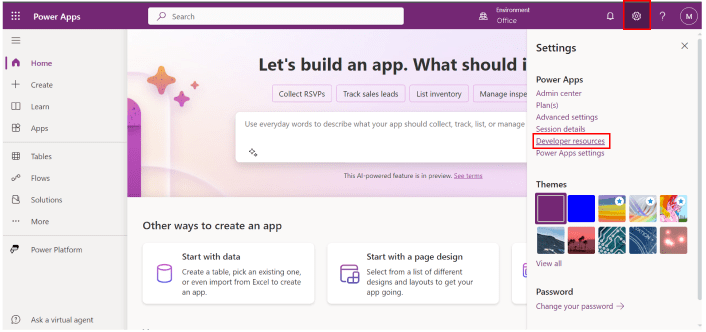
1. Sign in to the Microsoft Power Apps.
2. Click on the Settings icon in the upper right corner. Select Developer resources.
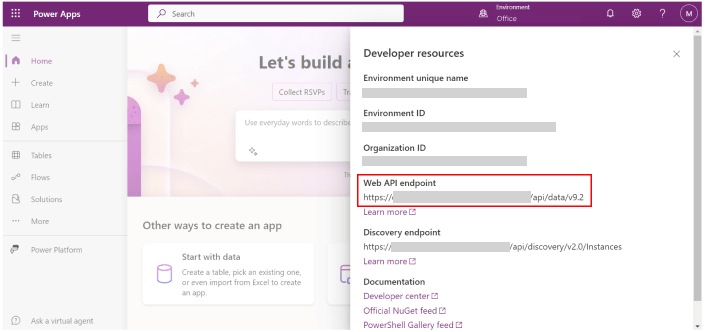
3. In the Developer resources section, retrieve the base URL of the Web API endpoint.
3. Add Application User in Dynamics 365
An application user in Dynamics 365 refers to a user account that is specifically created to run automated processes. It provides a way to authenticate and authorize external systems to interact with the Dynamics 365 environment.
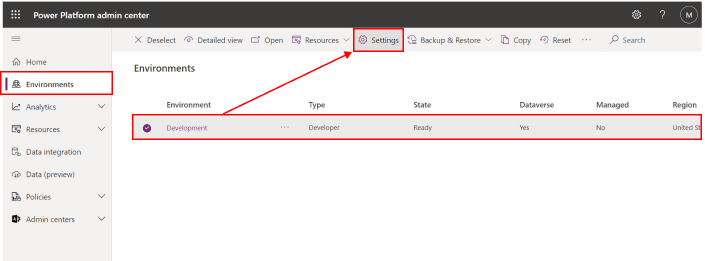
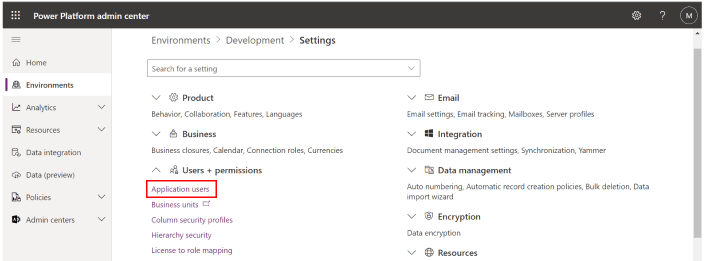
1. Sign in to the Microsoft Power Platform. Select the Environment. Click on the Settings icon.
2. Under the Users + permissions section, click Application users.
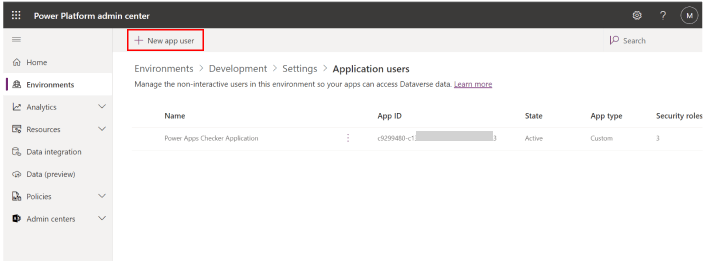
3. Click the +New app user button.
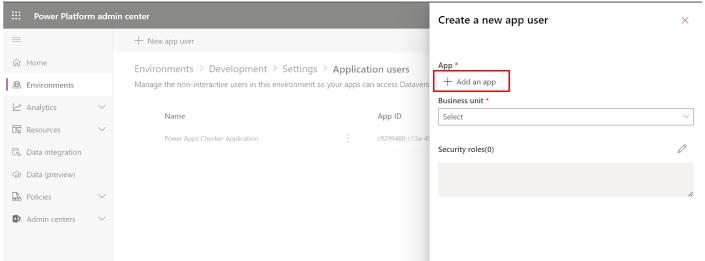
4. In the appeared Create a new app user window, click Add an app. Select the app that was registered in the Microsoft Azure Portal.
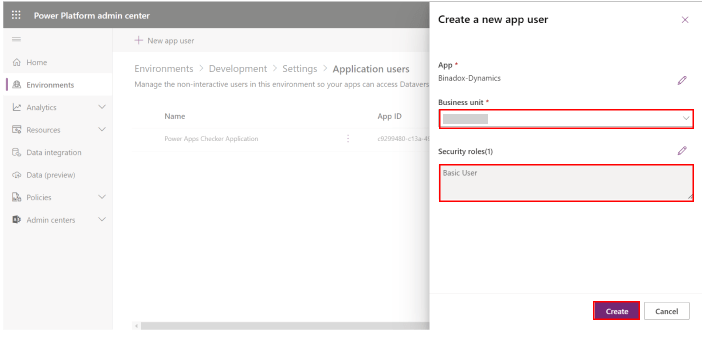
5. Fill in the following fields in the form:
- Select the Business unit.
- Select the Security roles.
- Click the Create button.
4. Create New Connection for Dynamics 365 in Binadox
1. Log into your Binadox account.
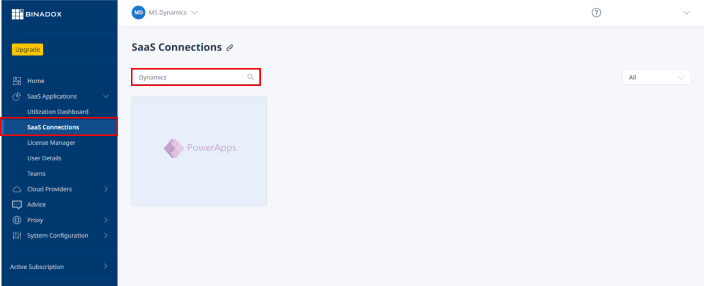
2. In the navigation pane on the left, click SaaS Connections. Click on the Power Apps icon. To quickly locate the Power Apps software in the list of supported applications, type in its name in the search bar.
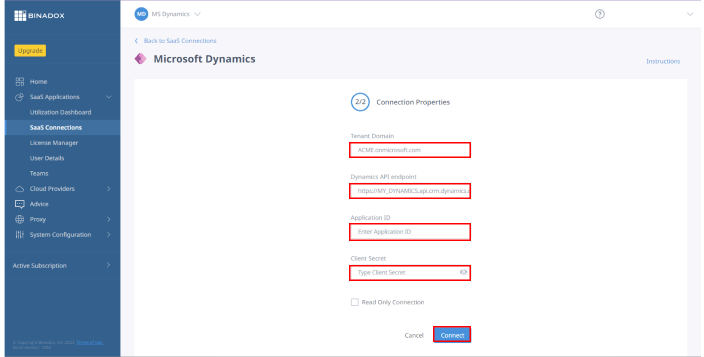
3. In the Dynamics 365 view, type in the name of an instance in the Connection Name field. Click Continue.

4. Fill in the required fields with the data from the instructions above:
- Tenant Domain
- Dynamics API endpoint (Step 2.3)
- Application ID (Step 1.6)
- Client Secret (Step 1.9)
Click Connect.
IMPORTANT:
Admin permissions are required to grant Binadox access to read usage and cost data in the account. For this purpose, log in with administrator credentials.
You will be redirected to the Microsoft login page. Log in.
Dynamics 365 connection with Binadox is established.