Amazon Web Services Integration to Issues
Overview
This guide provides information on how to integrate an AWS environment with the Issues. To successfully integrate Issues with an AWS account, it is required to create a new IAM user with read-only access to billing data.
1. Add a New IAM User
1. Sign in to the AWS Management Console with root account credentials.
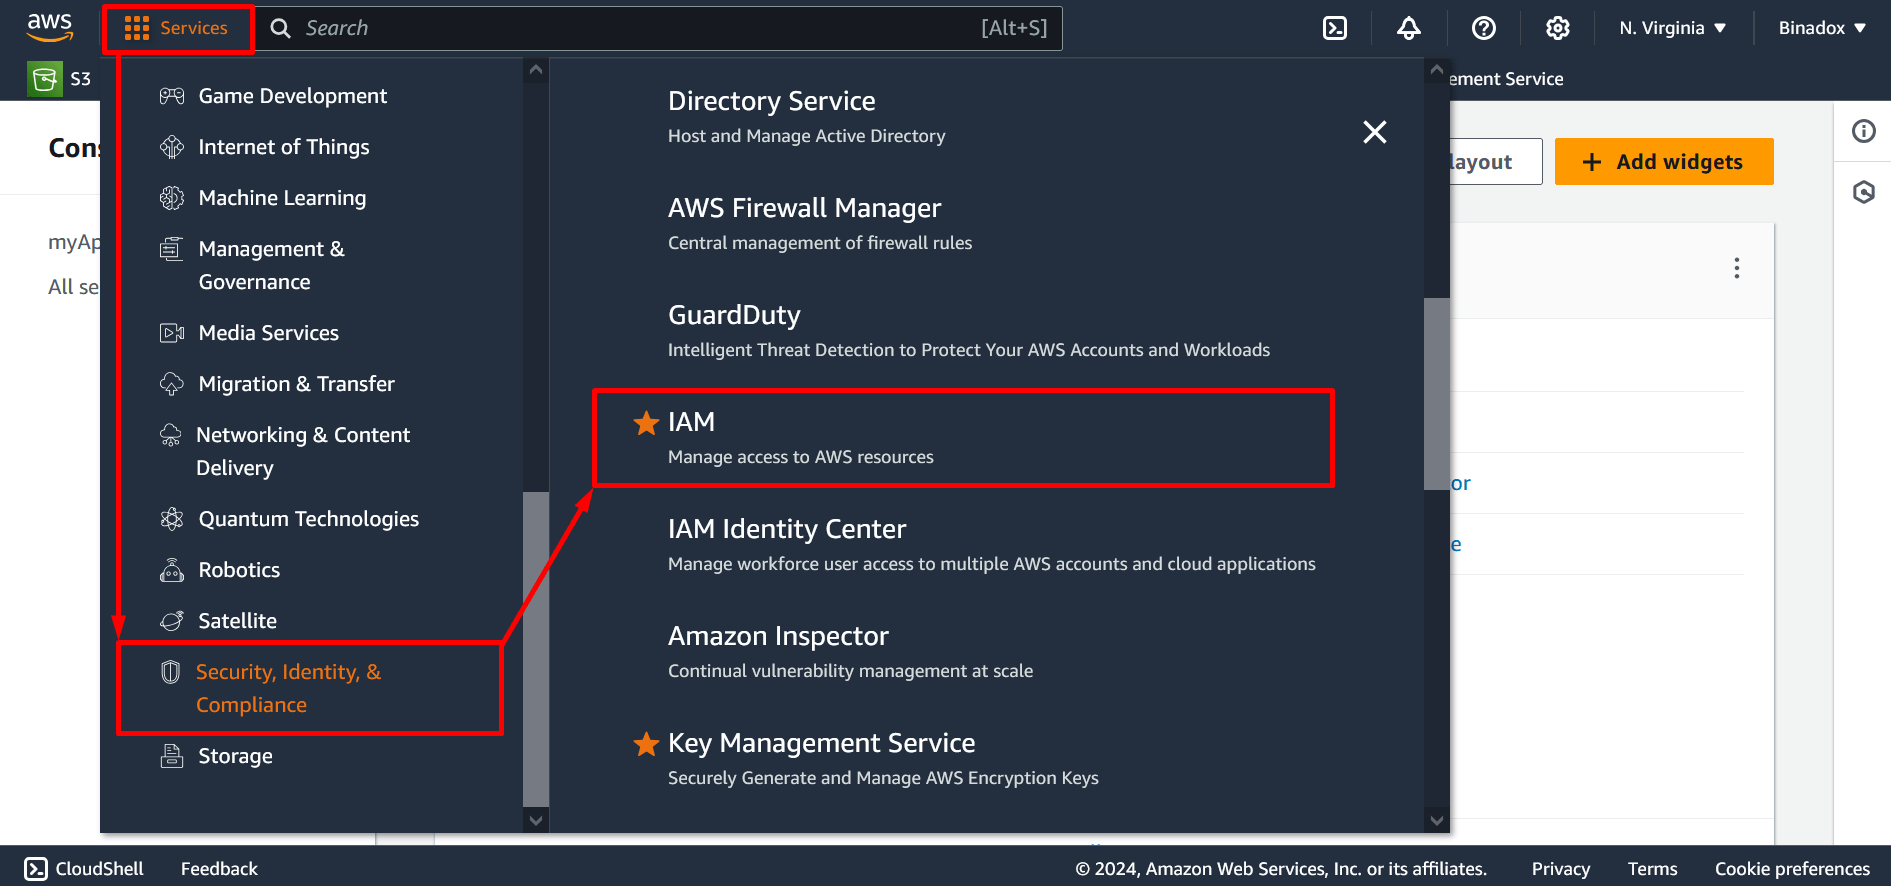
Navigate to the IAM Console. In the menu bar at the top, click Services > Security, Identity & Compliance > IAM. Use the search bar, if necessary.
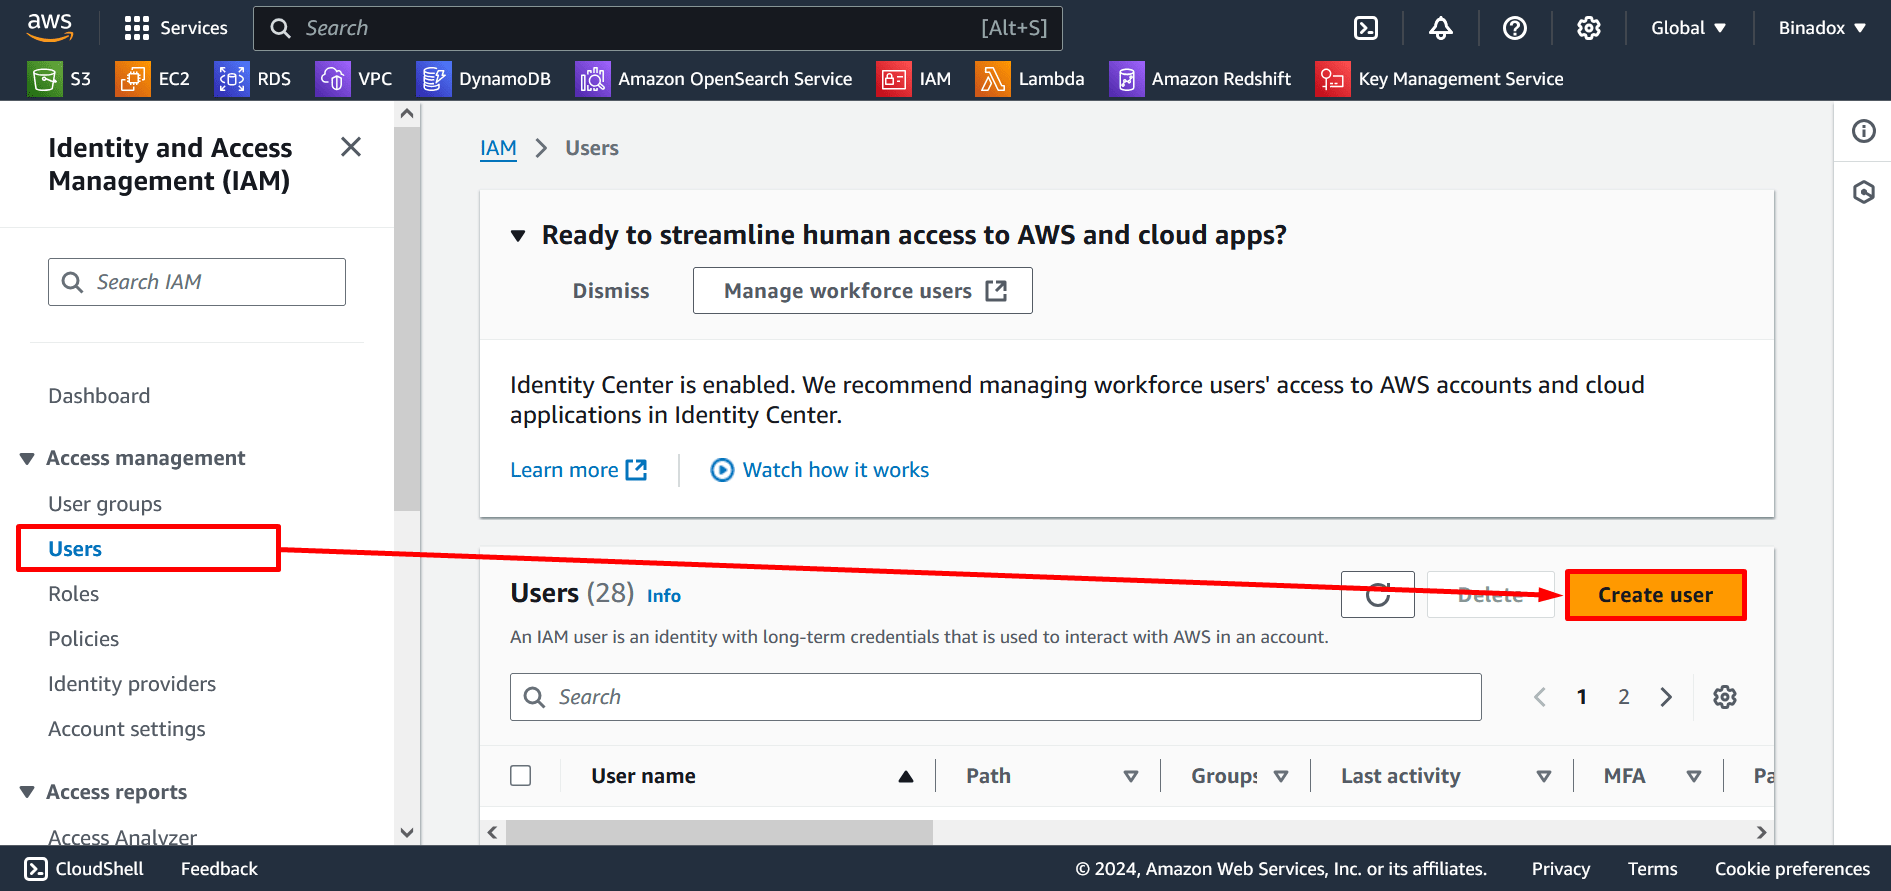
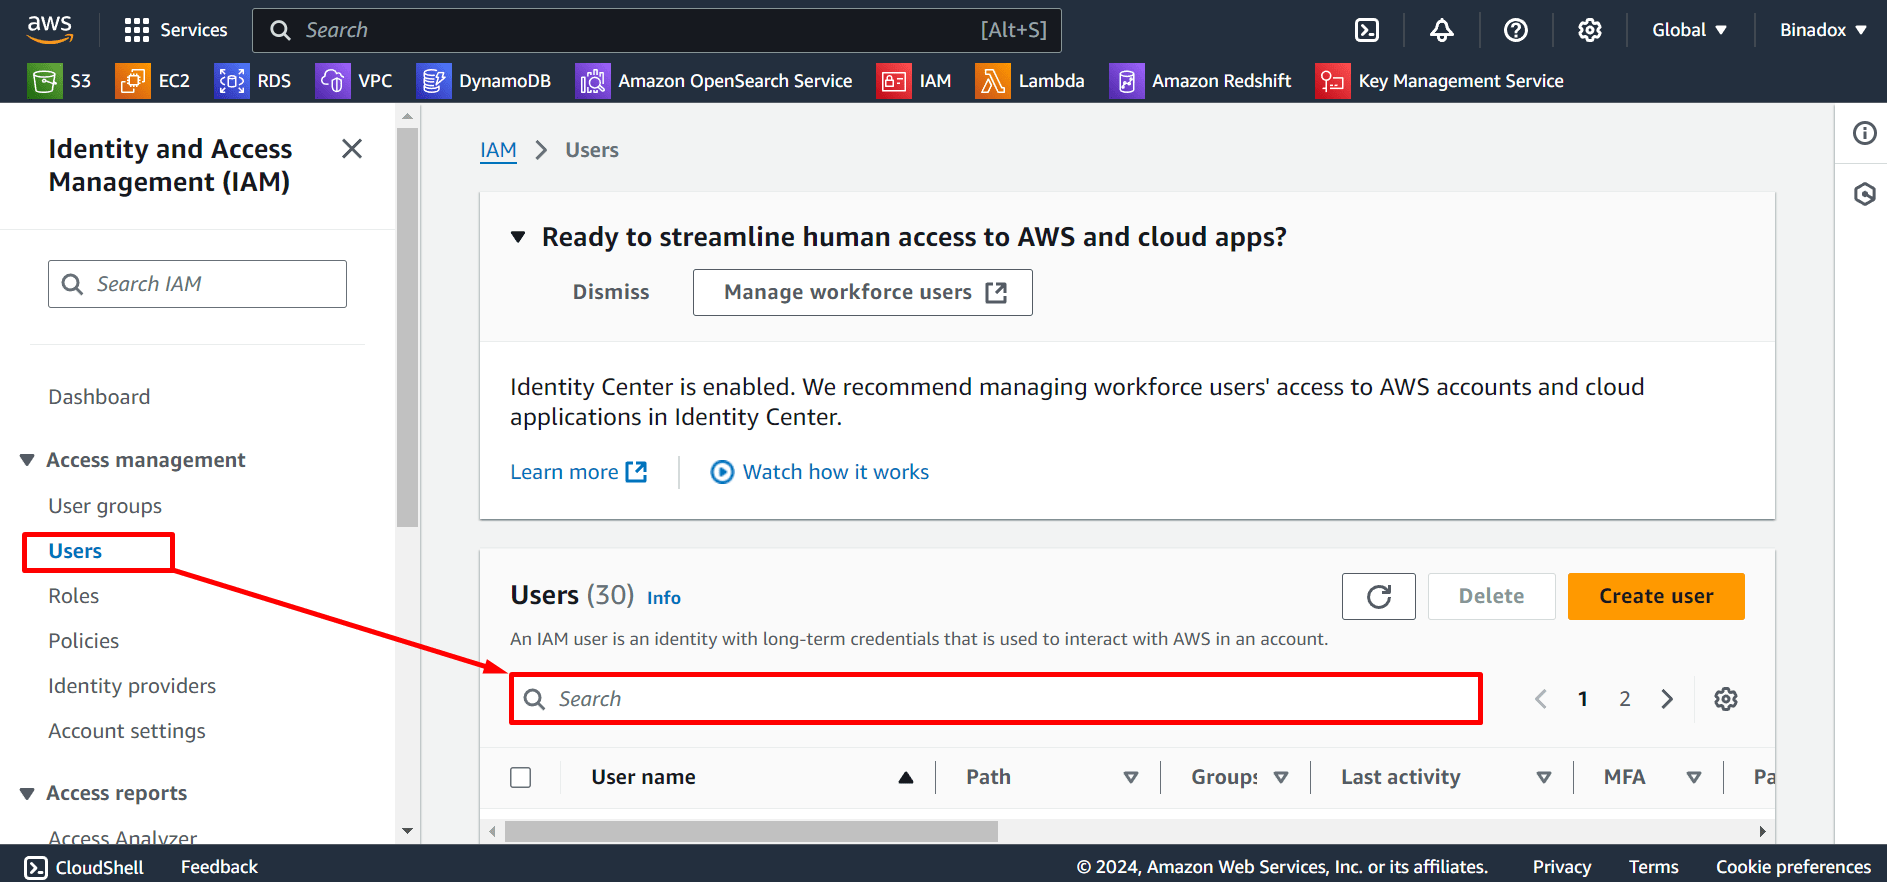
2. You will be redirected to the Identify and Access Management Console. In the navigation pane, select Users in the Access management group and click Create user.
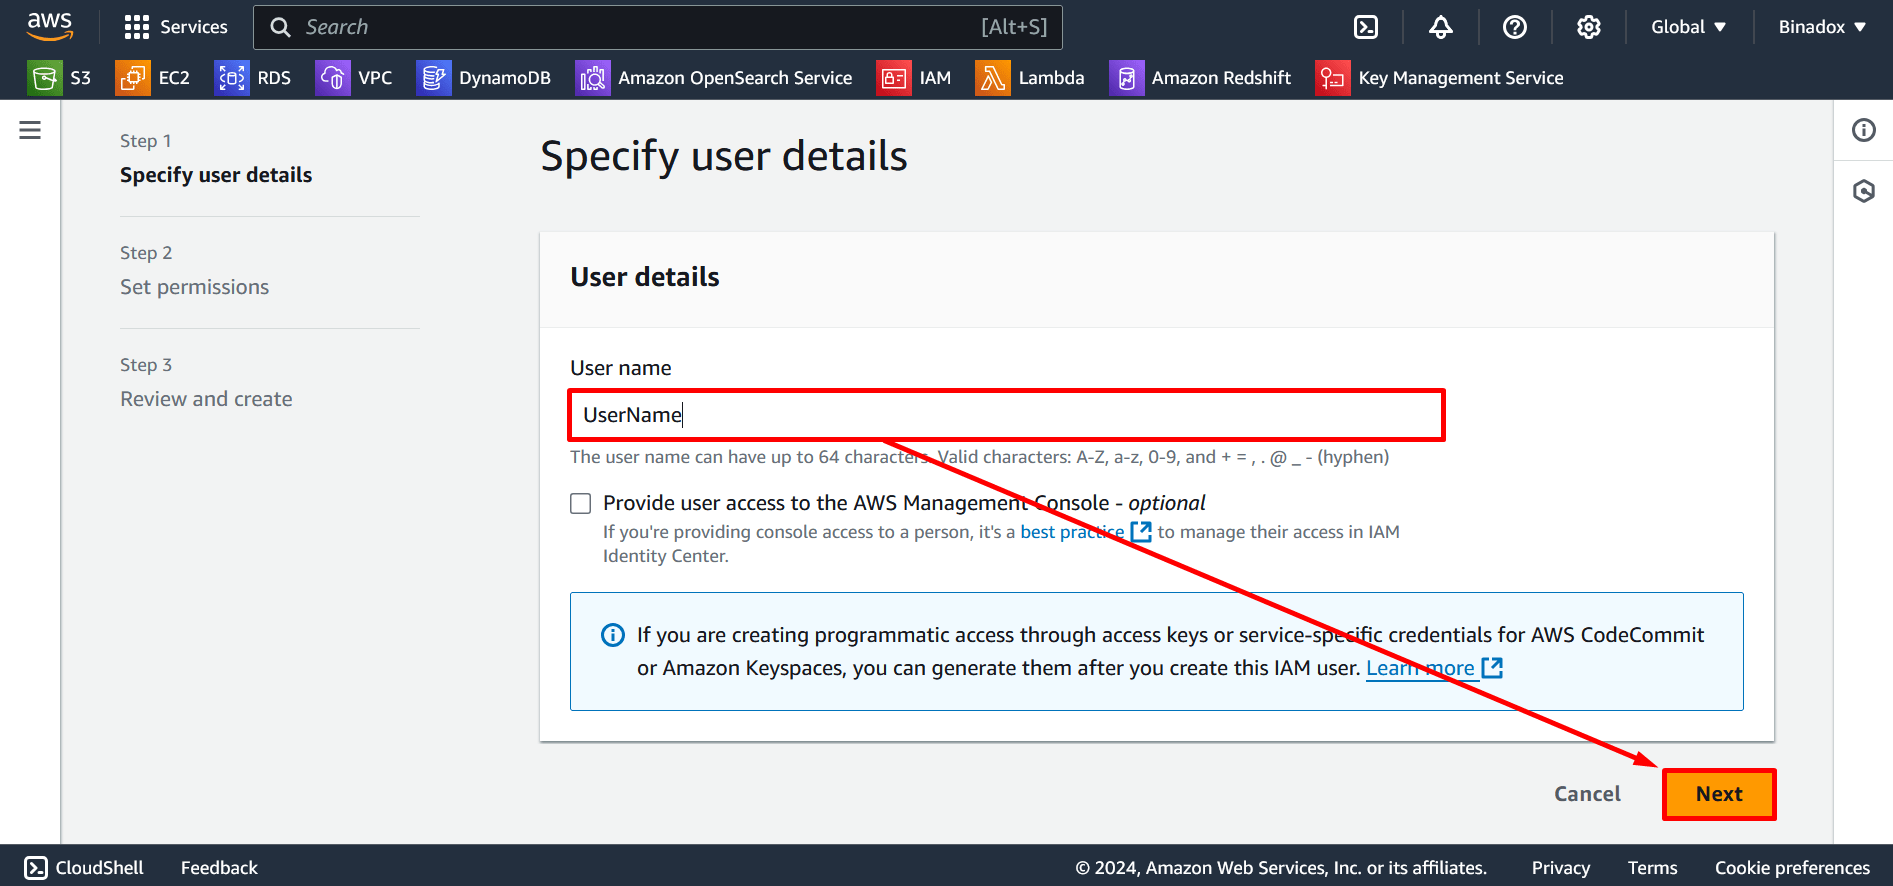
3. Set User name and click the Next button.
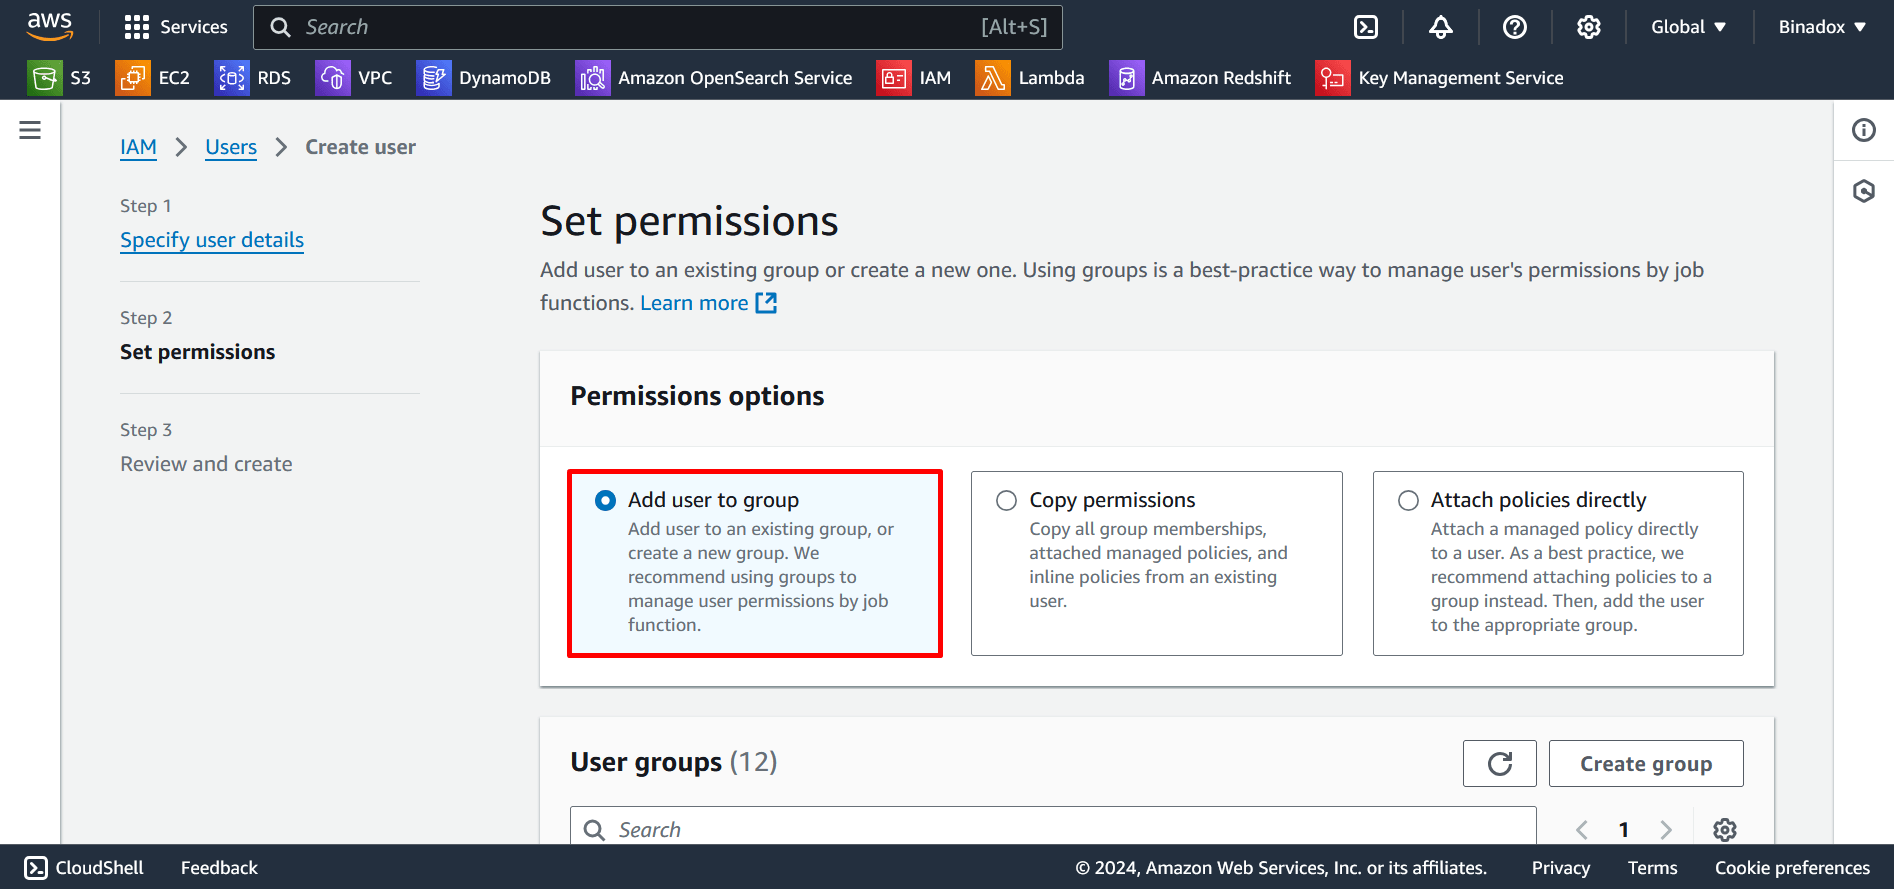
4. Select Add user to group in the Permissions options section and click Next at the bottom of the page.
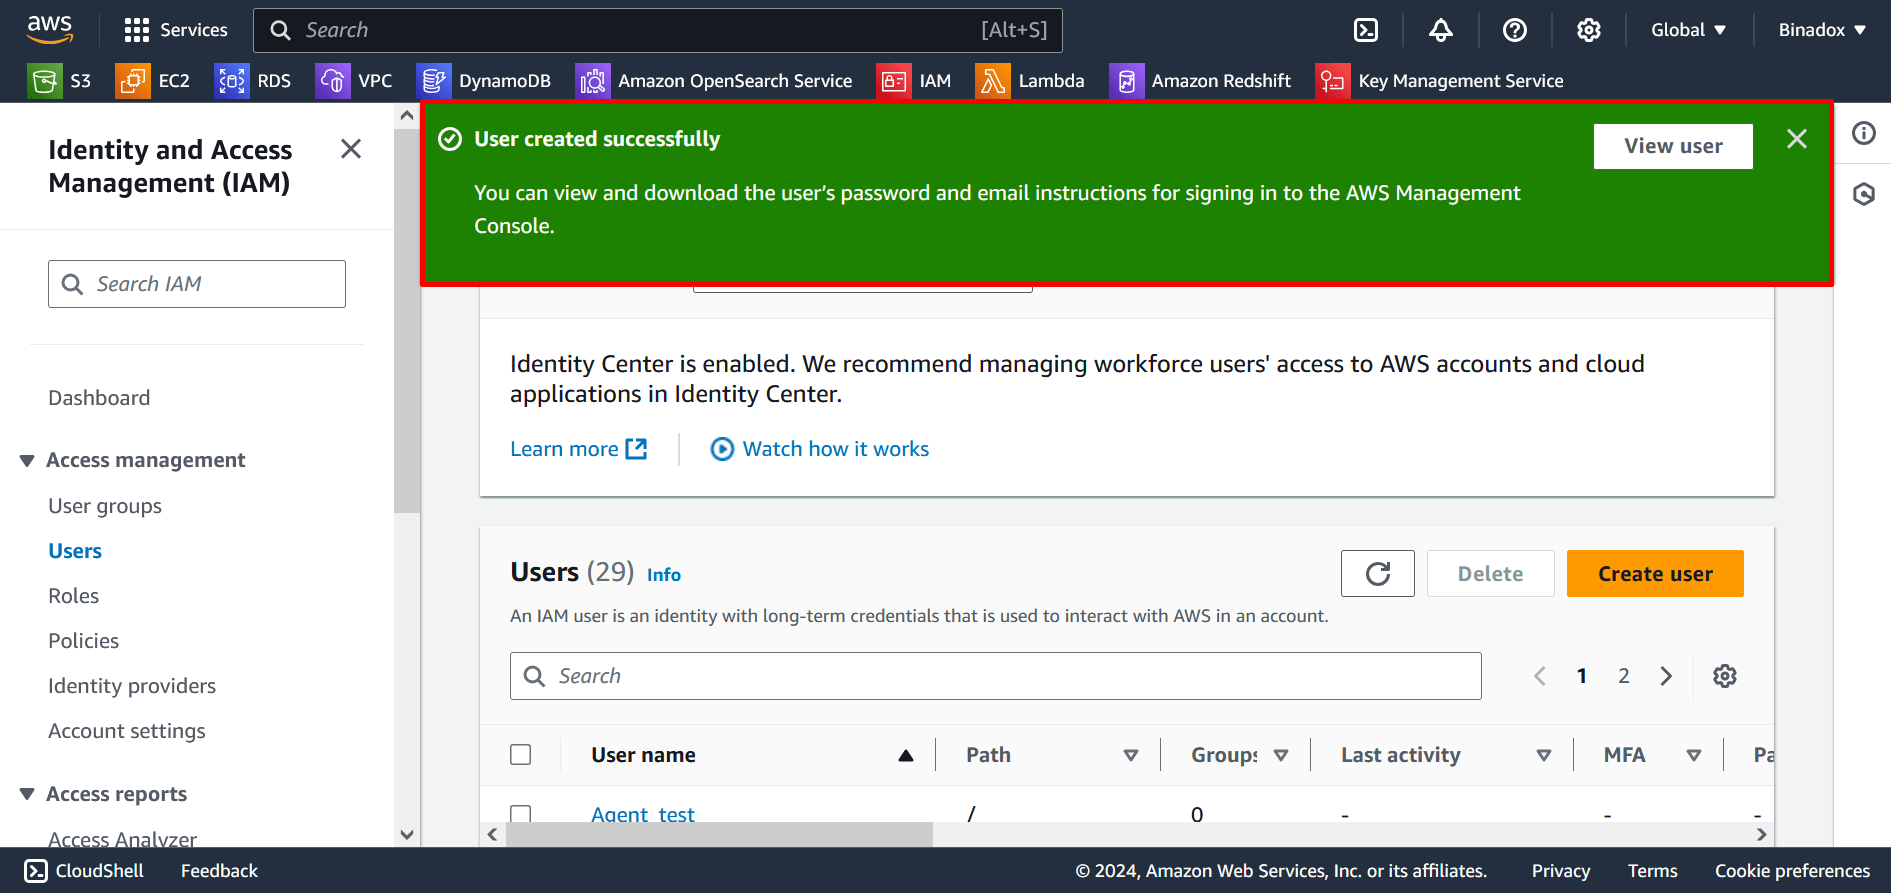
5. On the Review and create page, scroll down and click Create user. If all conditions are met, you will get an alert “User created successfully”.
4. Add a Policy
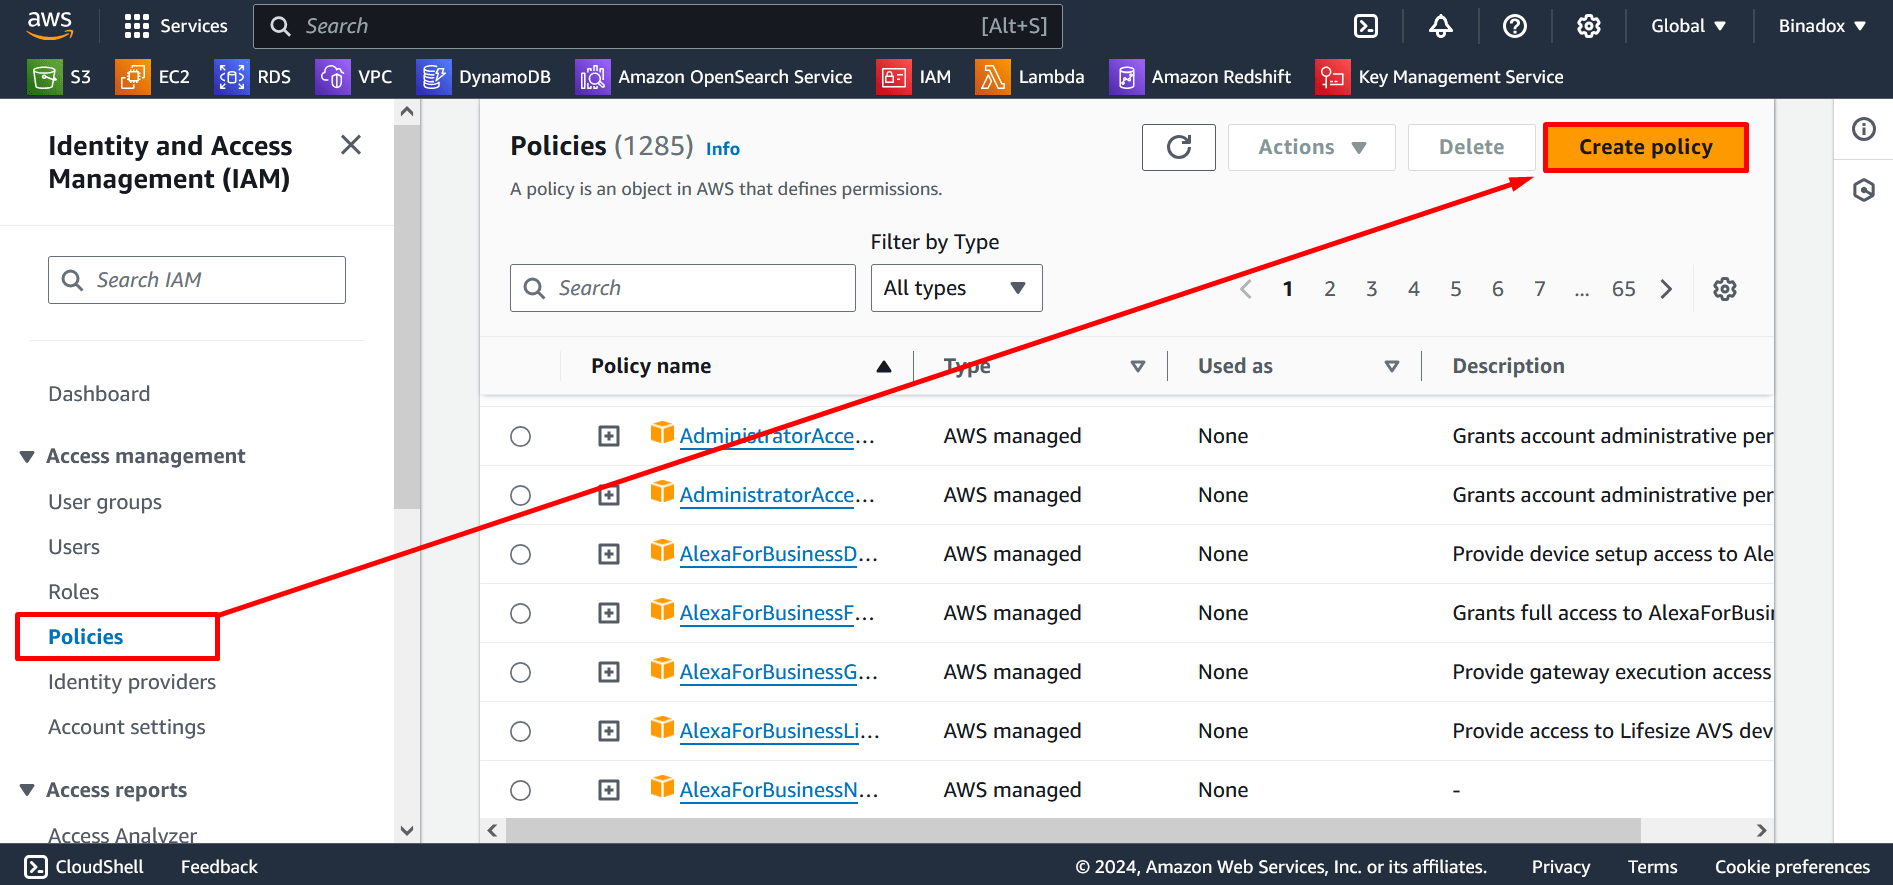
1. In the navigation pane, choose Policies. Click the Create policy button at the top of the page.
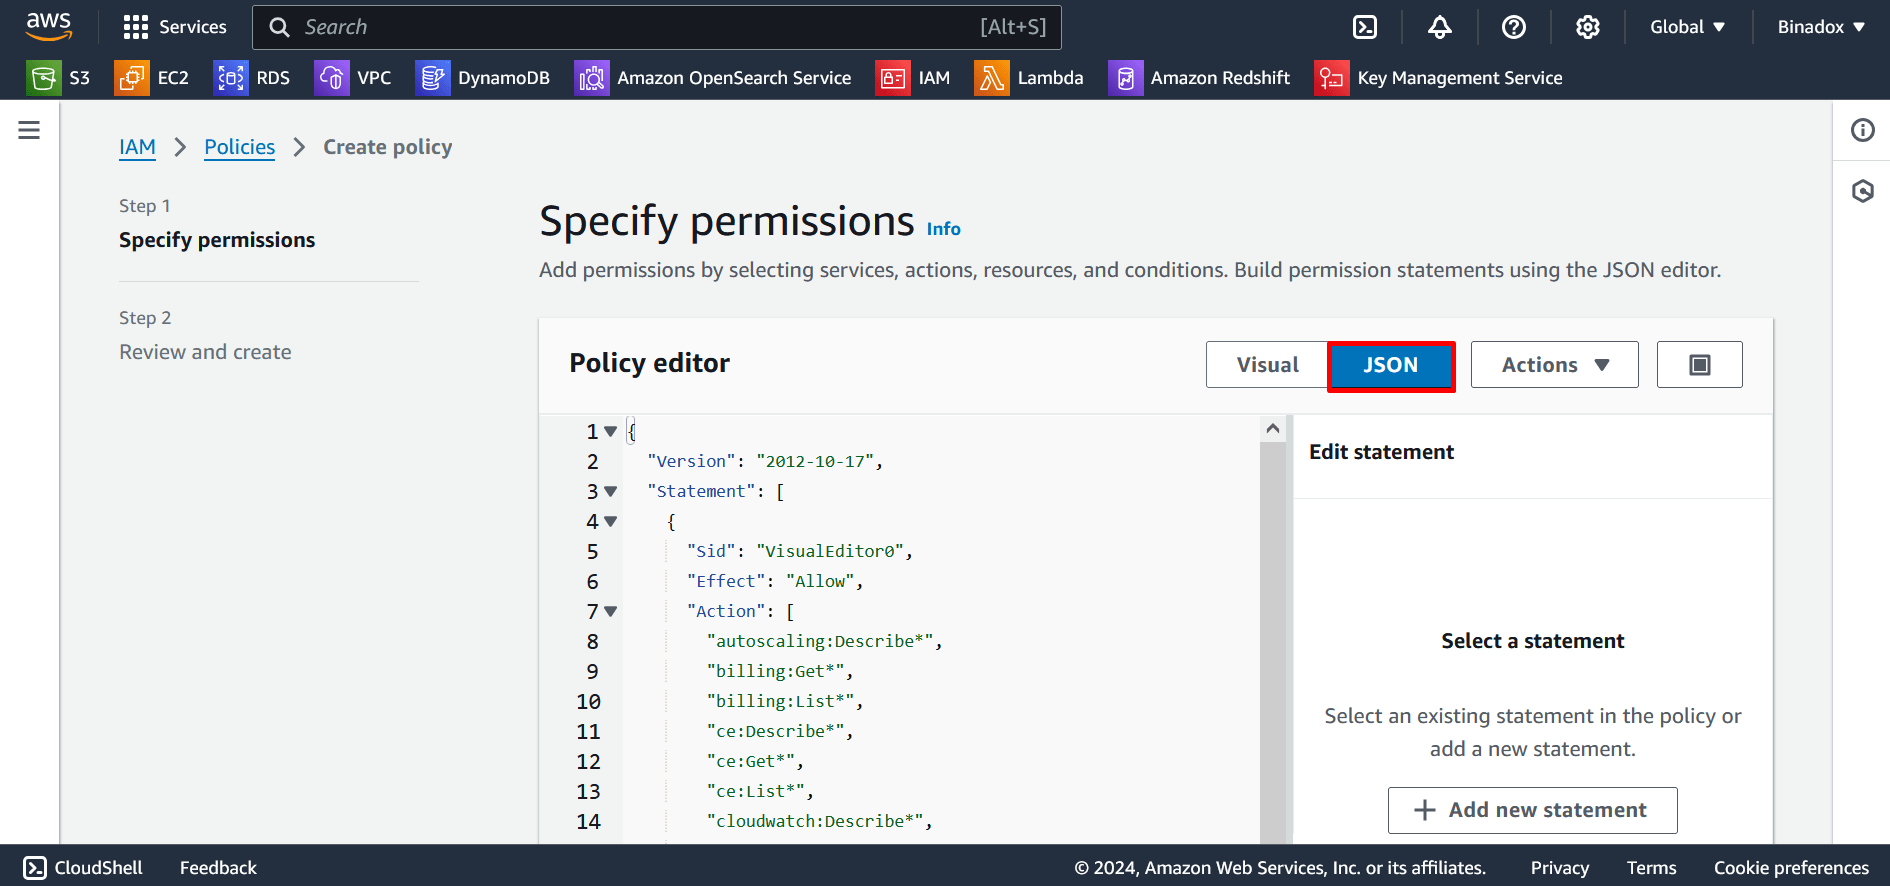
2. You will be redirected to the Create Policy view. On the JSON tab, insert the following file in the Policy editor if you want to give only read permissions. Click the Next button at the bottom of the page.
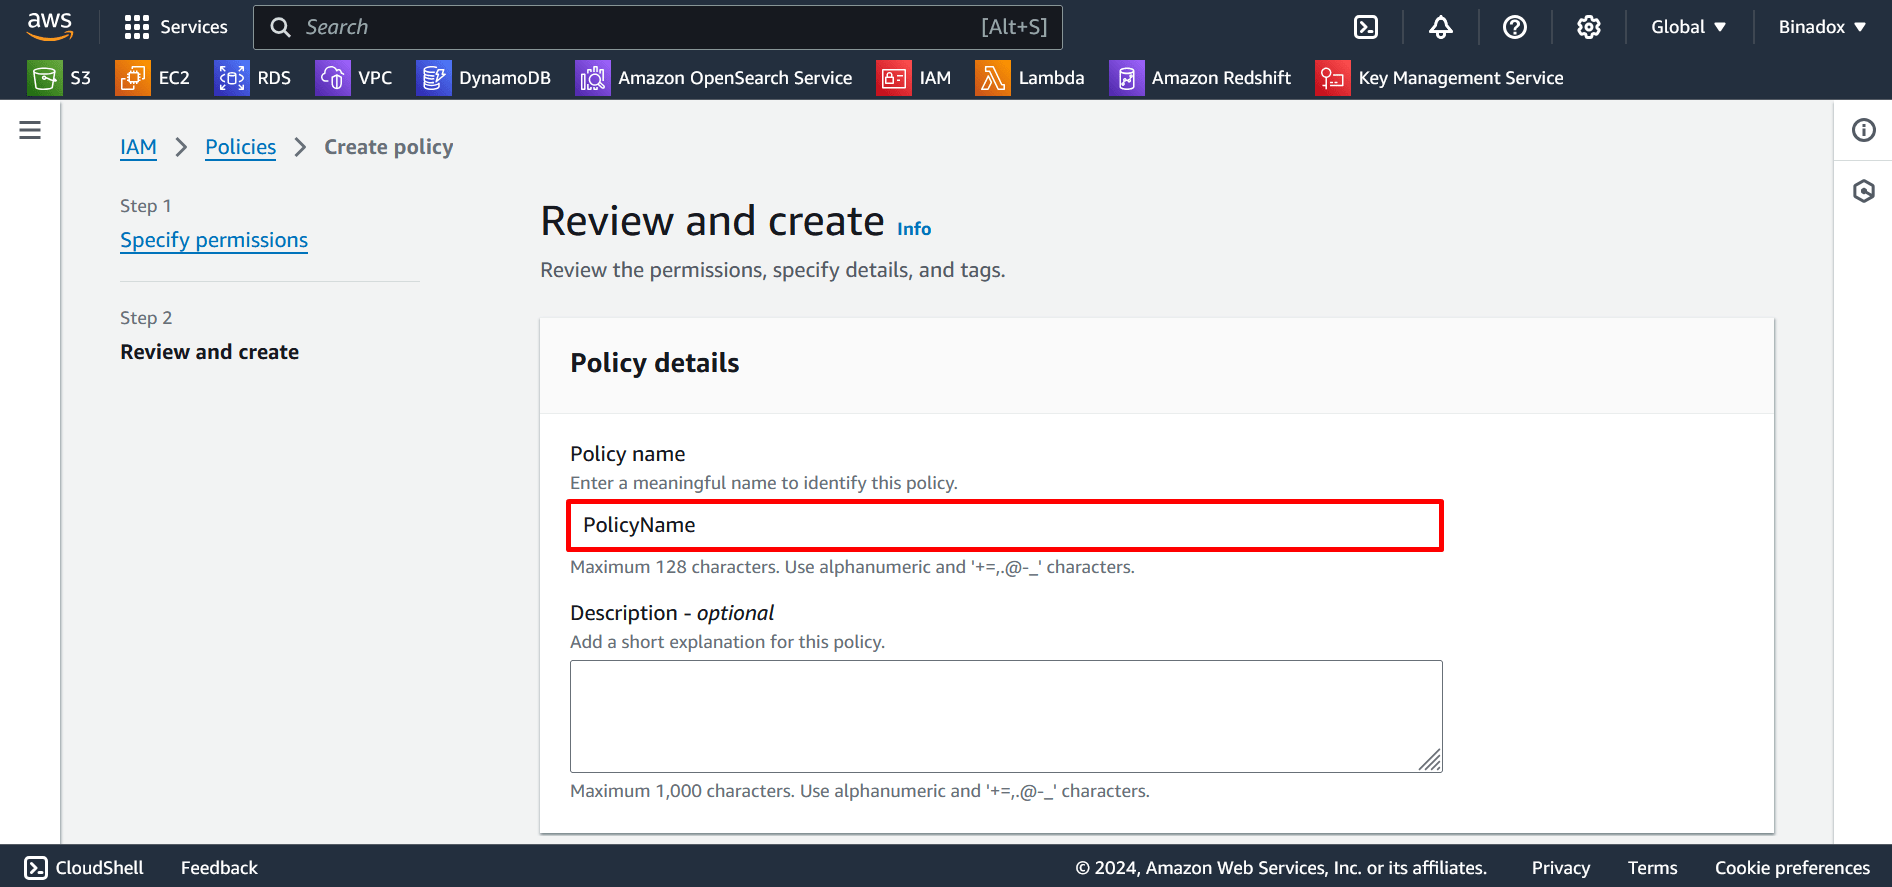
3. Provide the Policy name and Description(optional) in the fields of Policy details form. Click the Create policy button at the bottom of the page.
2. If you want to give read and write permissions, insert the following file in the Policy editor on the JSON tab. Click the Next button at the bottom of the page.
3. Provide the Policy name and Description(optional) in the fields of Policy details form. Click the Create policy button at the bottom of the page.
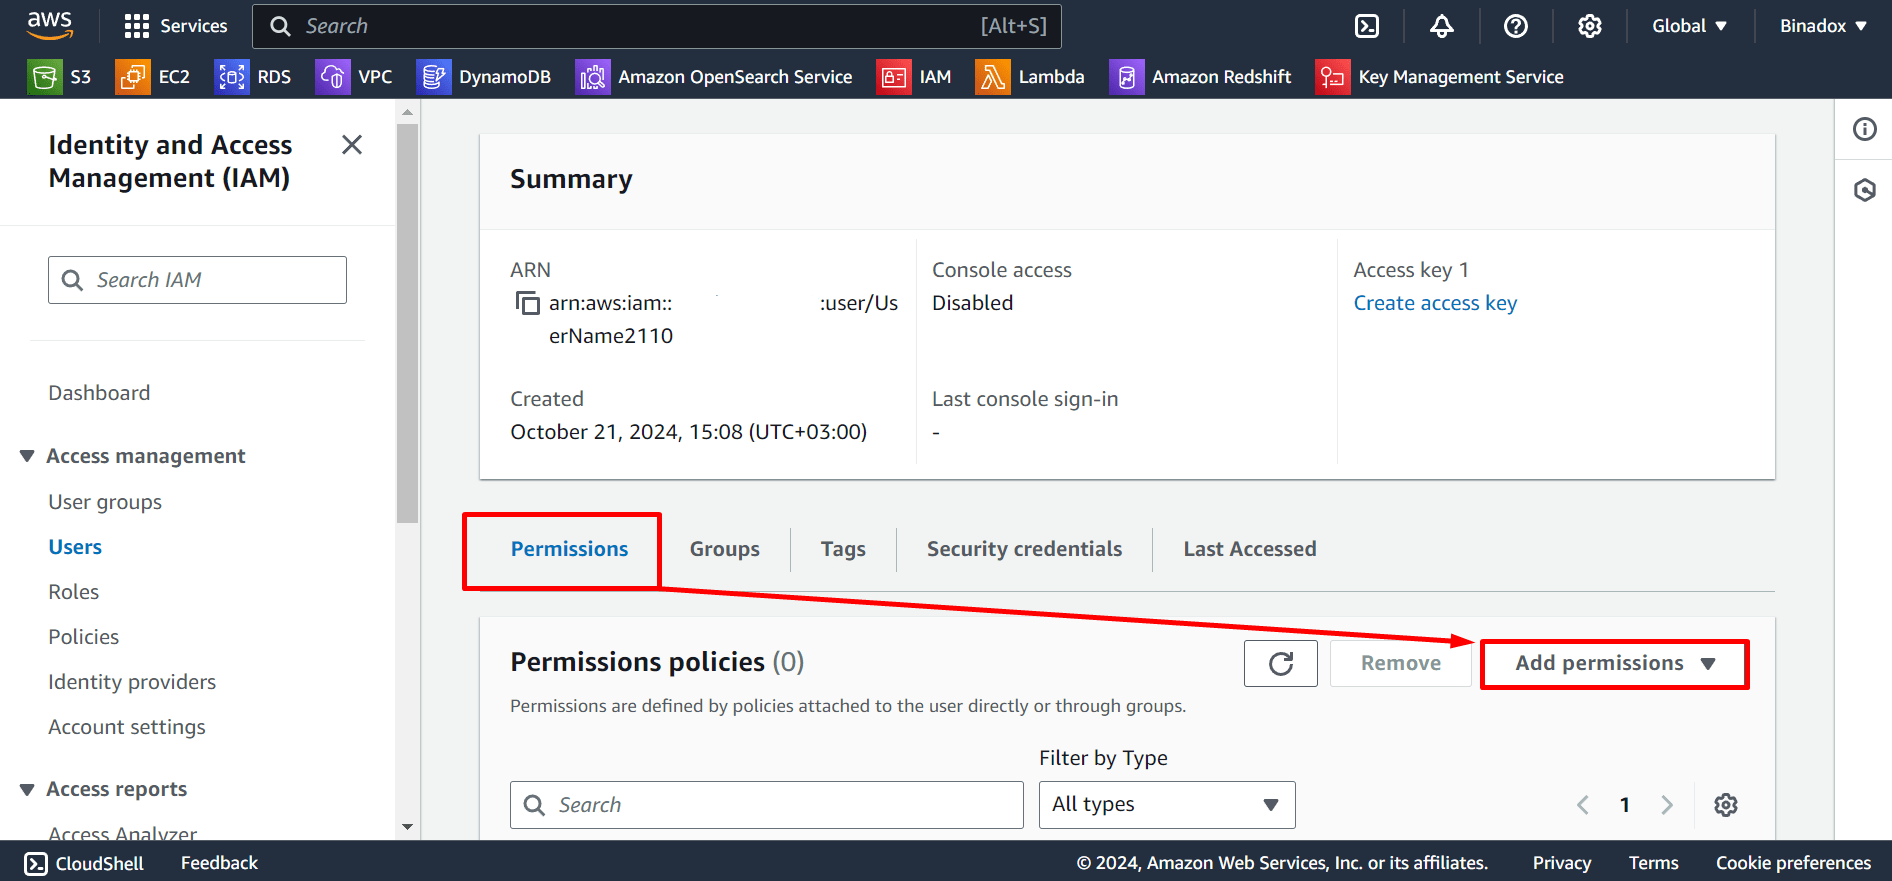
4. If all conditions are met, you will get an alert “Policy created”. Select the Users section and search for your new user. Click on it.
5. You will be redirected to the user page. On the Permissions tab, click Add permissions.
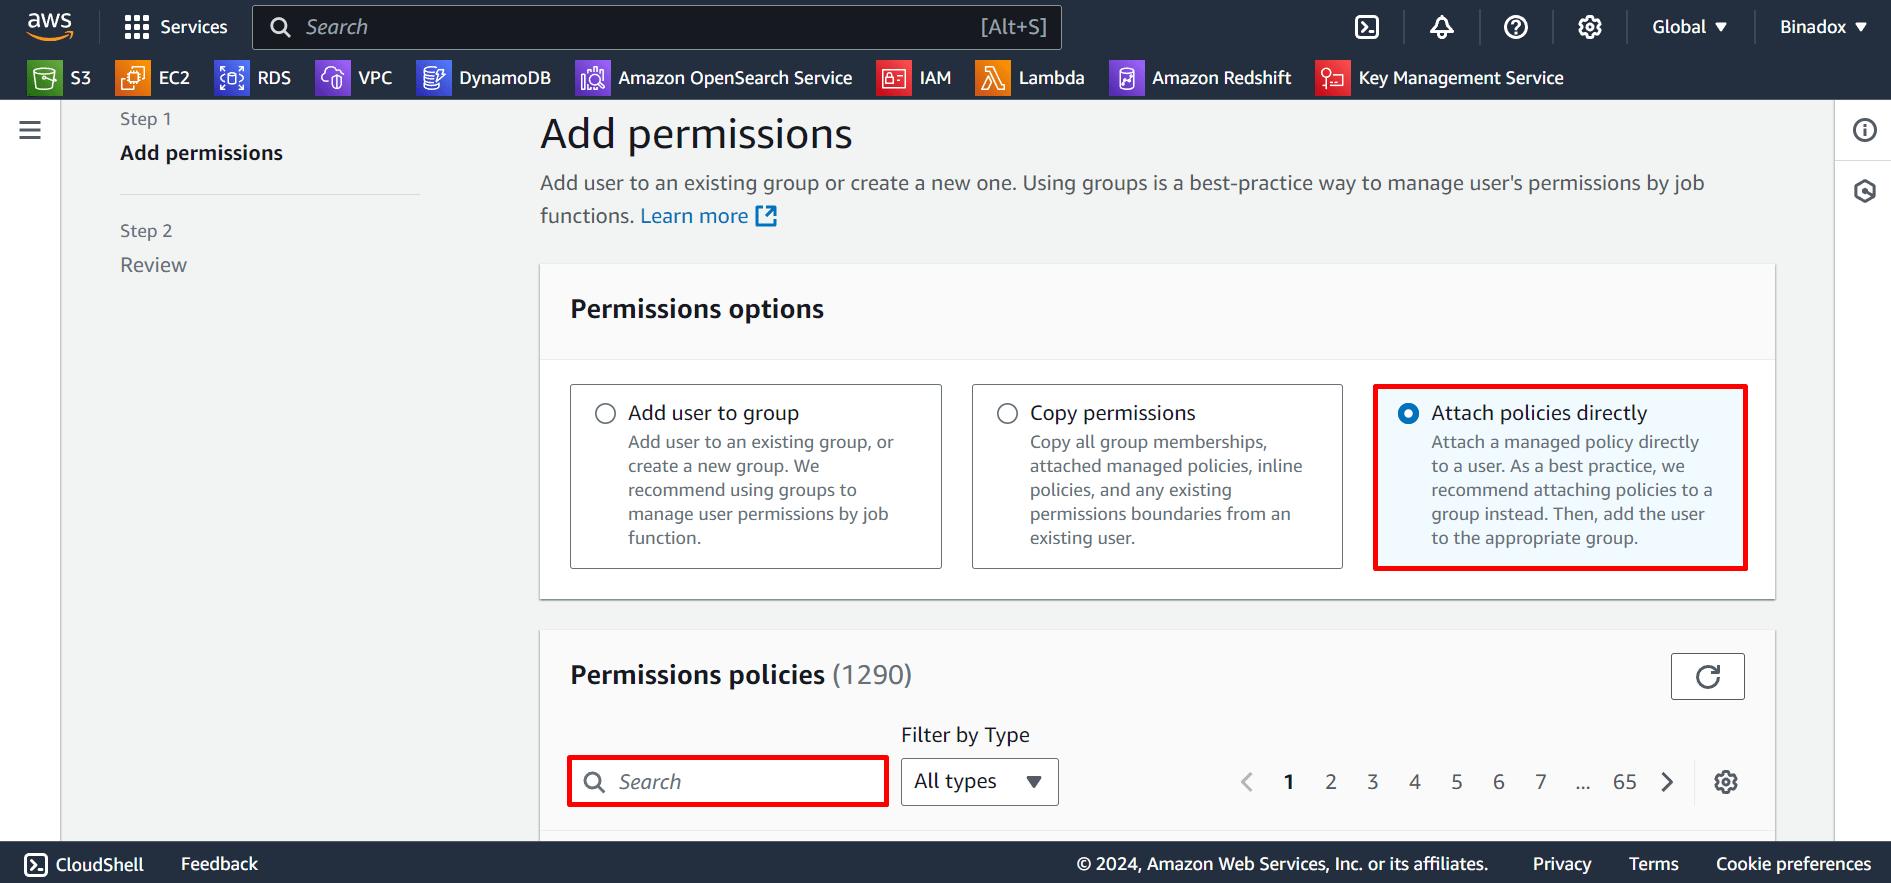
6. On the Add permissions page, select Attach policies directly in Permissions options. Search for new permission in the search bar and put a tick mark against it. Click Next.
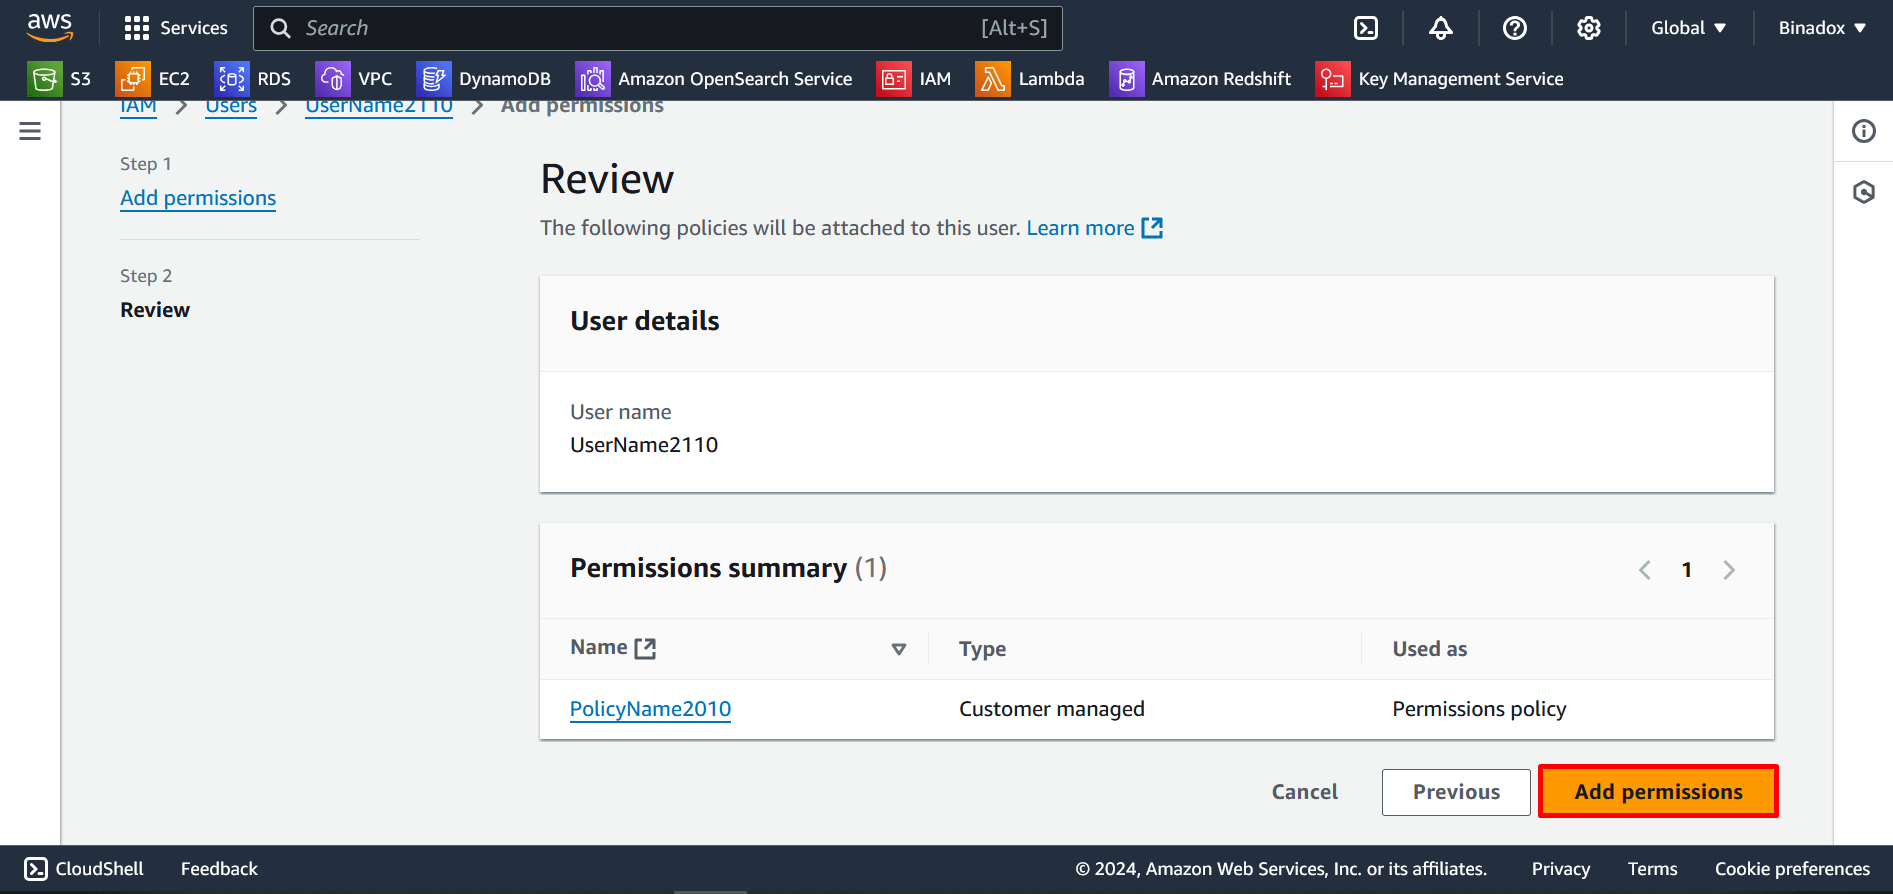
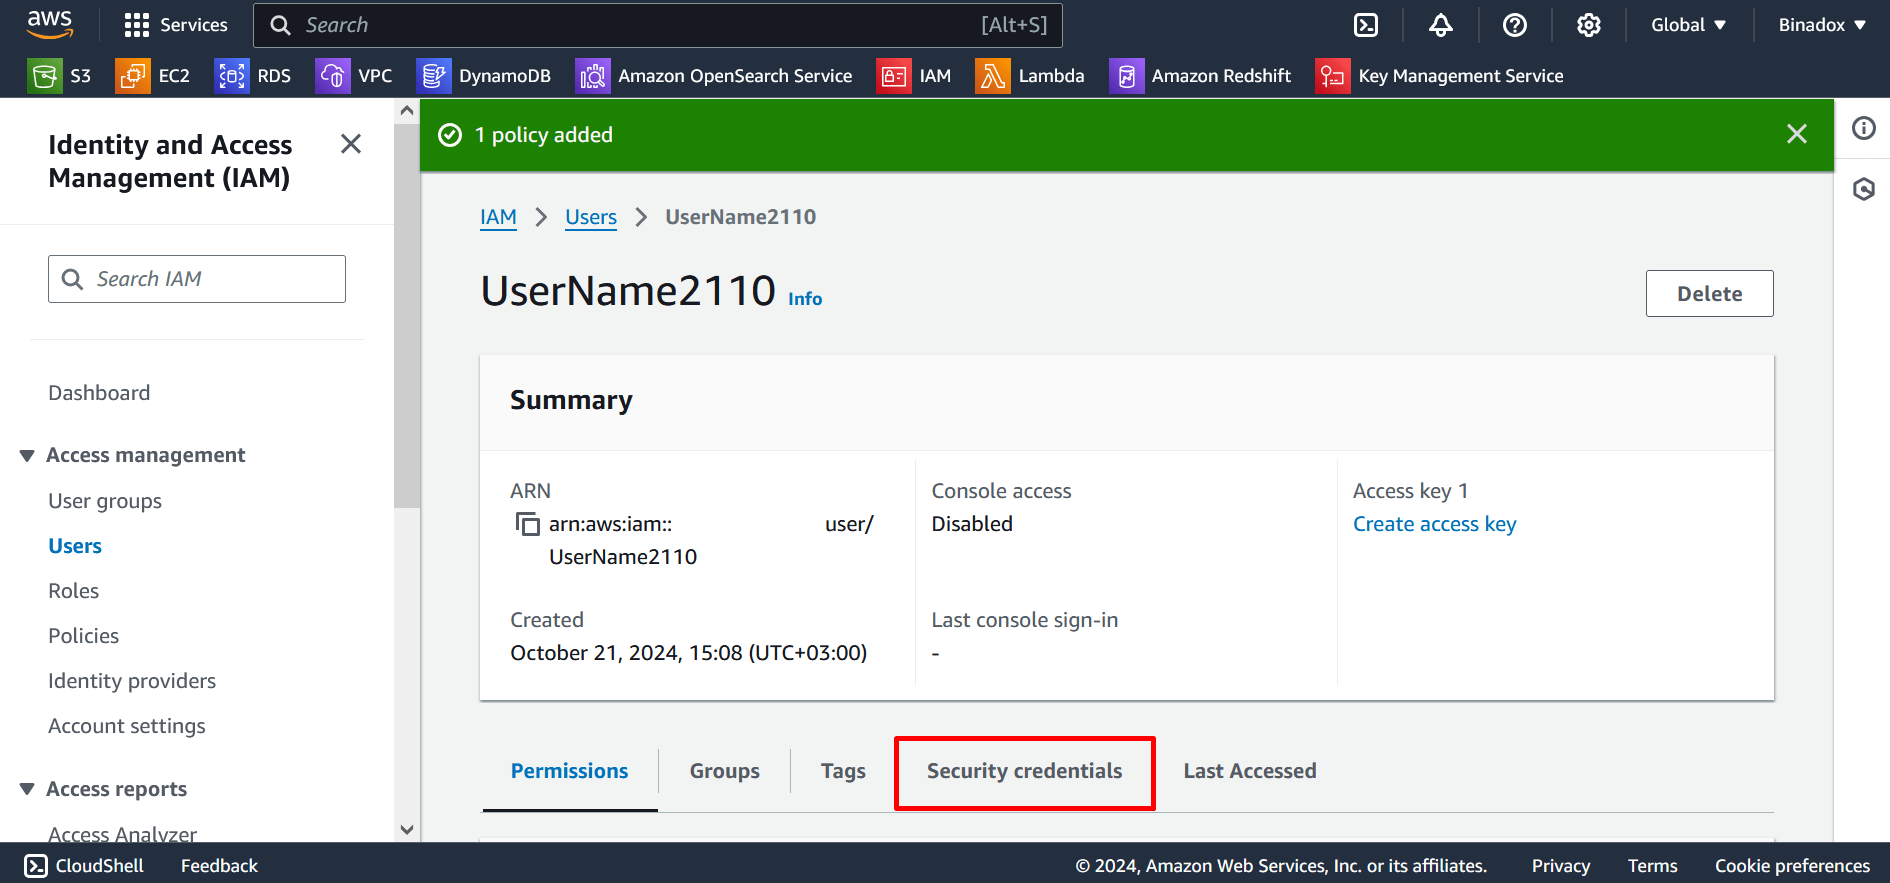
7. On the Review page, click Add permissions. If all conditions are met, you will get an alert “1 policy added”.
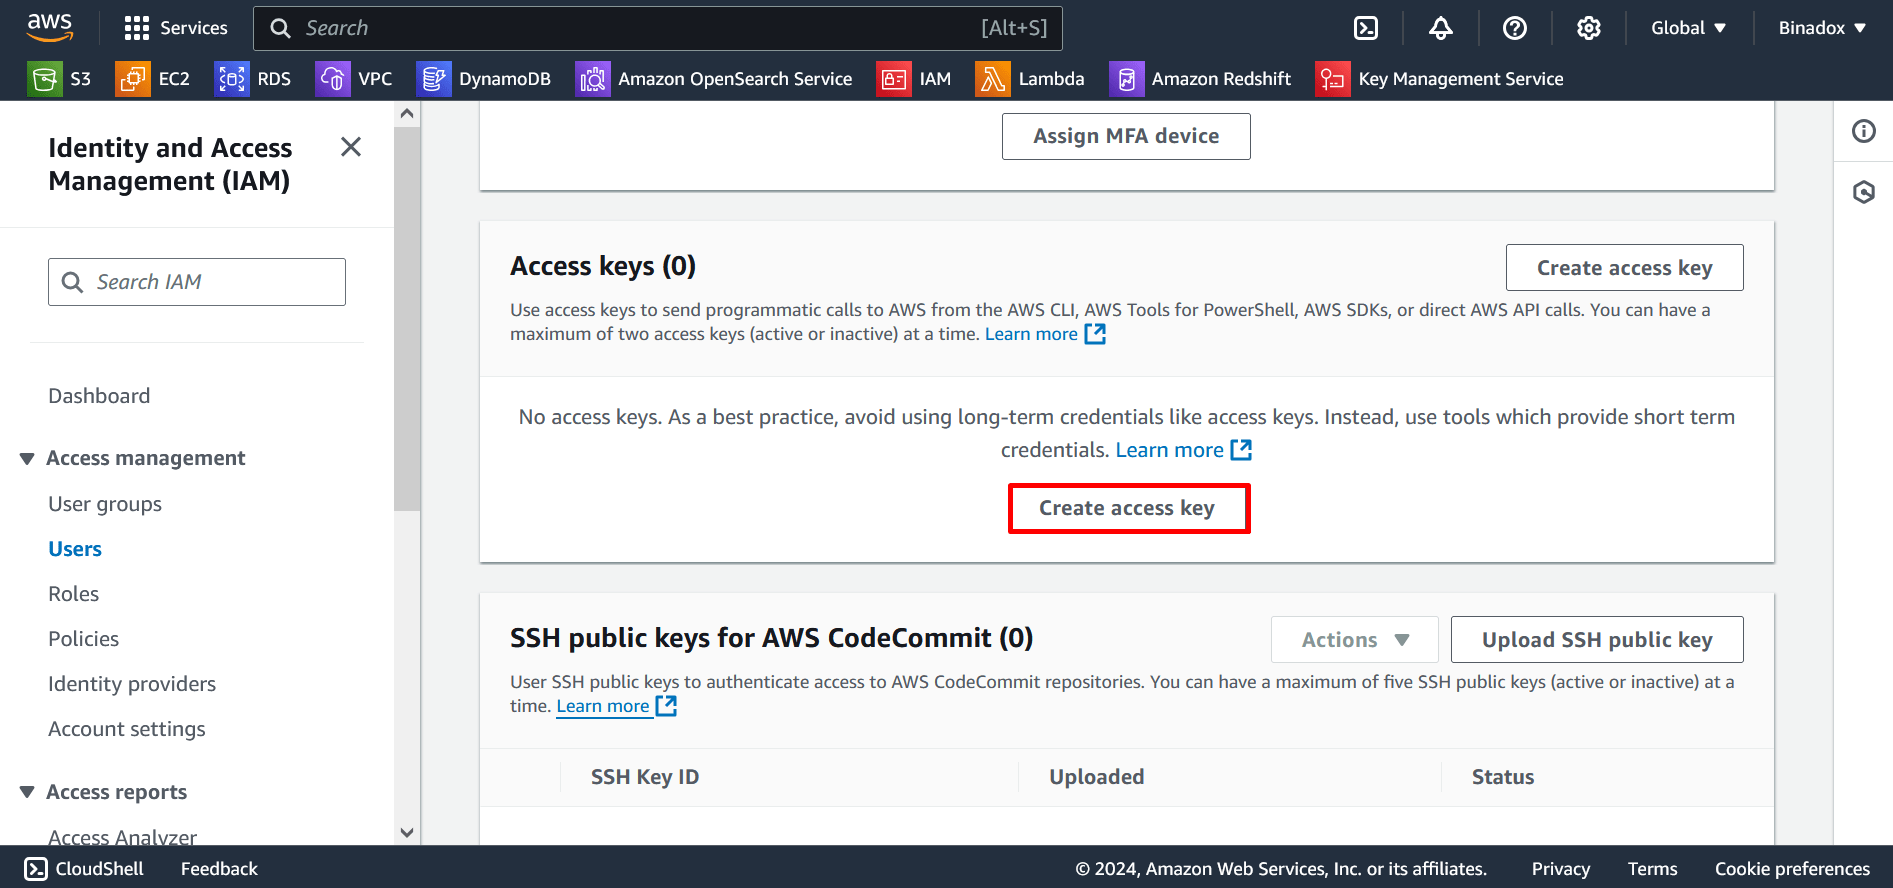
3. Create an Access Key
1. Go to the Security credentials tab.
2. Scroll down and click the Create access key button in the Access keys section.
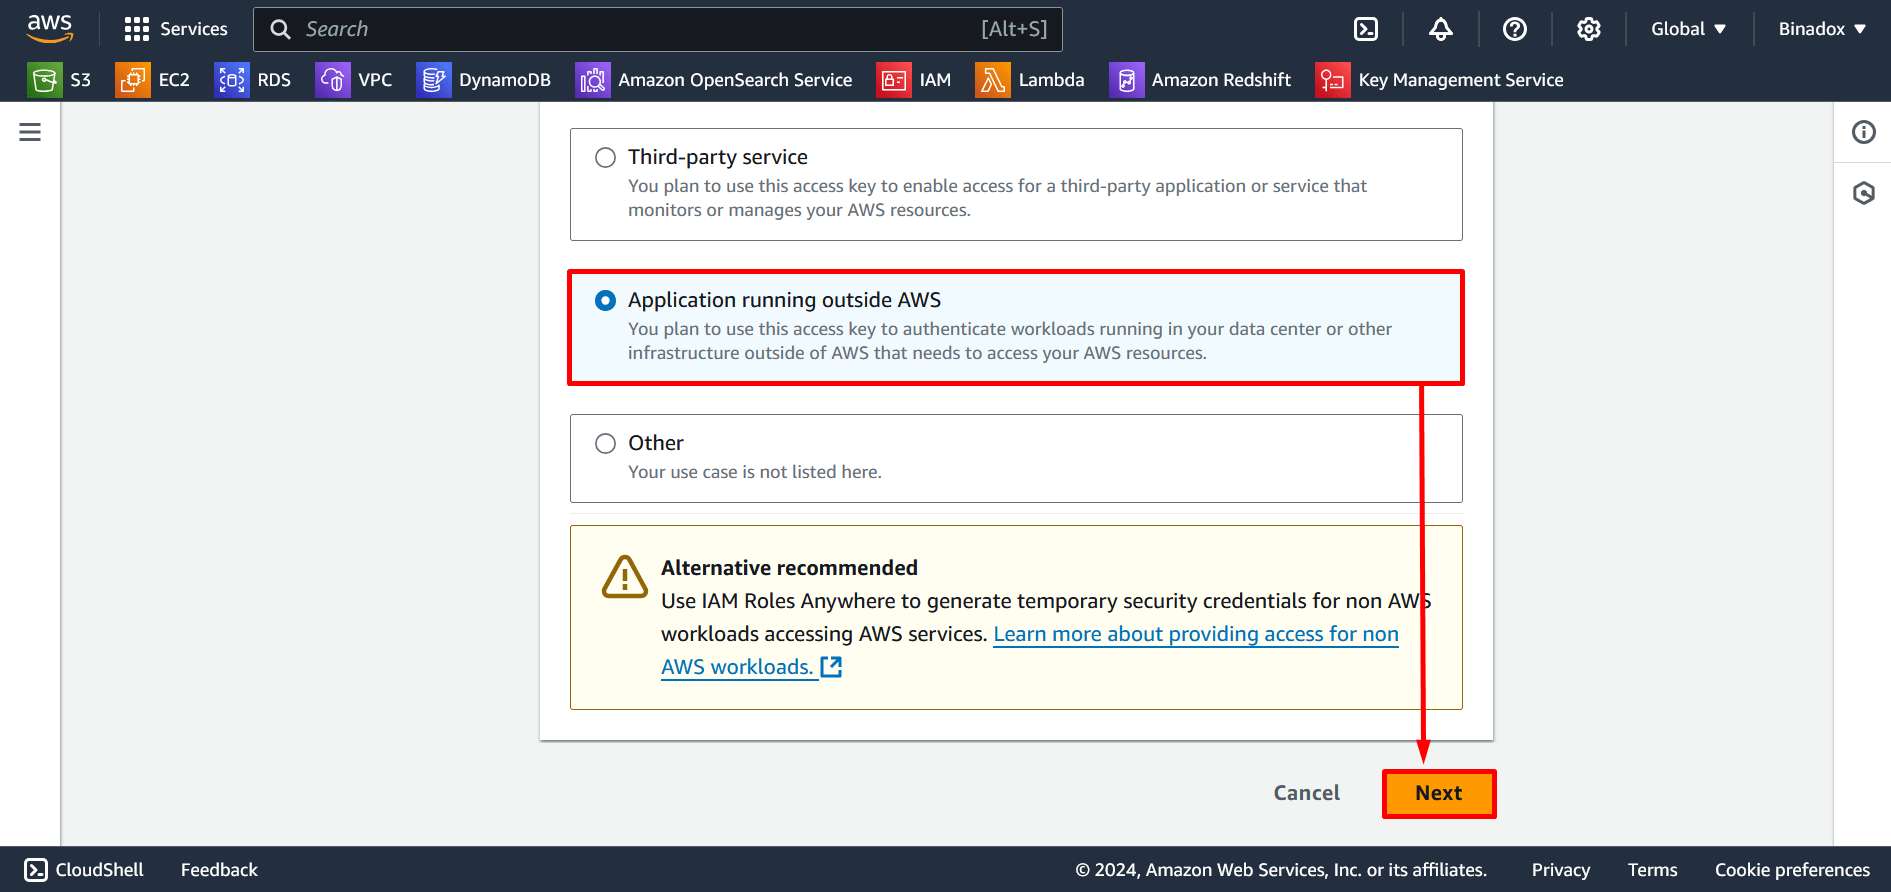
3. On the Access key best practices & alternatives page, select Application running outside AWS and click Next in the lower right corner of the page.
4. Click the Create access key button.
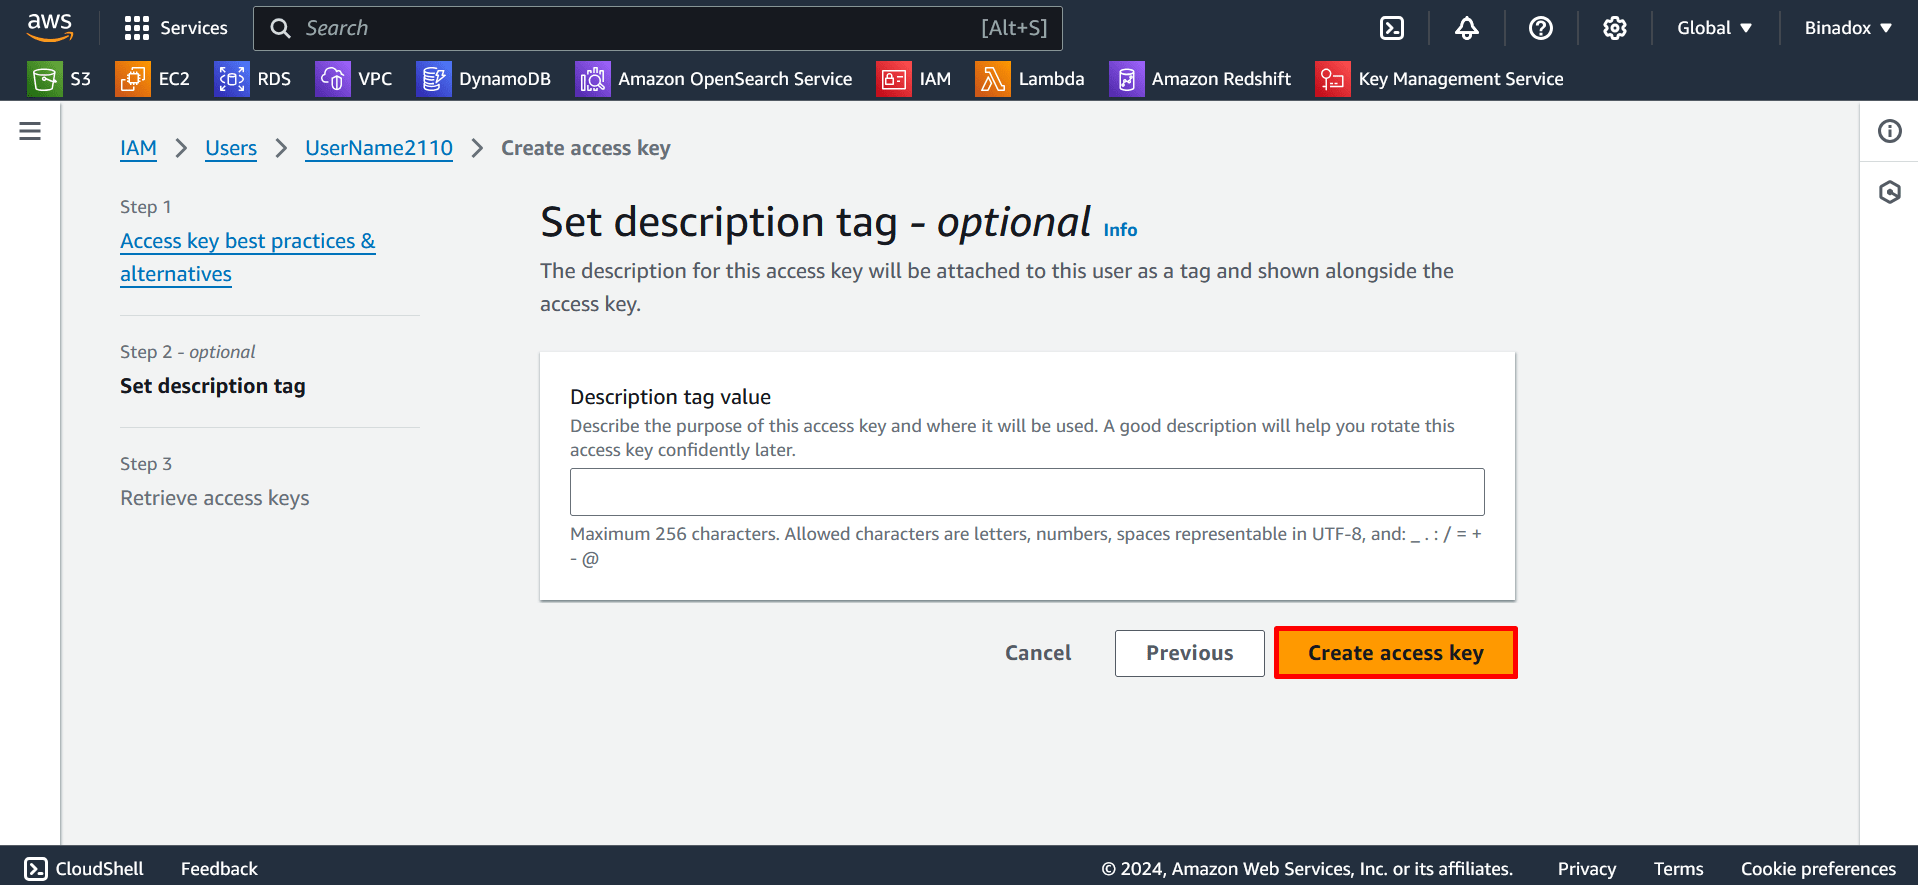
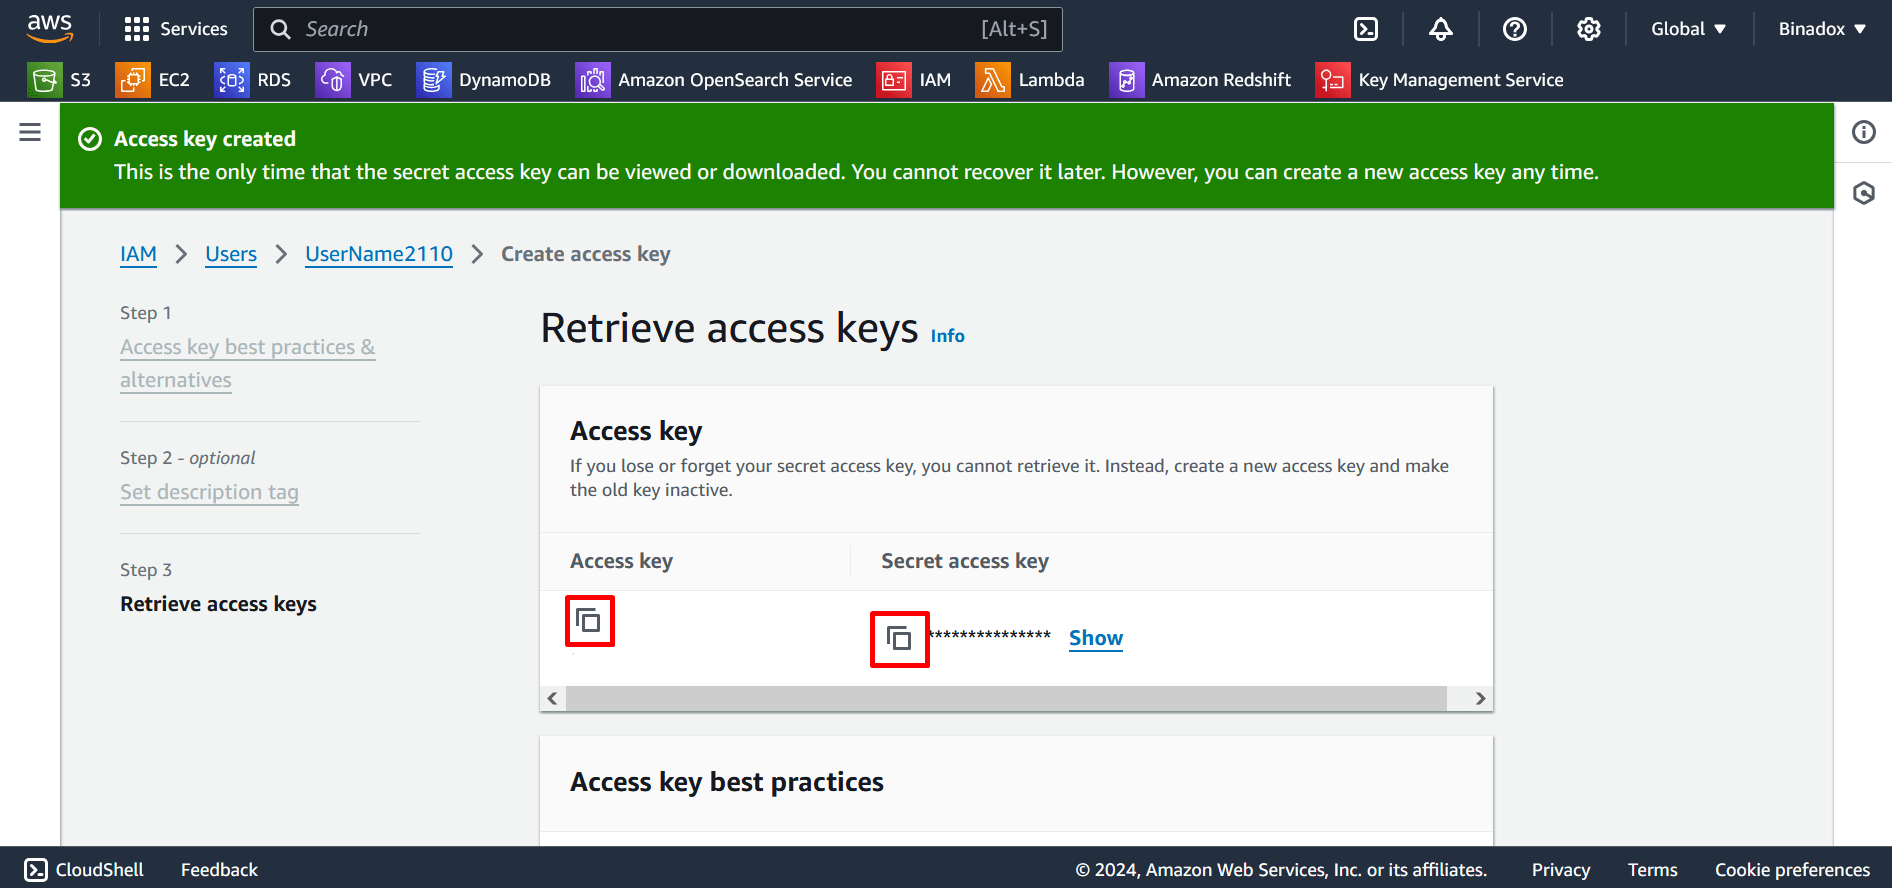
5. On the Retrieve access keys page, click on the Add to clipboard icon and save keys.
Note:
This is the only time that the secret access key can be viewed or downloaded. You cannot recover it later. However, you can create a new access key any time.
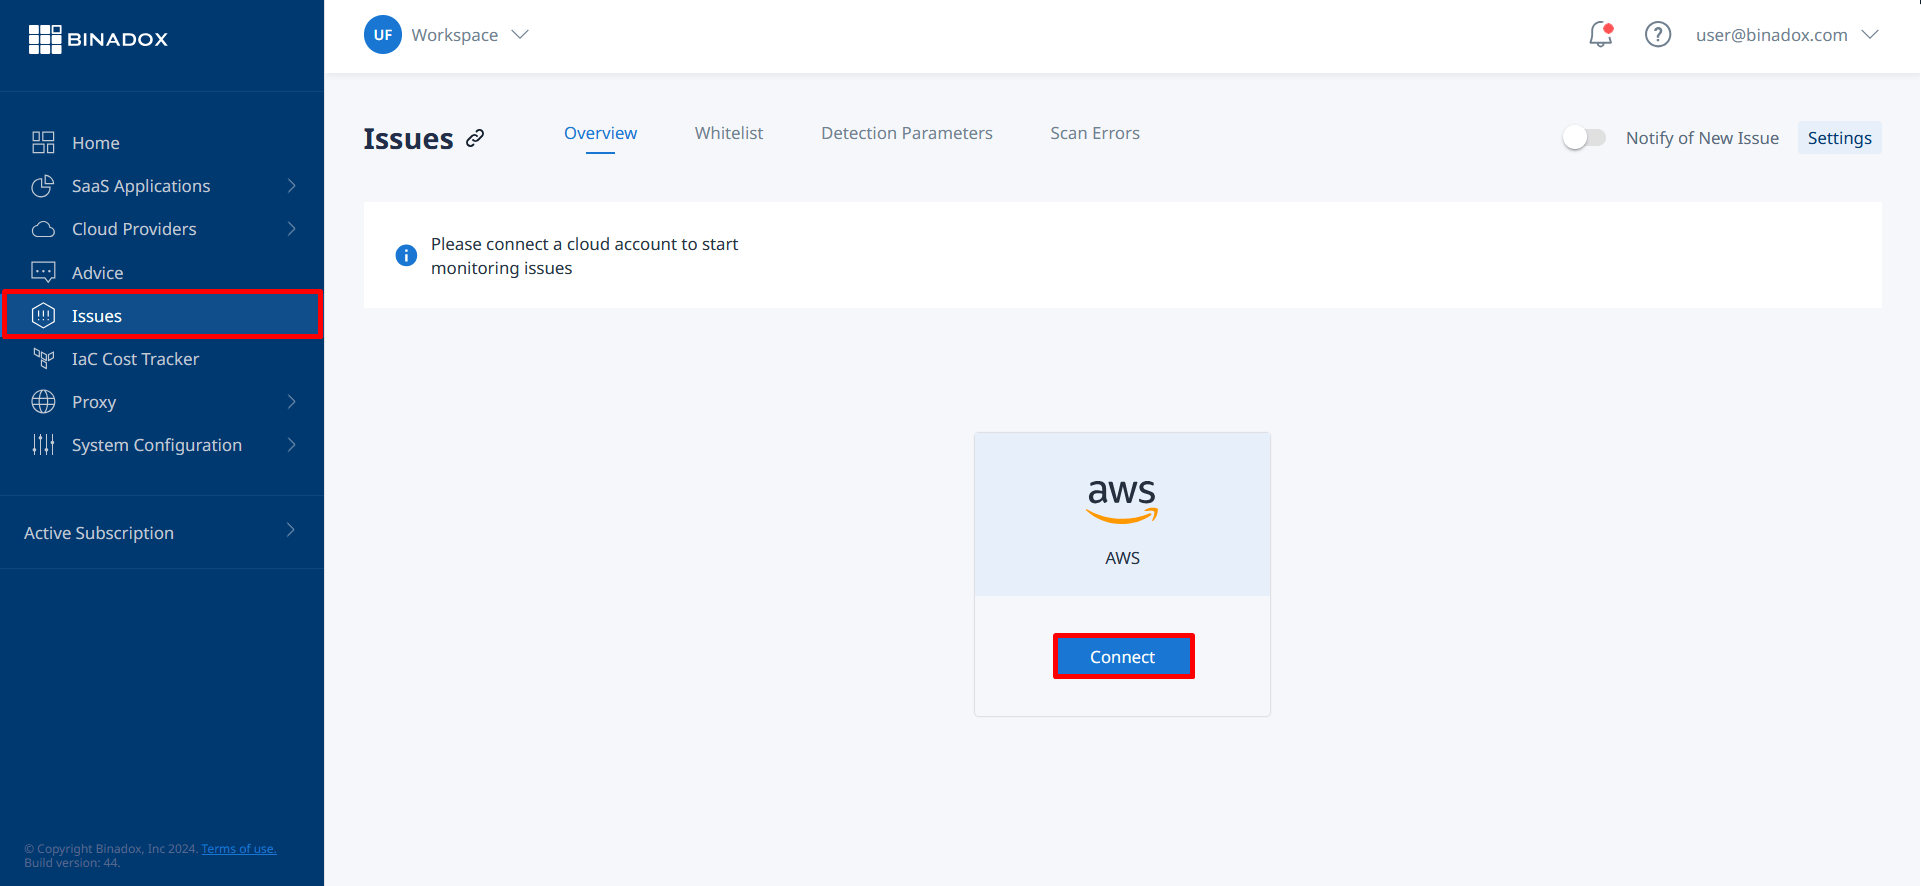
4. Create New Connection for AWS in Binadox
1. In Binadox, navigate to the Issues page and select Amazon Web Services.
2. Enter the Connection Name.
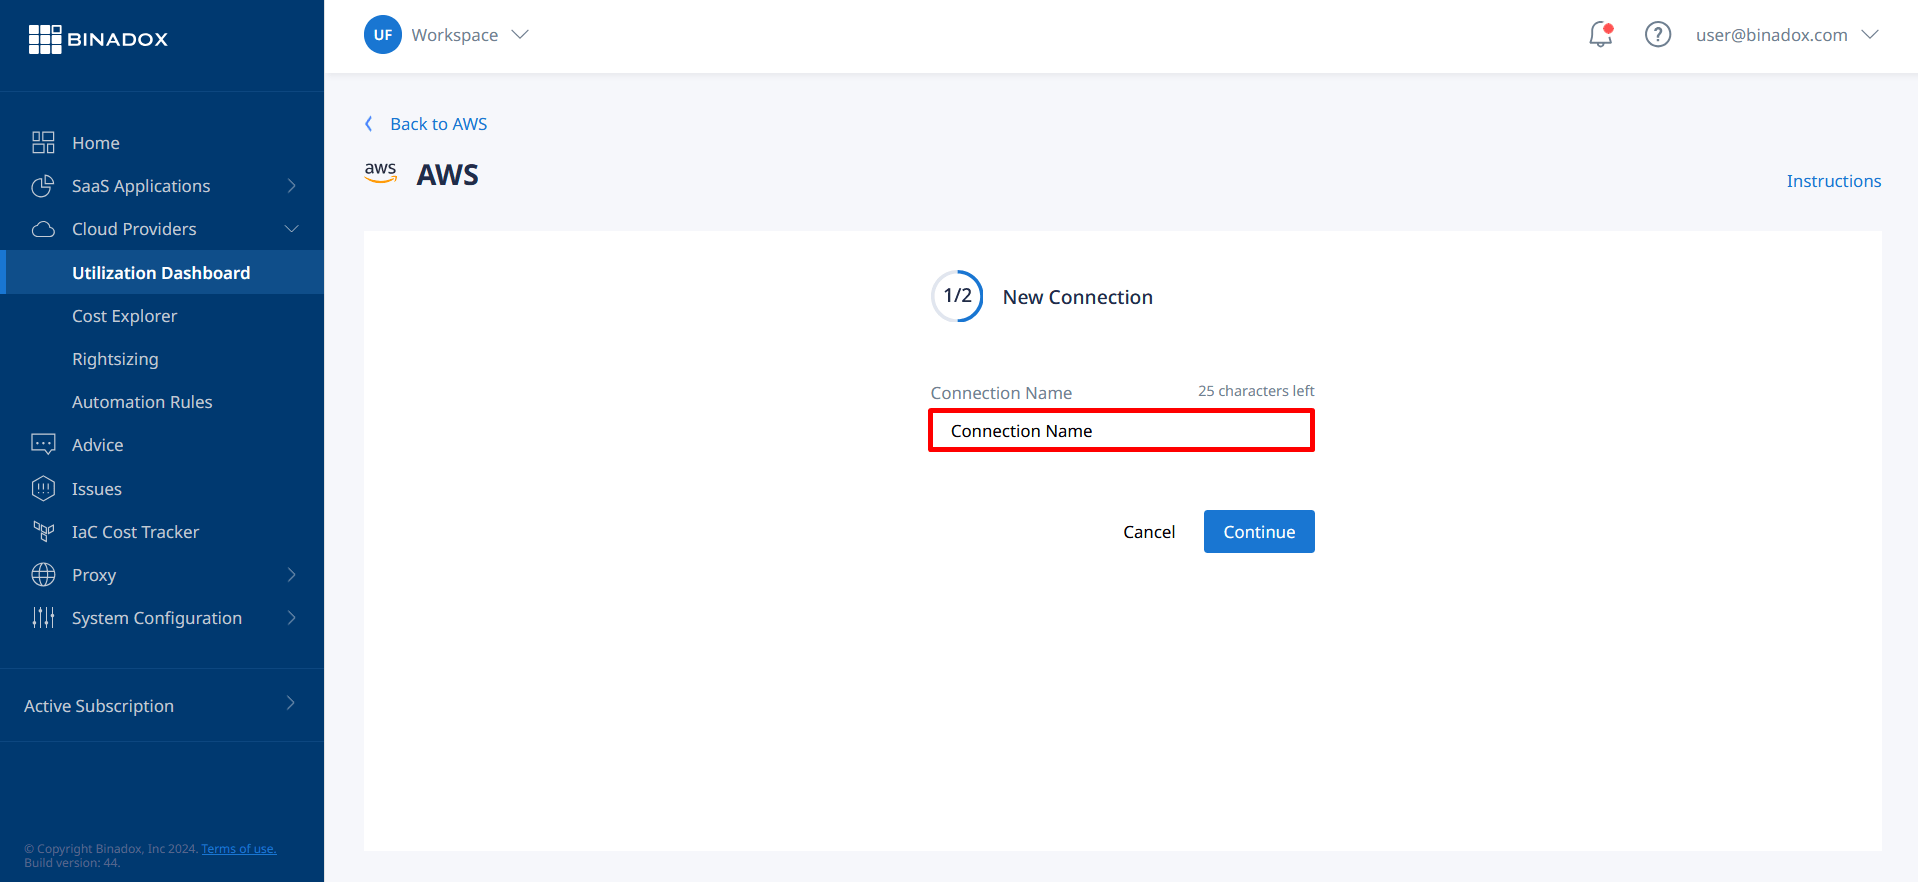
3. Fill the fields. Click Continue.
