Google Cloud Platform Integration
This guide provides information on how to integrate a GCP account with the cloud management and cost optimization platform Binadox to take control of your cloud assets and reduce expenses.
To integrate Binadox with the Google Cloud Platform, you need to follow 4 steps:
1. Set up Cloud Billing data export to BigQuery;
2. Run the Script from the Cloud Shell;
Further, these steps are described in detail. To enlarge images in the instructions, click on them.
1. Set up Cloud Billing data export to BigQuery
Cloud Billing export to BigQuery implies the export of Google cloud billing data (such as usage, cost, and pricing) to a specified BigQuery dataset throughout the day at regular intervals.
1. Sign in to the Google Cloud console.
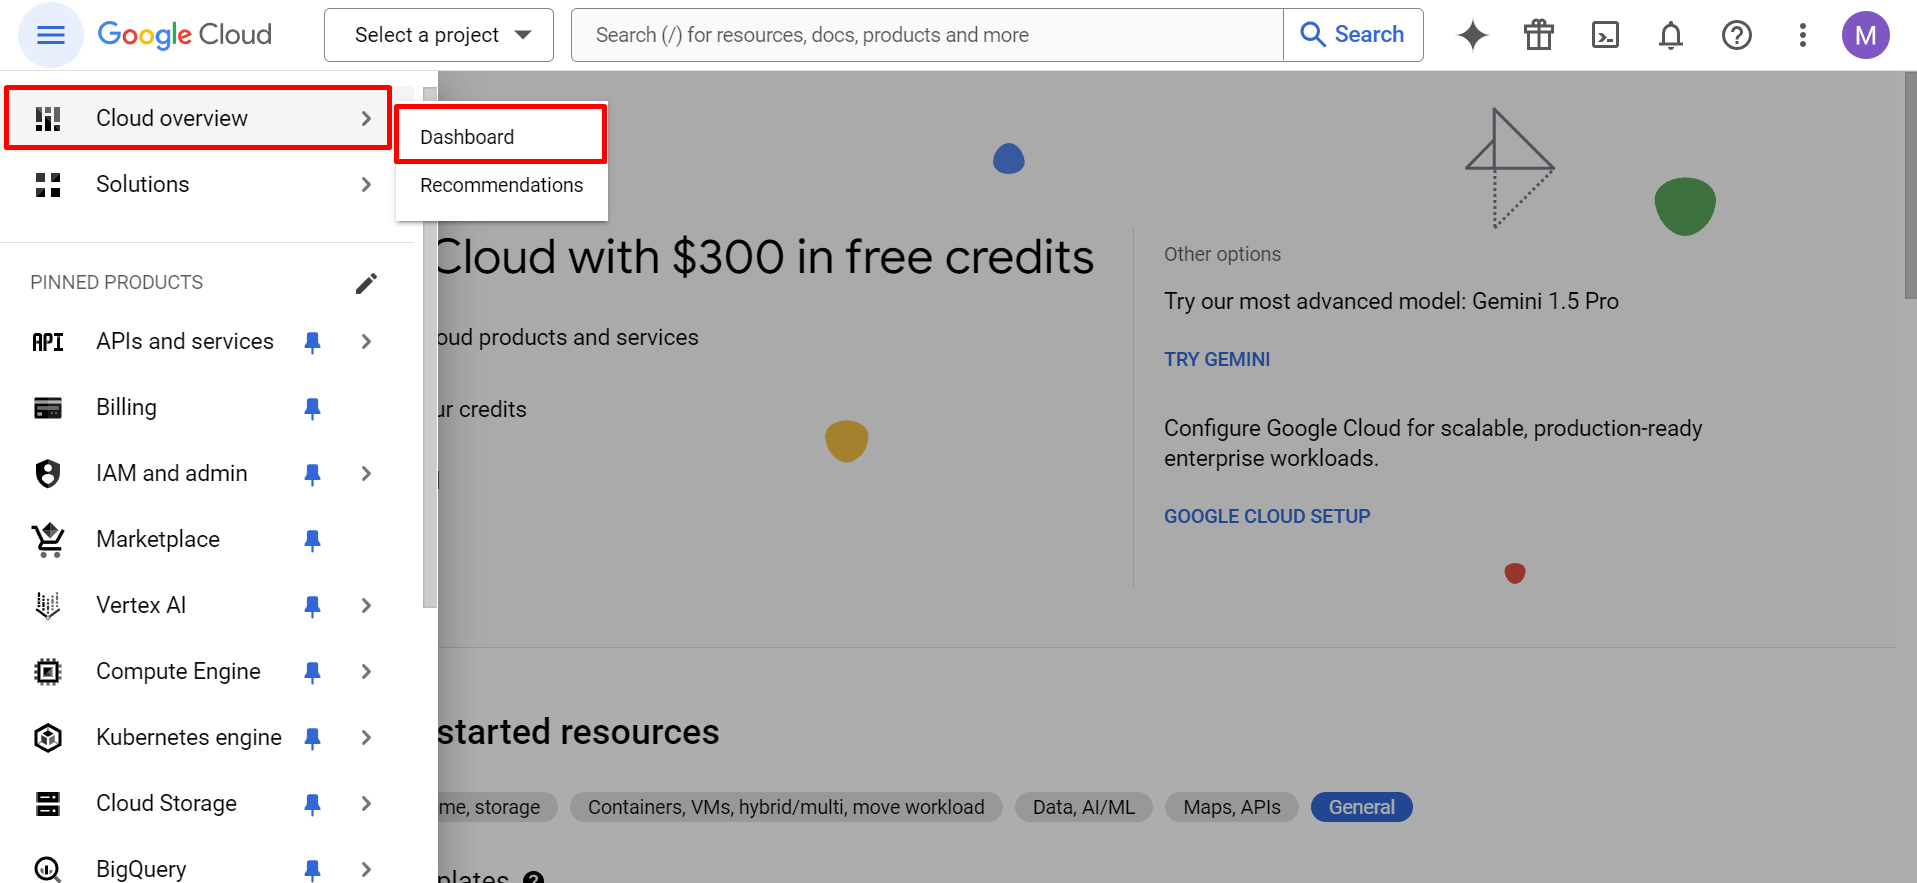
2. Click on the menu button at the top left corner to open a portal menu. In the navigation pane on the left, click Cloud overview > Dashboard.
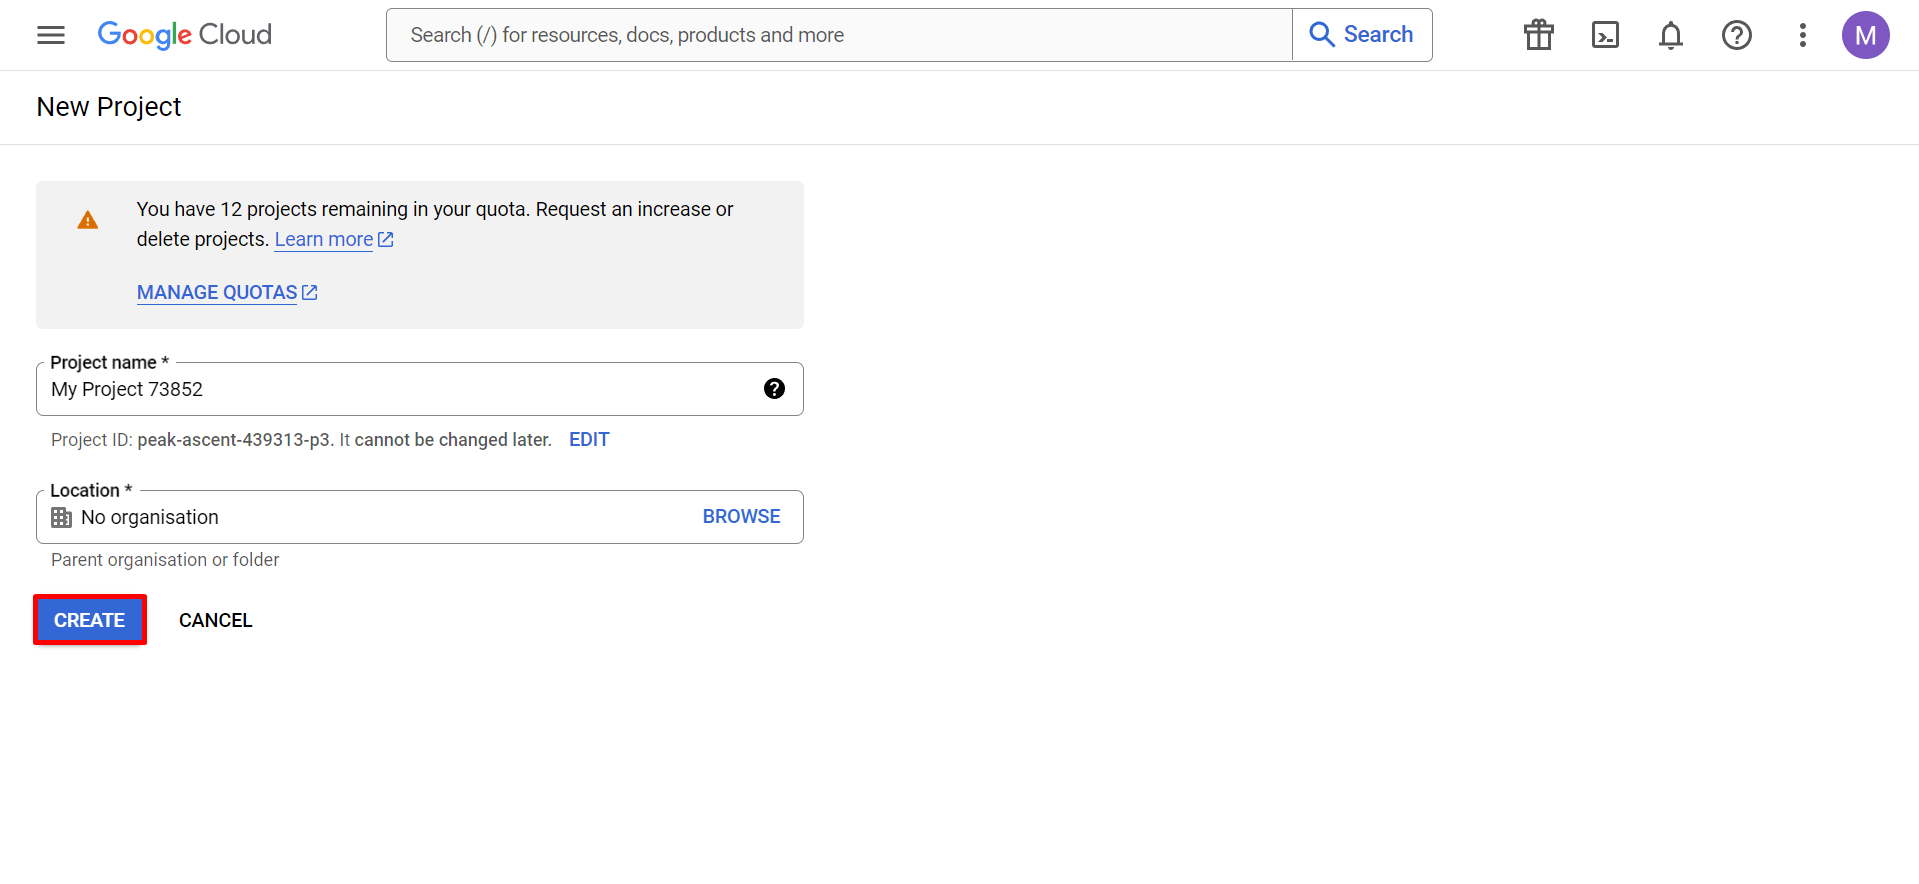
3. In a Dashboard either select an existing project or create a new project to store Cloud Billing data there.
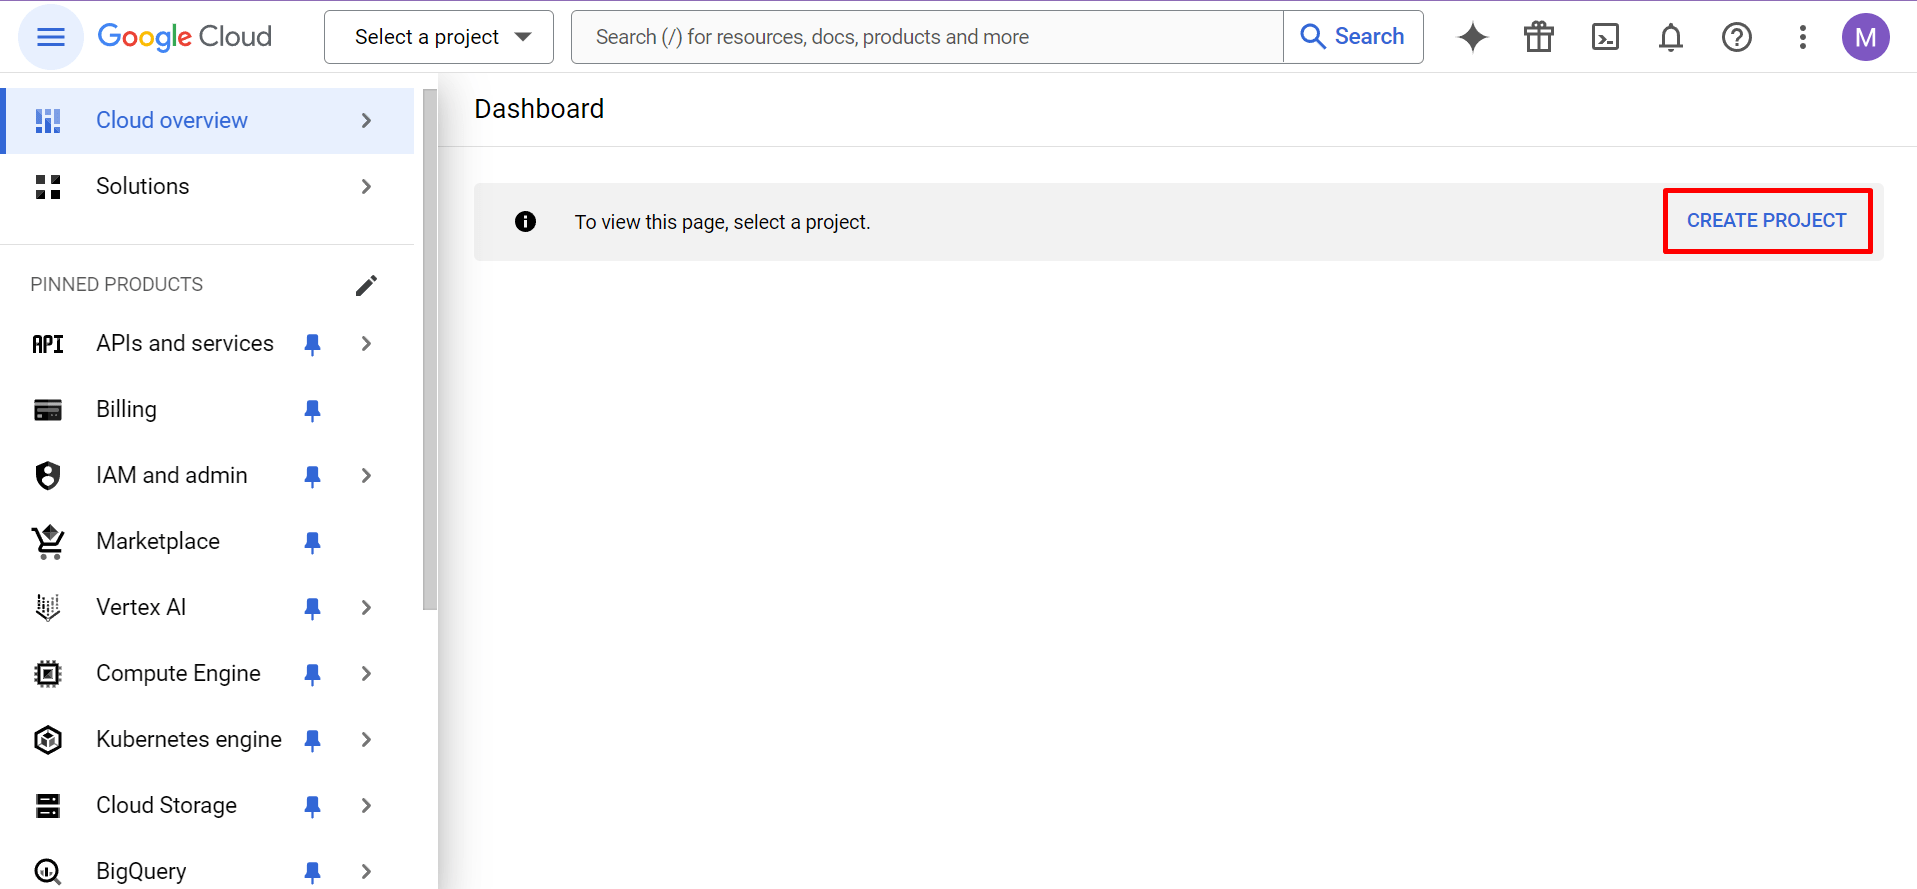
To create a new project, enter the Project name, Organization, and Location. Click the Create button.
4. Create a BigQuery dataset in which the data will be stored. To do that, you need to complete the following steps:
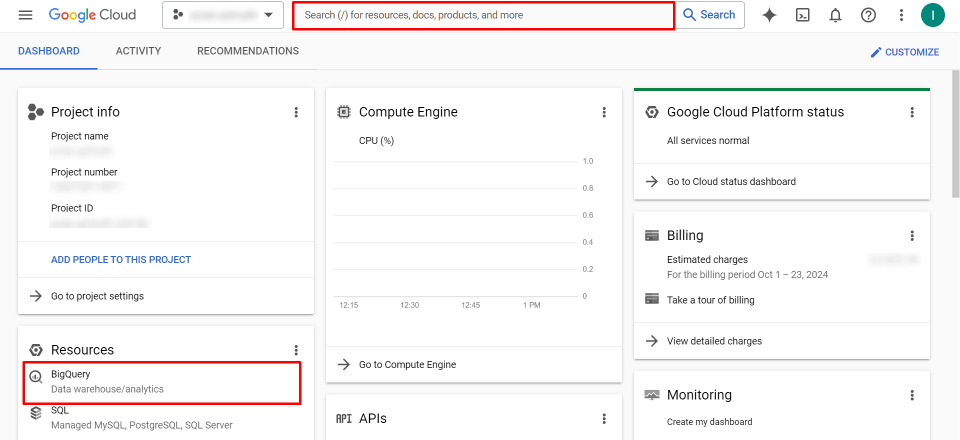
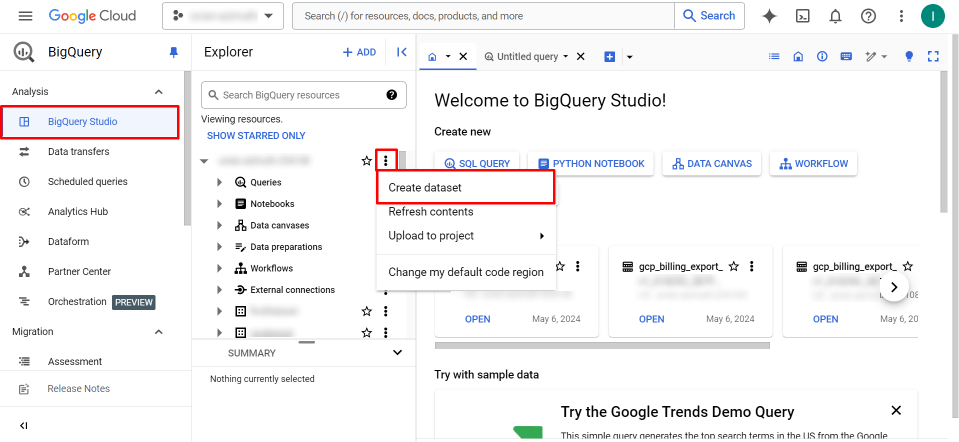
- Go to Dashboard > Resources > BigQuery, or use the search bar at the top.
- On the BigQuery page, in the navigation pane on the left, click BigQuery Studio. On the left side of the workspace page, you will see an ID of the created project. Click the three dots menu on the right and select Create dataset;
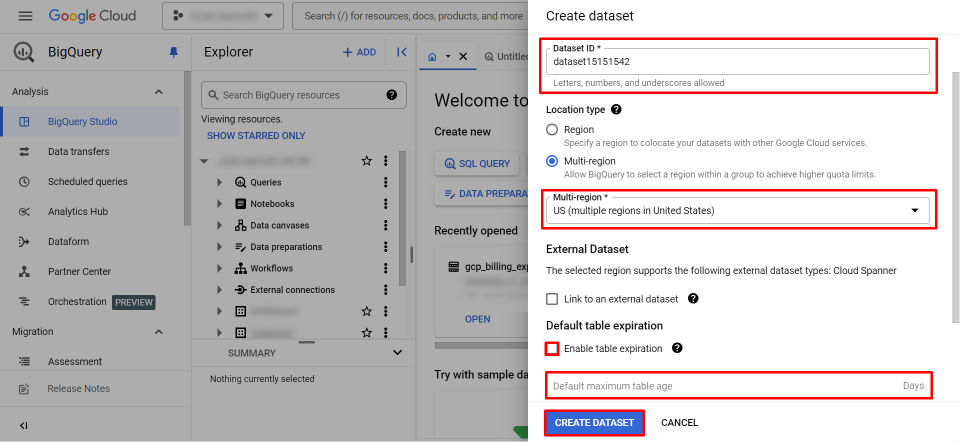
- In the popped-out Create dataset window on the right, enter the dataset ID, select the location and select when the default table expires (or leave this field empty). Once this step is completed, click Create Dataset button.
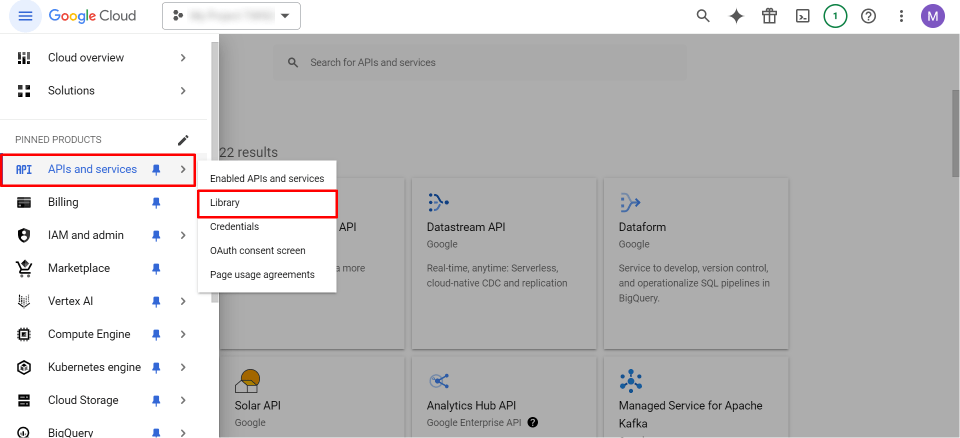
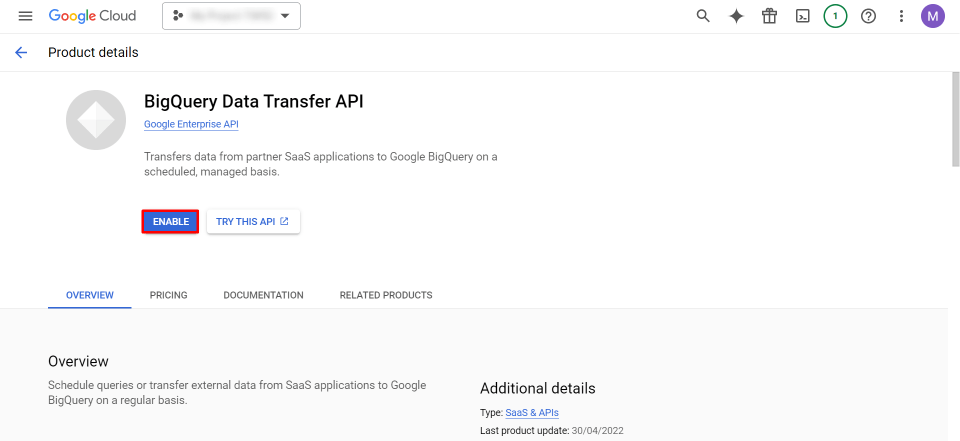
5. Enable the BigQuery Data Transfer Service API. To complete this step, go to APIs and services > Library. In Category, select Big Data. Find BigQuery Data Transfer API. Click Enable button.
6. After API is enabled, you will see a modal window with the suggestion to create a transfer. Leave this step incomplete, as the transfer will be created automatically by the script.
7. Enable billing on the project. To do that, in the navigation pane on the left, click Billing. If the project has no billing account, link a billing account. Enter the name of the account and click the Set Account button.
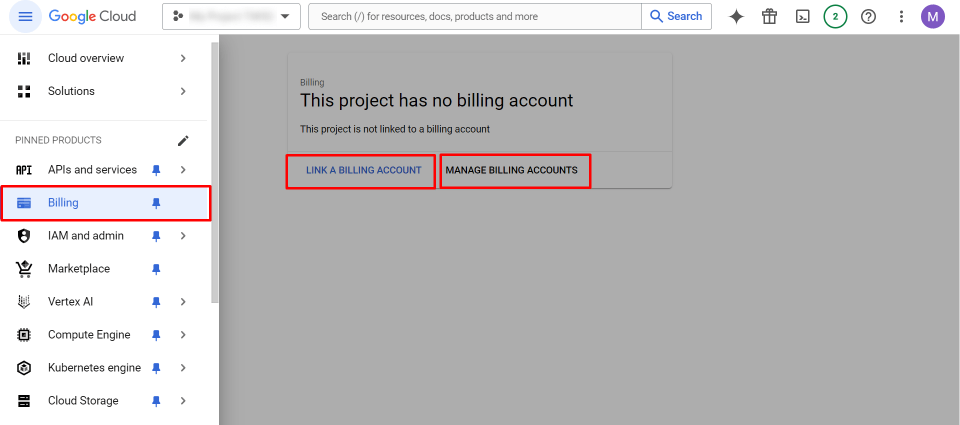
Troubleshooting:
If you reached the limit of projects on which you can enable billing, you can request an increase of your billing quota, or click Manage Billing Account and delete the accounts that are linked to the deleted projects. Then try to link the billing account to the newly created project again.
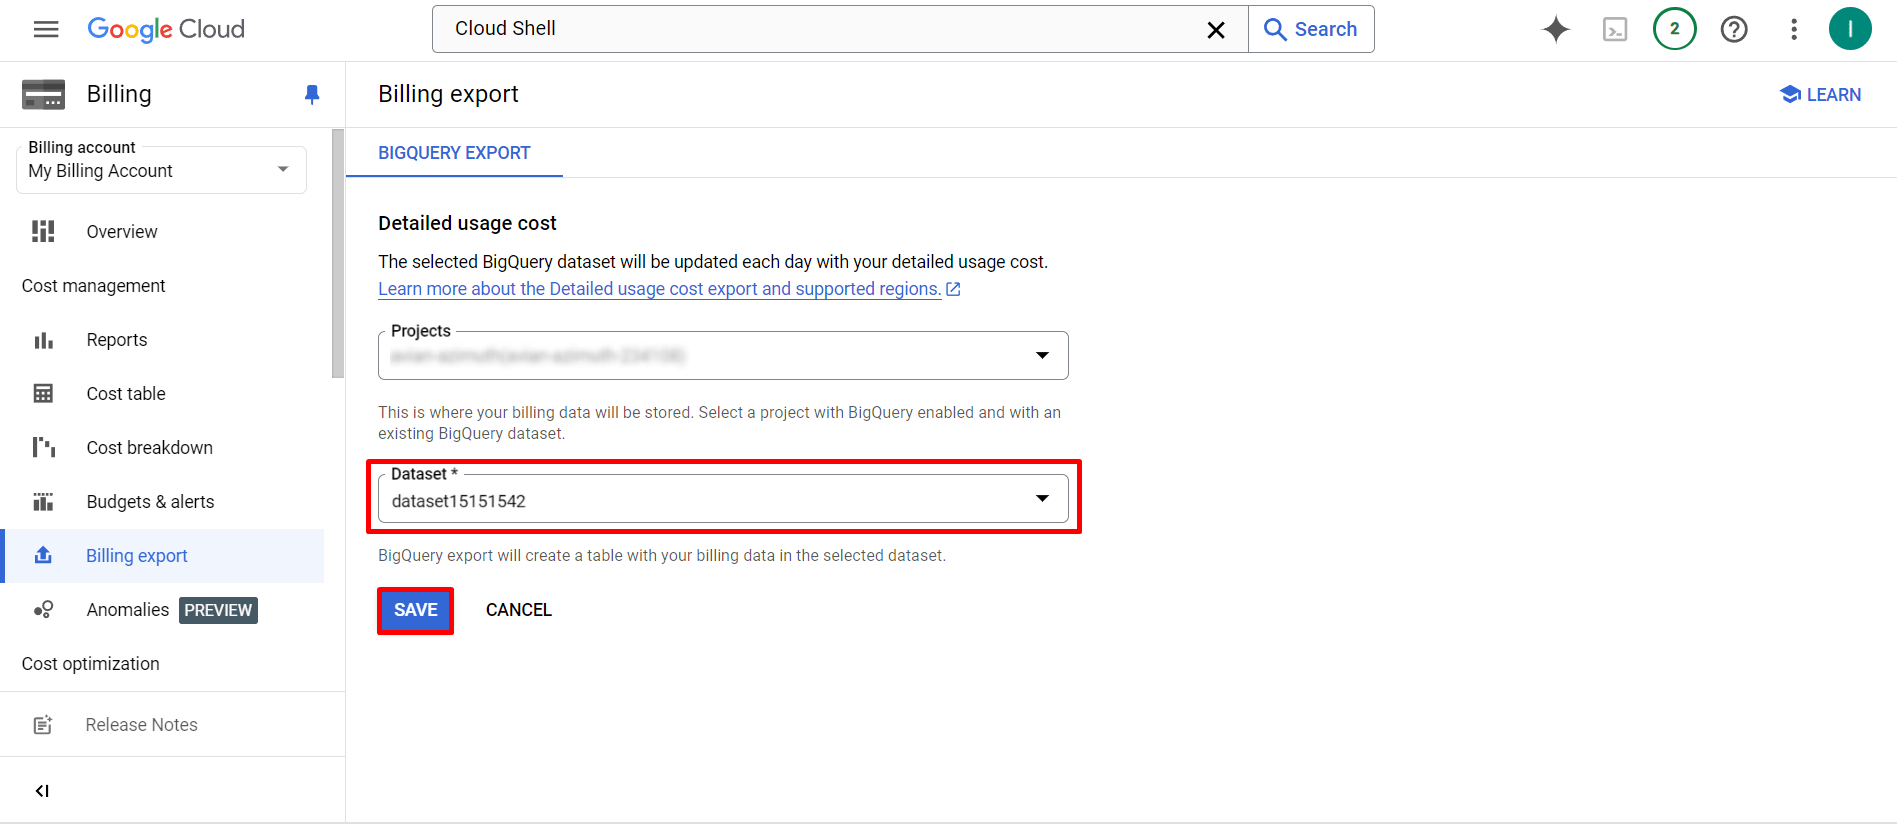
8. Enable Cloud Billing export of cost data and pricing data to be written into the dataset:
- In the navigation pane on the left, click Billing export;
- On the Billing Export page, in the BigQuery export tab (selected by default) edit the settings of the Standard usage cost and Detailed usage cost;
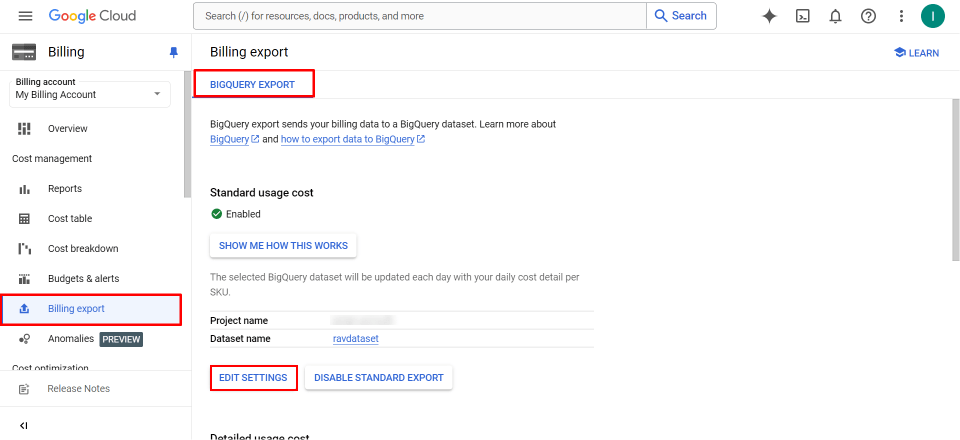
- Click the Edit Settings button, select a created dataset and click the Save button. This action needs to be done for all two parameters – Standard usage cost and Detailed usage cost.
2. Run the Script from the Cloud Shell (within the cloud console)
Binadox script creates a Role with Permissions, Data Transfer, and Service Account, as well as enables APIs required for getting access to the Billing information. To have the script running you need to follow the steps below:
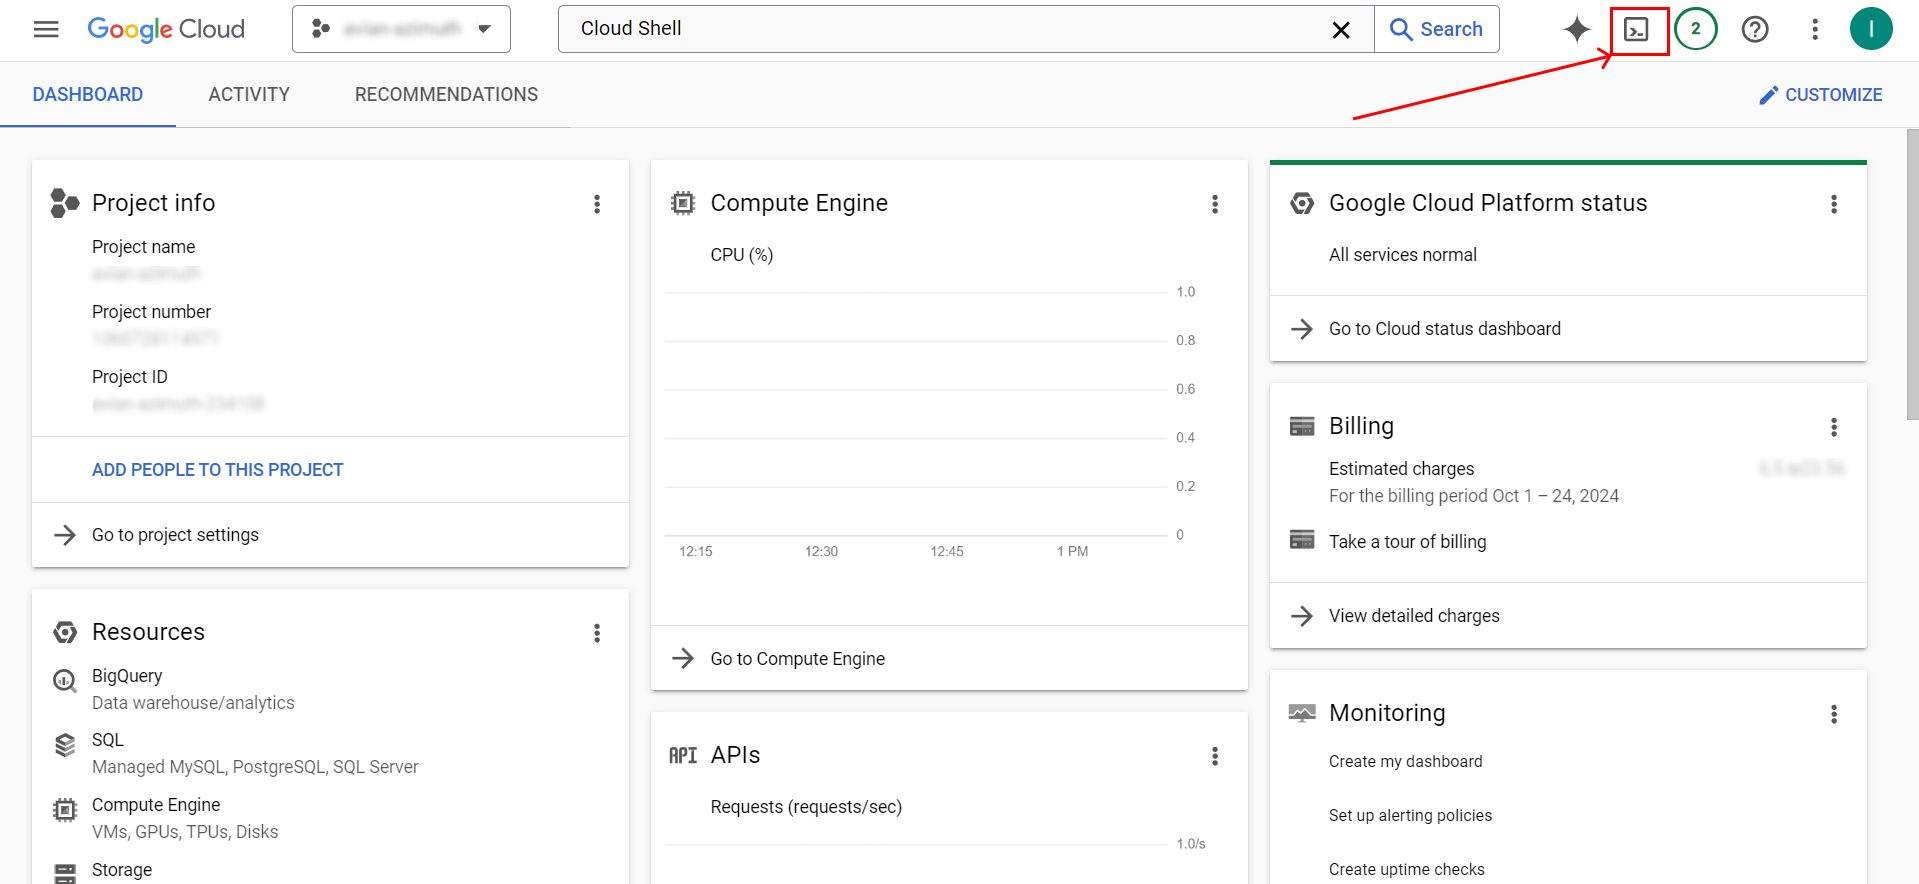
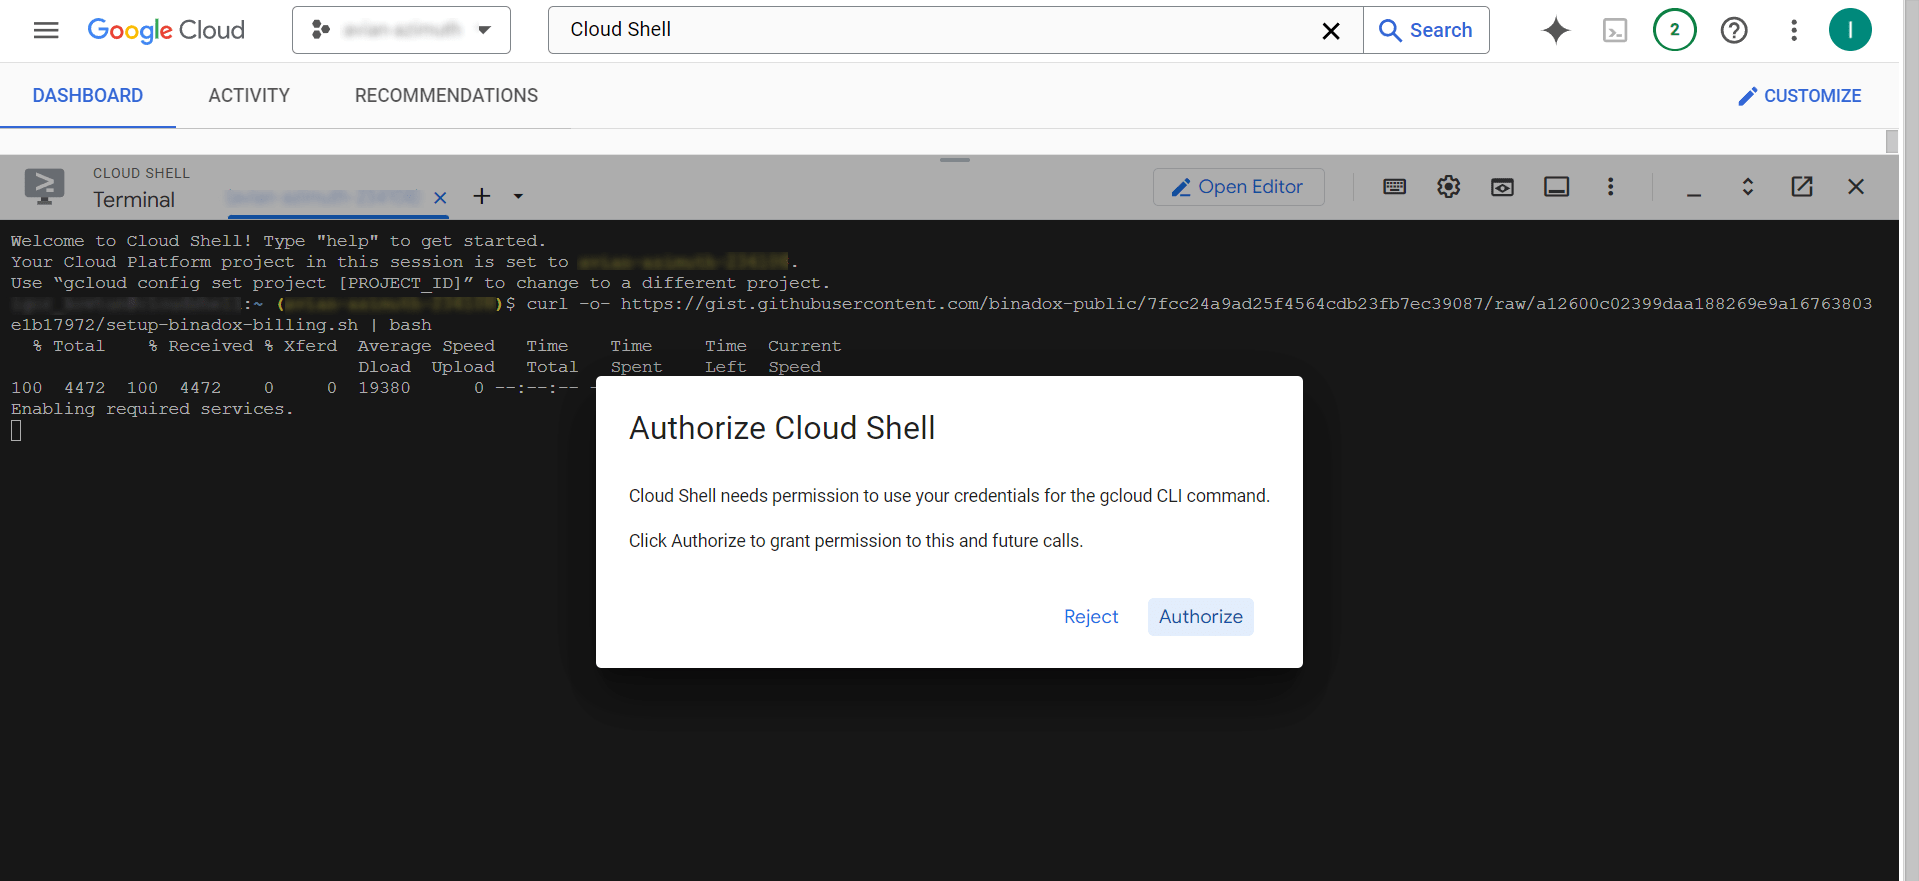
1. Click on the Activate Cloud Shell icon on the header. Wait for the cloud console to open.
2. Copy and paste the command into the opened cloud console. You will need to authorize Google to run the script. In a popped-out Authorize Cloud Shell modal window, click the Authorize button.
Troubleshooting:
Error text:
FAILED_PRECONDITION: You can’t create a role with role_id [name] where there is an existing role with that role_id in a deleted state.
Solution: Undelete the existing role with role_id [name], from your billing project, and run the script again.Error text:
Resource in a project is the subject of a conflict.
Solution: No additional actions are required.
3. Once the script is successful, you can close the Cloud Shell console and proceed to the next step.
3. Create a JSON file for the required service account
1. A service account is created automatically by the script (view Clause 2).
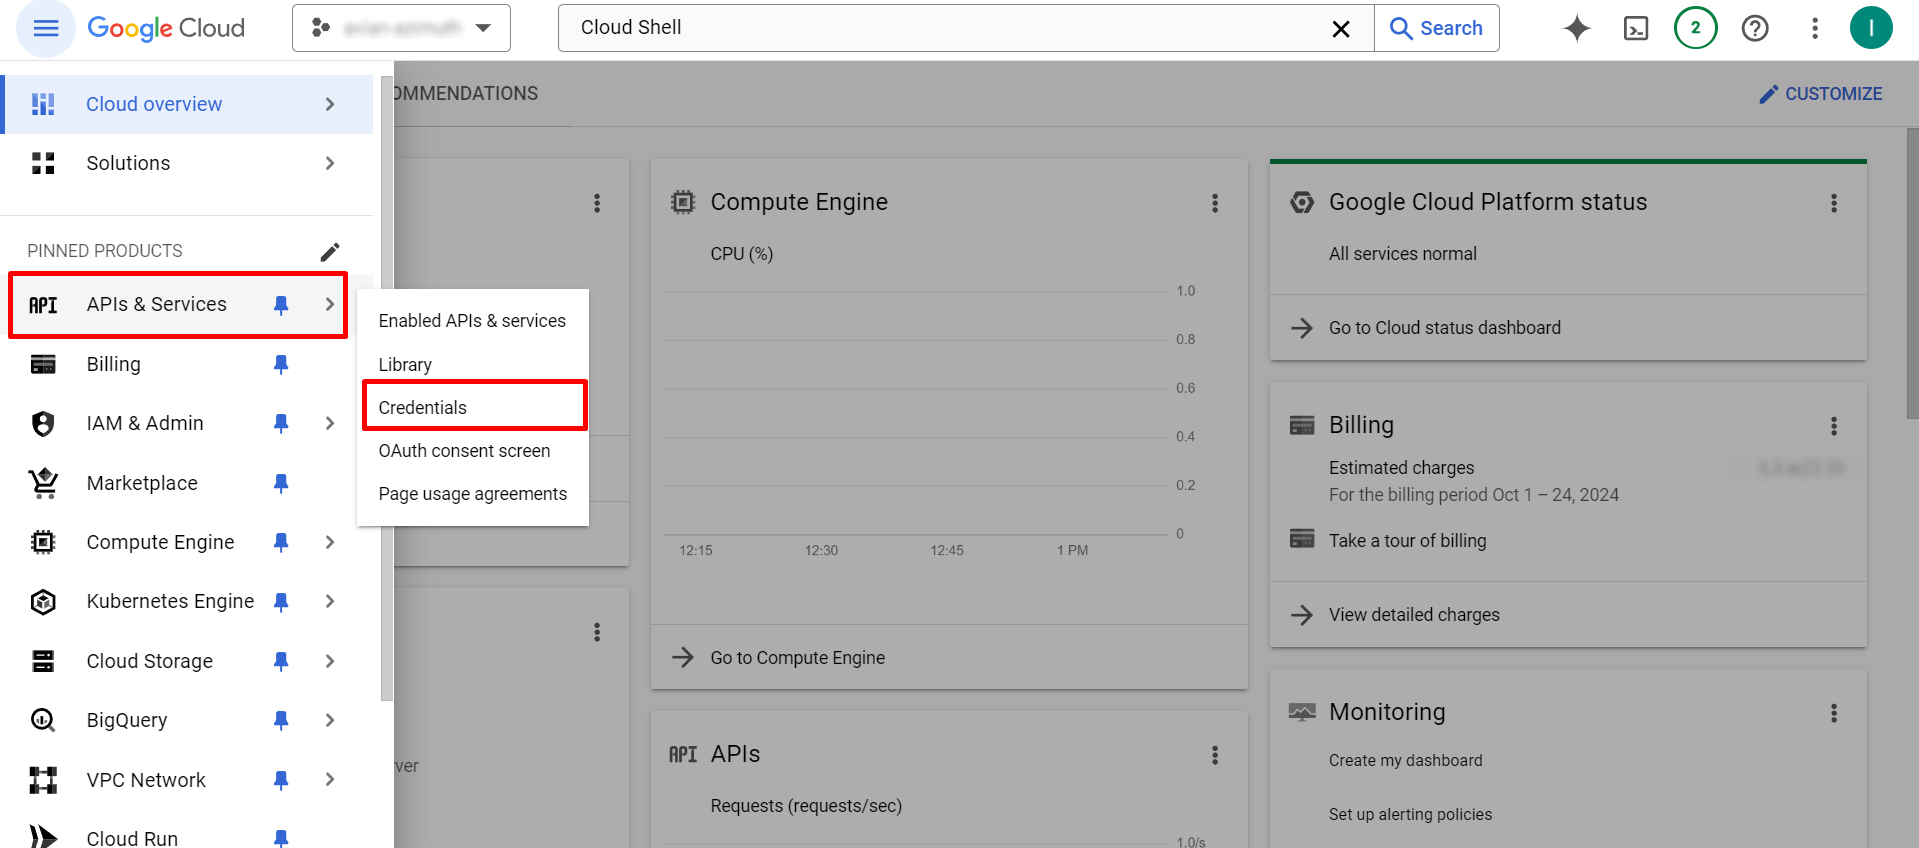
2. To create a JSON file for the service account, click APIs&Services.
3. Once you’re on the API&Services page, proceed to the Credentials section.
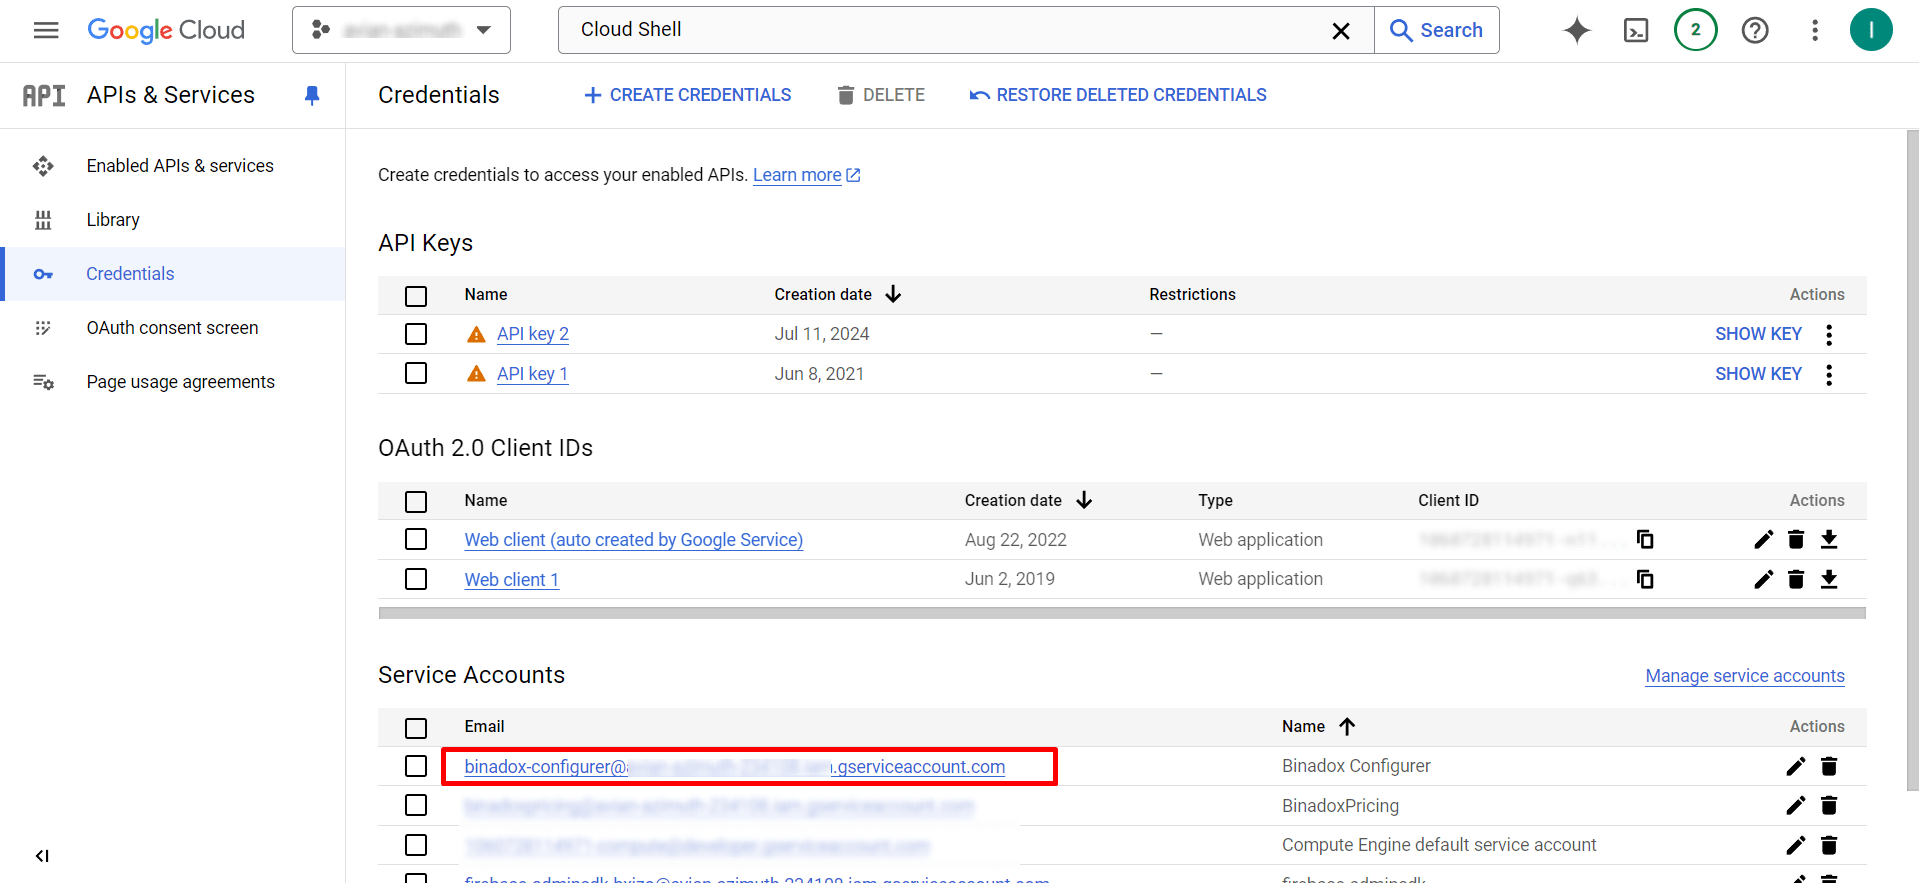
4. Click on the email of the Service Account called “Binadox Configurer”.
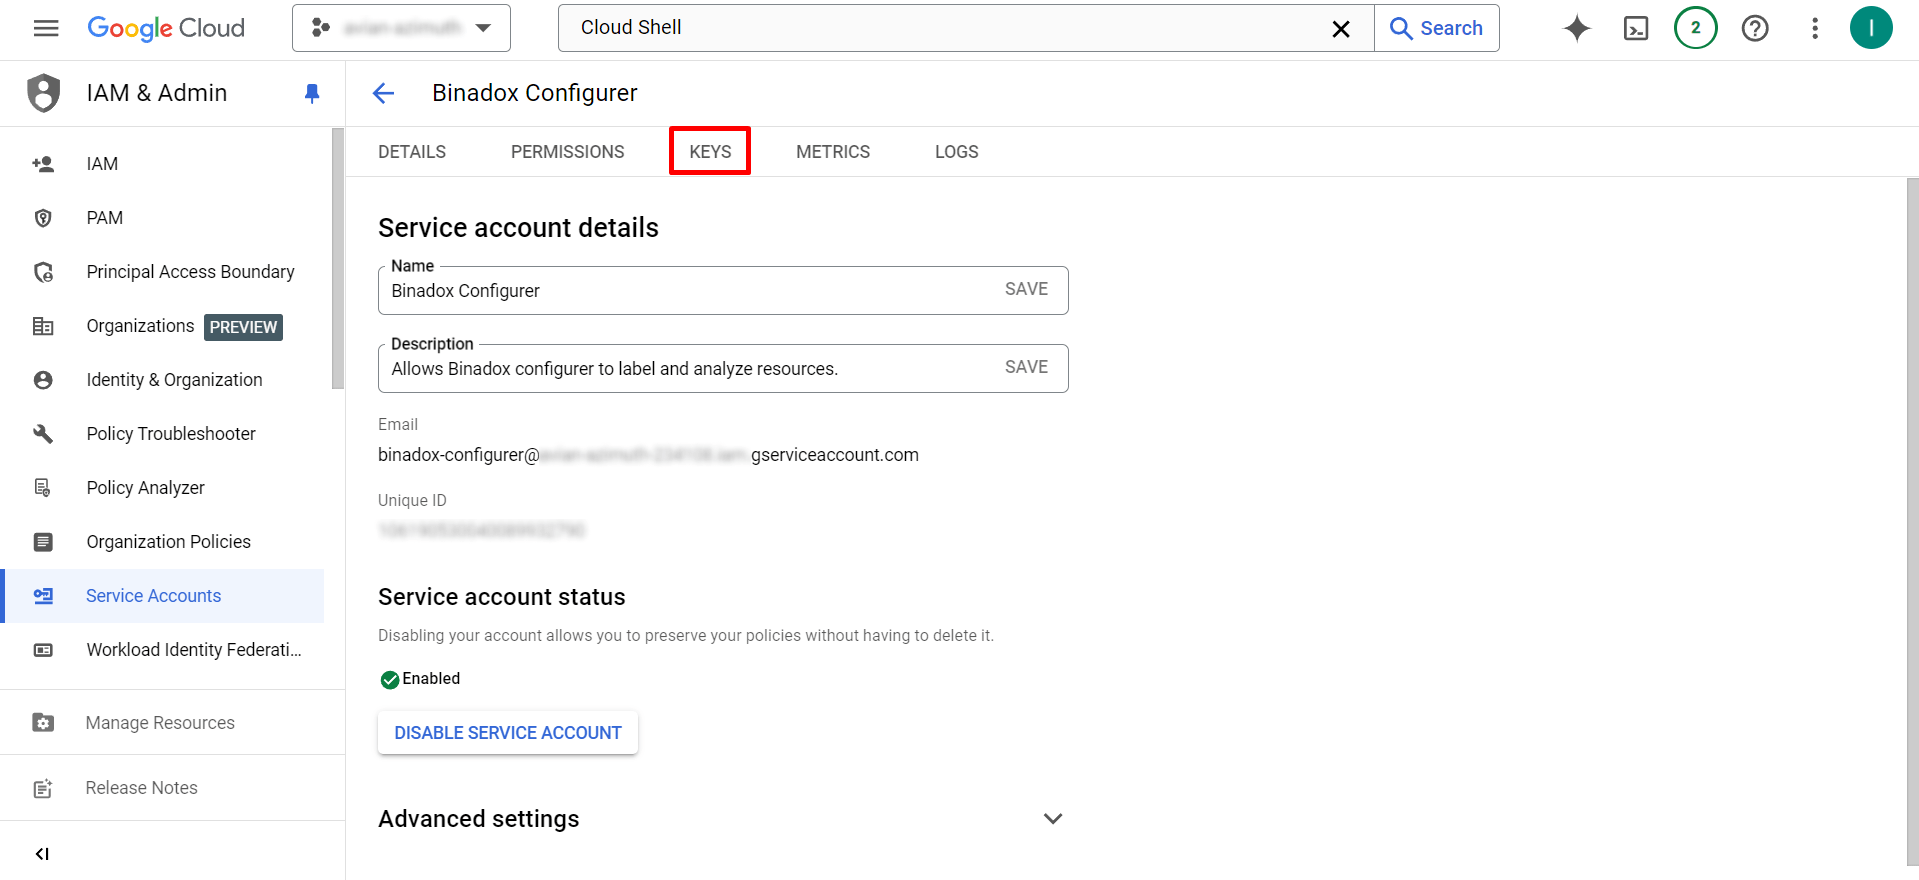
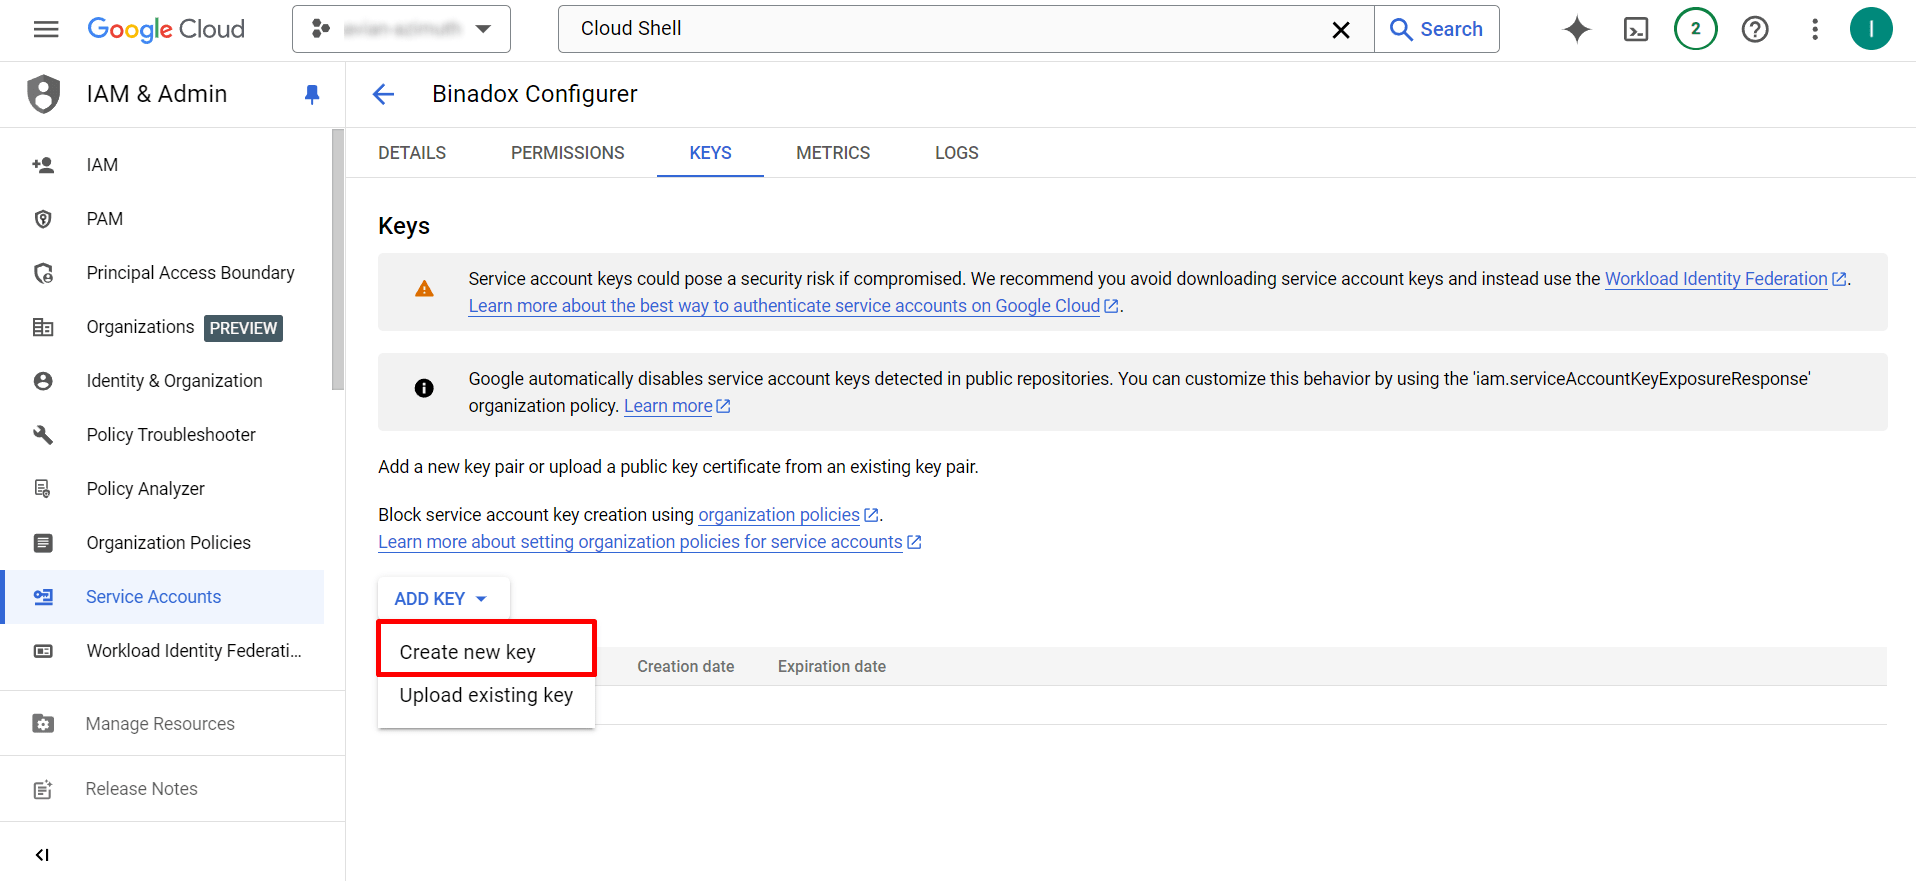
5. You will be redirected to the Service account details page. Proceed to the Keys tab located at the top of the page.
6. On the Keys page, click on the Add Key button and then select Create new key from the drop-down list.
7. In a popped-out modal window, download a file that contains the private key. Choose JSON key type. Click the Create button.
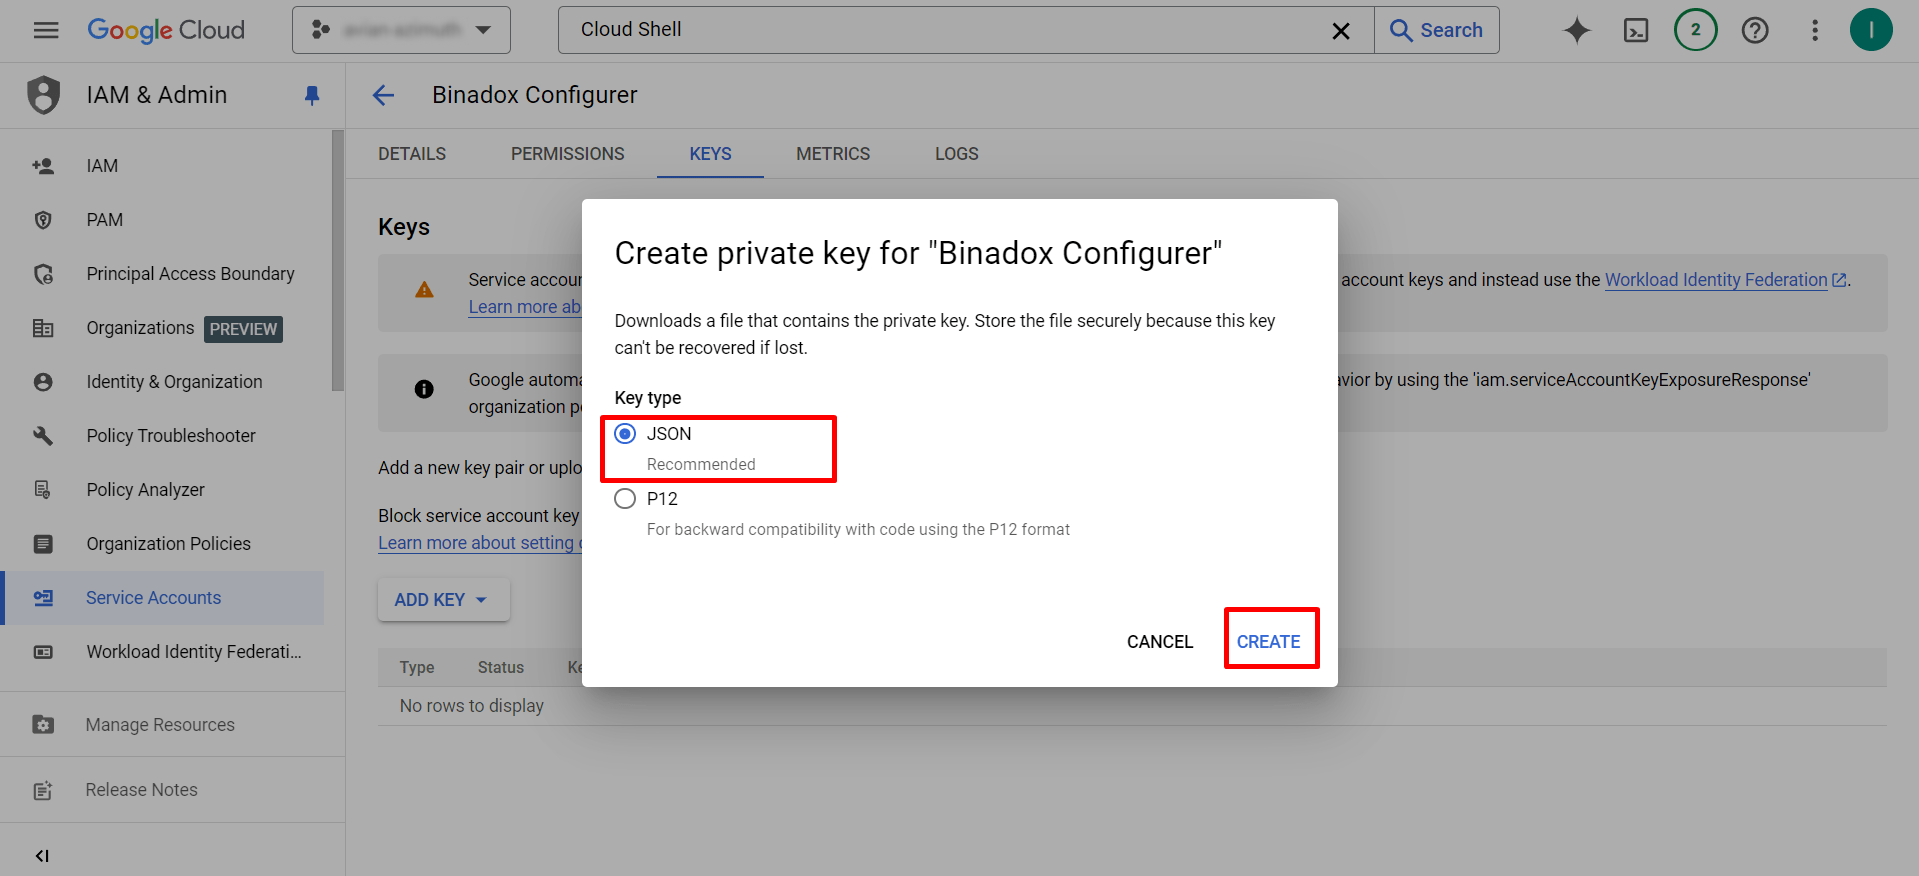
7. Save the JSON file to your computer.
4. Integrate your GCP with Binadox using the downloaded JSON file
1. Log into your Binadox accont.
2. There are two main flows to connect a cloud account:
- In case when you have no cloud accounts connected yet, click Home in the navigation pane on the left. Choose a cloud account you want to connect to and click the Connect button.
- In case you have connected cloud accounts, click Home in the navigation pane on the left. Select the Cloud providers card and click the Manage button. In the Cloud Utilization Dashboard, click the Add Account button in the Cloud Accounts tab. Click on the Google Cloud Platform icon.

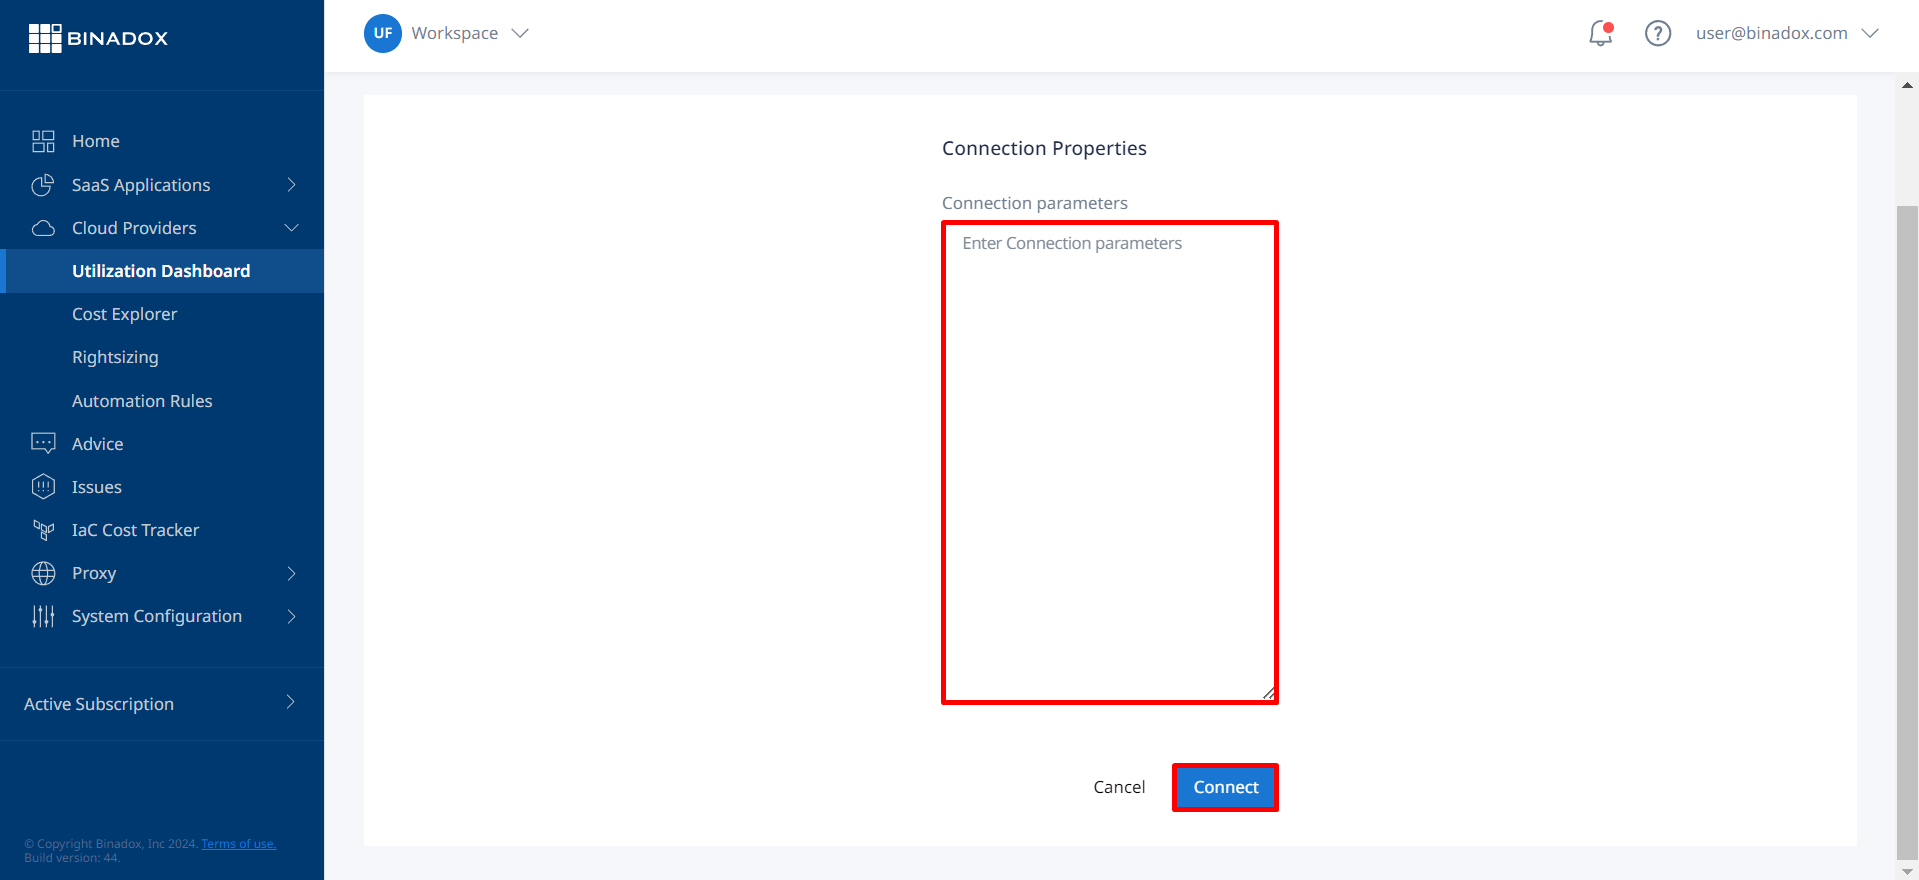
3. You will be redirected to the Connection page.
4. Copy the data from the downloaded JSON file and paste it to the Connection parameters field. Click the Connect button.
5. Google Cloud connection with Binadox is established.
Note:
You will be able to view GCP cost data in Binadox a day after integration.