Microsoft Azure Integration
This guide illustrates how to integrate Microsoft Azure with the cloud cost optimization platform Binadox to plan, analyze and reduce infrastructure costs.
To successfully integrate Binadox with Microsoft Azure, you need to follow 8 steps:
1. Create an Application in Azure Active Directory (AD);
2. Get Secret Value in Certificates & secrets;
Further, you can find each step described in detail. To enlarge images in instruction – click on it.
1. Create an Application in Azure Active Directory (AD)
1. Sign in to the Microsoft Azure portal.
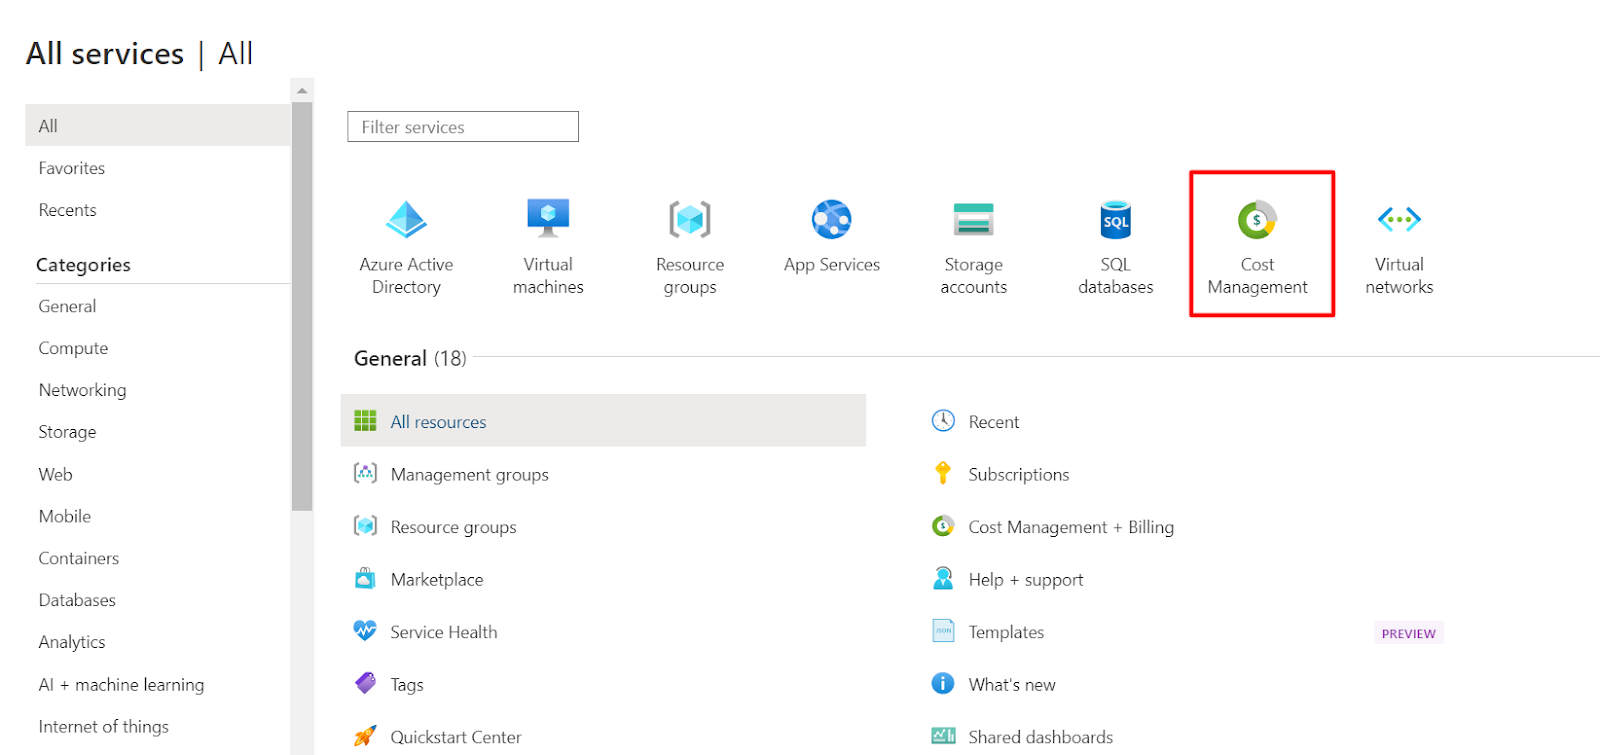
2. Proceed to Azure Active Directory. To find it you need to click on the menu button at the top left corner to open a portal menu. In the navigation pane on the left, click All services.
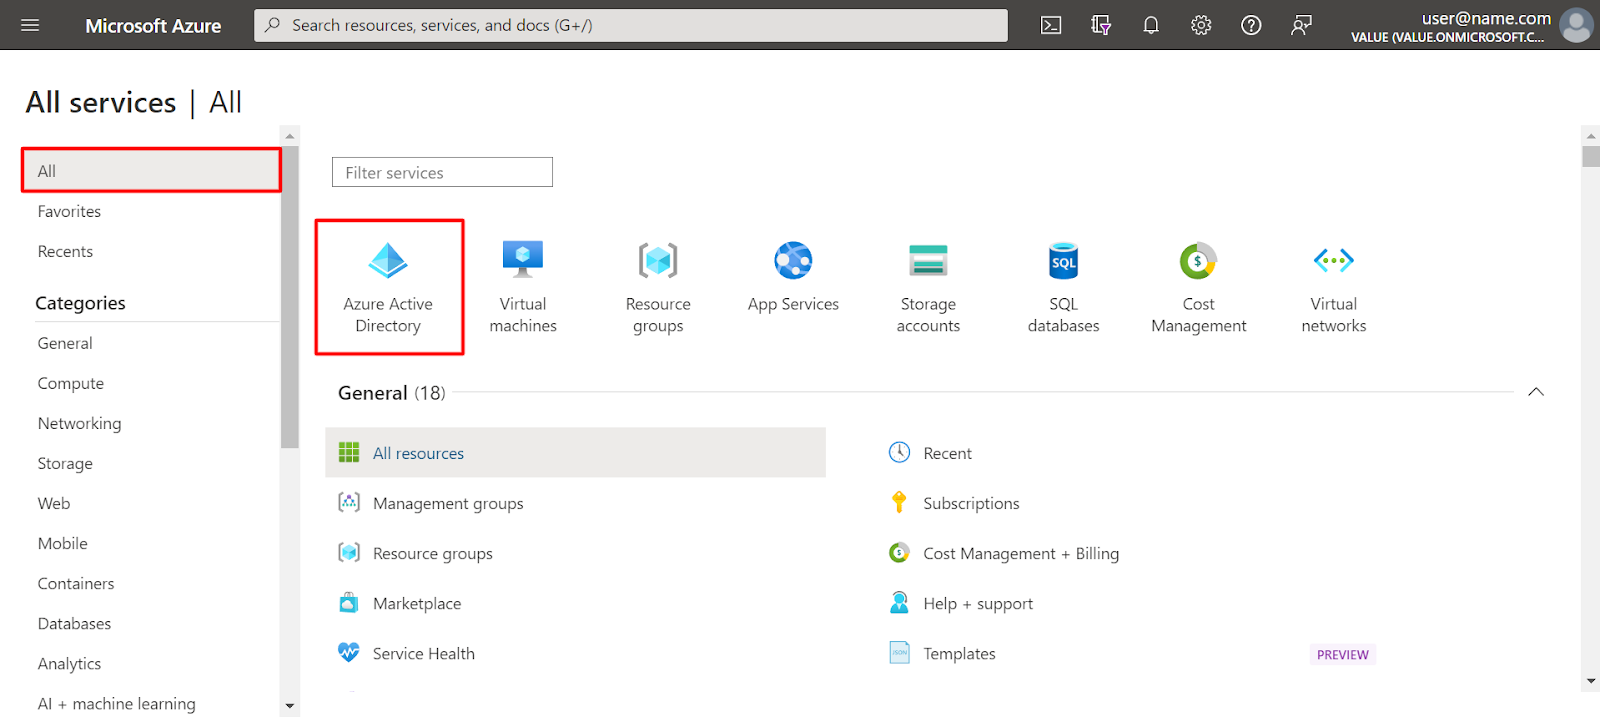
3. Select Azure Directory from the list of services or select Identity or Security > Azure Active Directory.
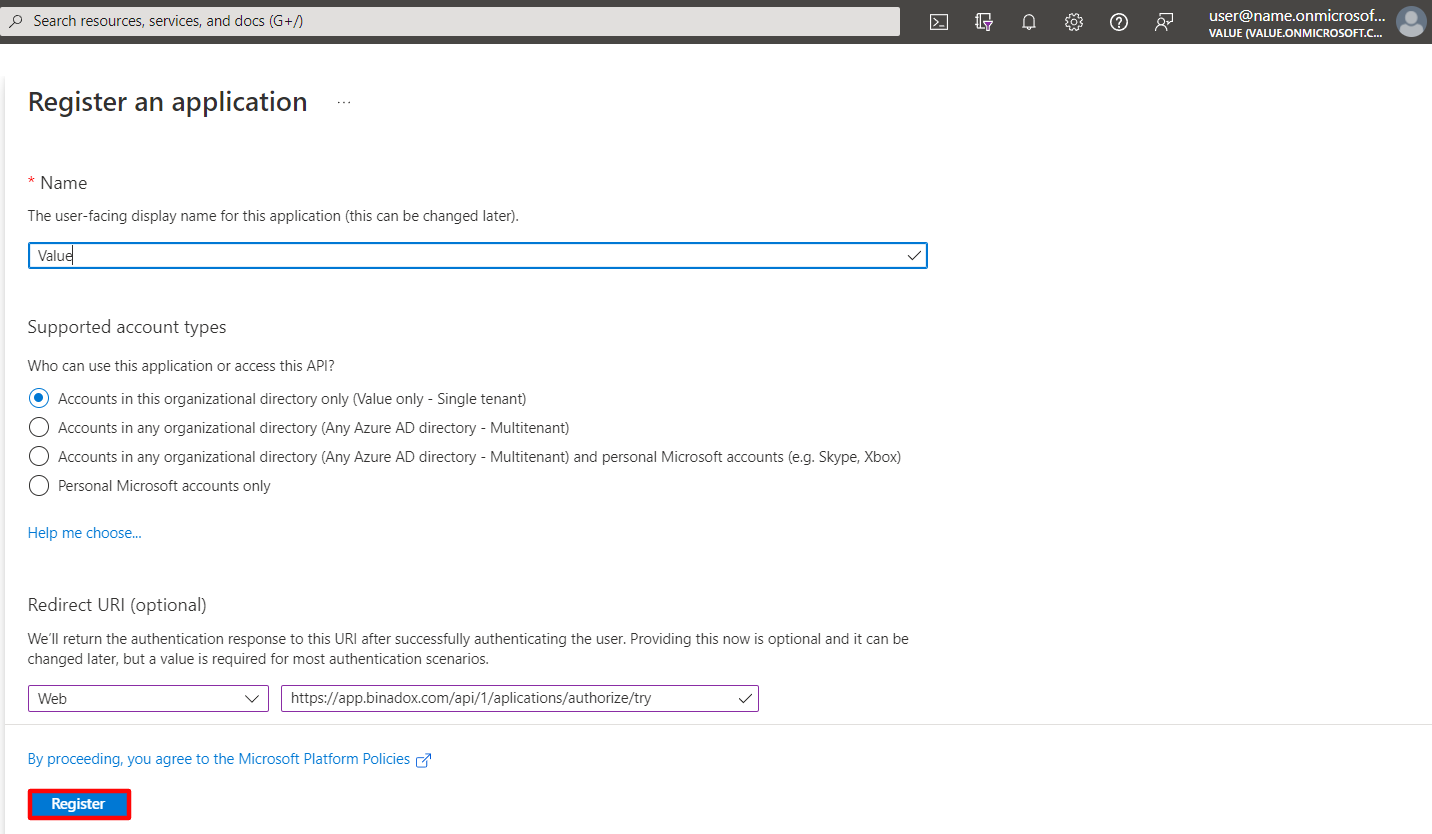
4. In the navigation pane on the left, click App registration. Then proceed to the New Registration at the top left corner of the App registration page. To register an application:
- Enter application name;
- Select account type – Accounts in this organizational directory only;
- In a drop-down list, select a platform – Web;
- Enter redirect URI – https://app.binadox.com/api/1/aplications/authorize/try;
- Click the Register button.
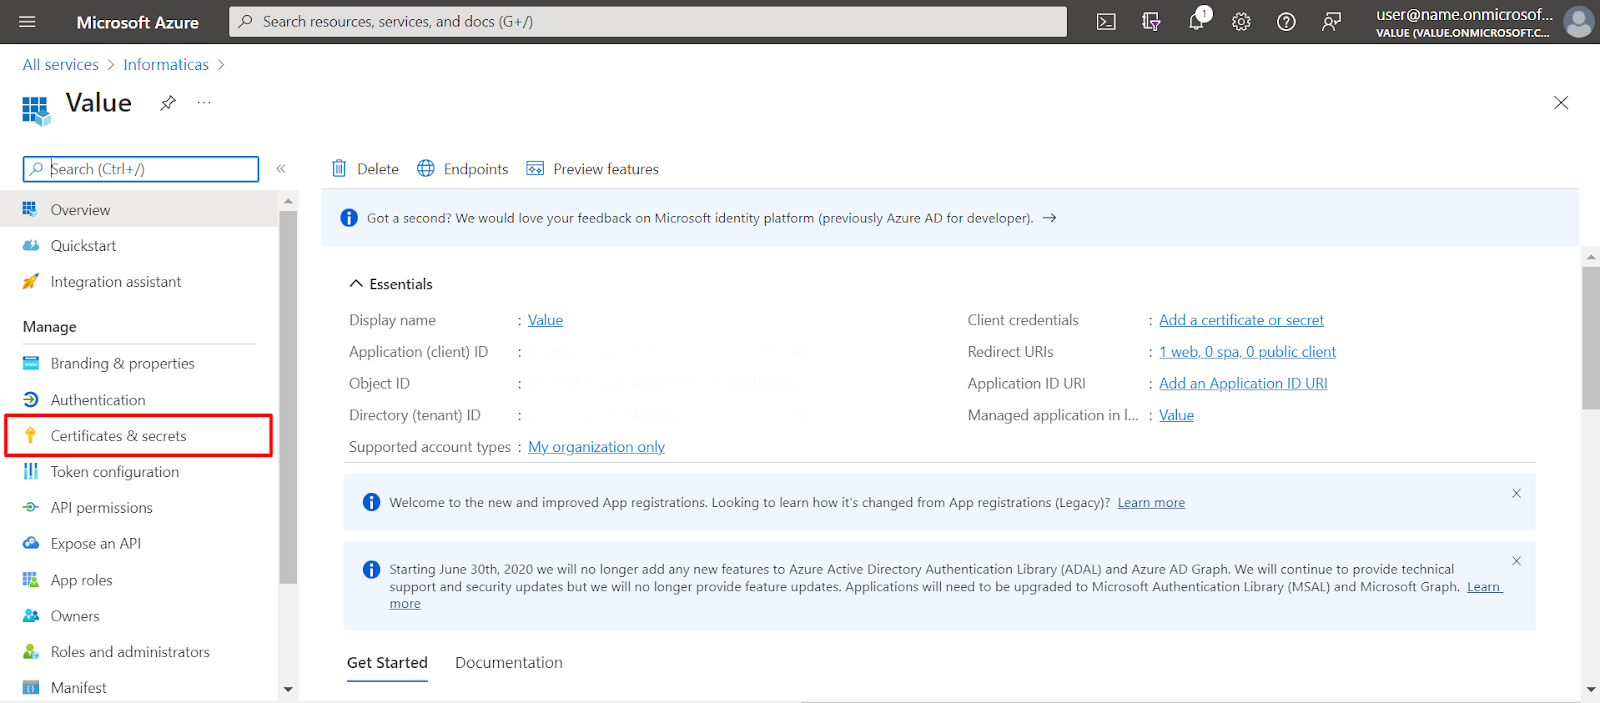
5. Once the application is created, you’ll be redirected to the newly created application page. Here you can copy the Application (client) ID and Directory (tenant) ID to enter them on the Binadox connection page.

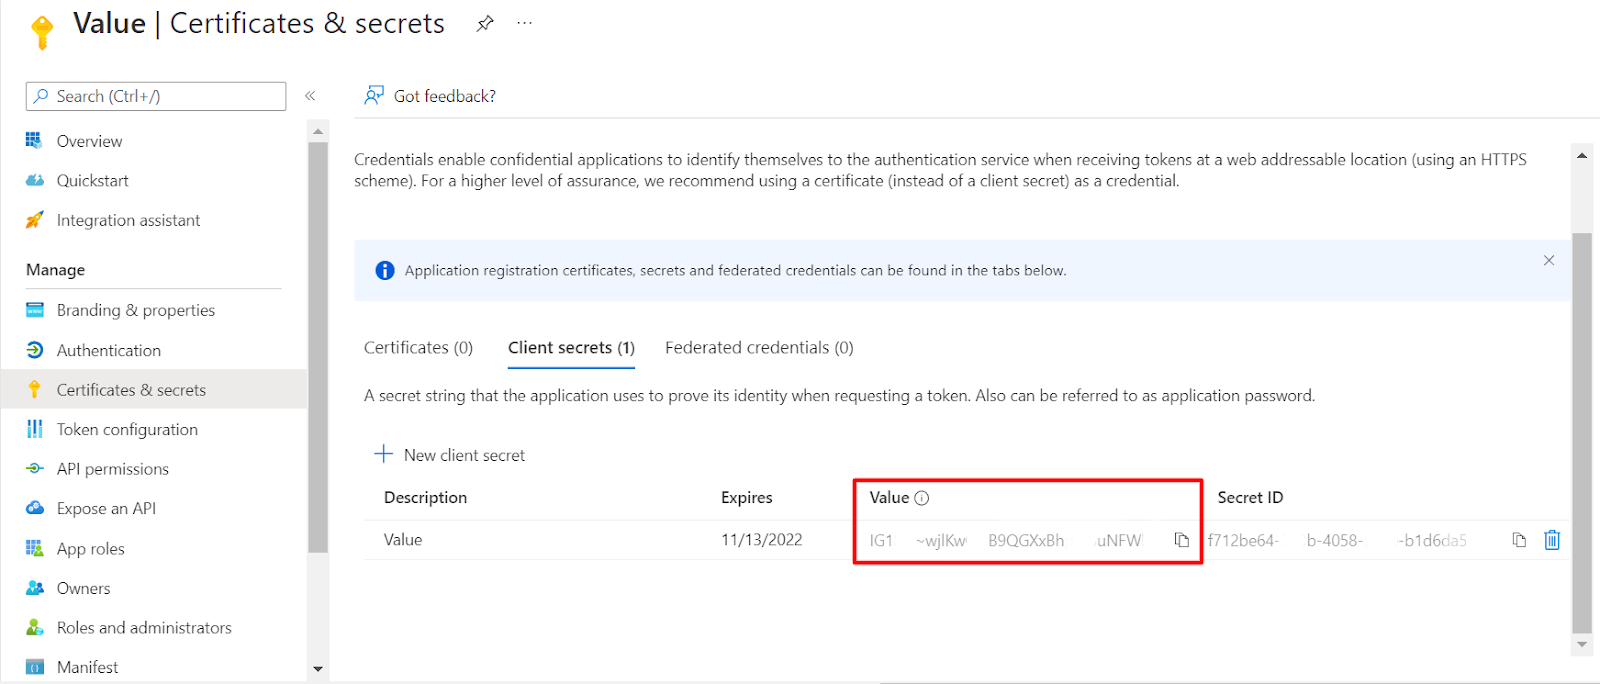
2. Get Secret Value in Certificates & secrets
1. On the newly created application page, in the navigation pane on left, click Certificates & secrets tab.
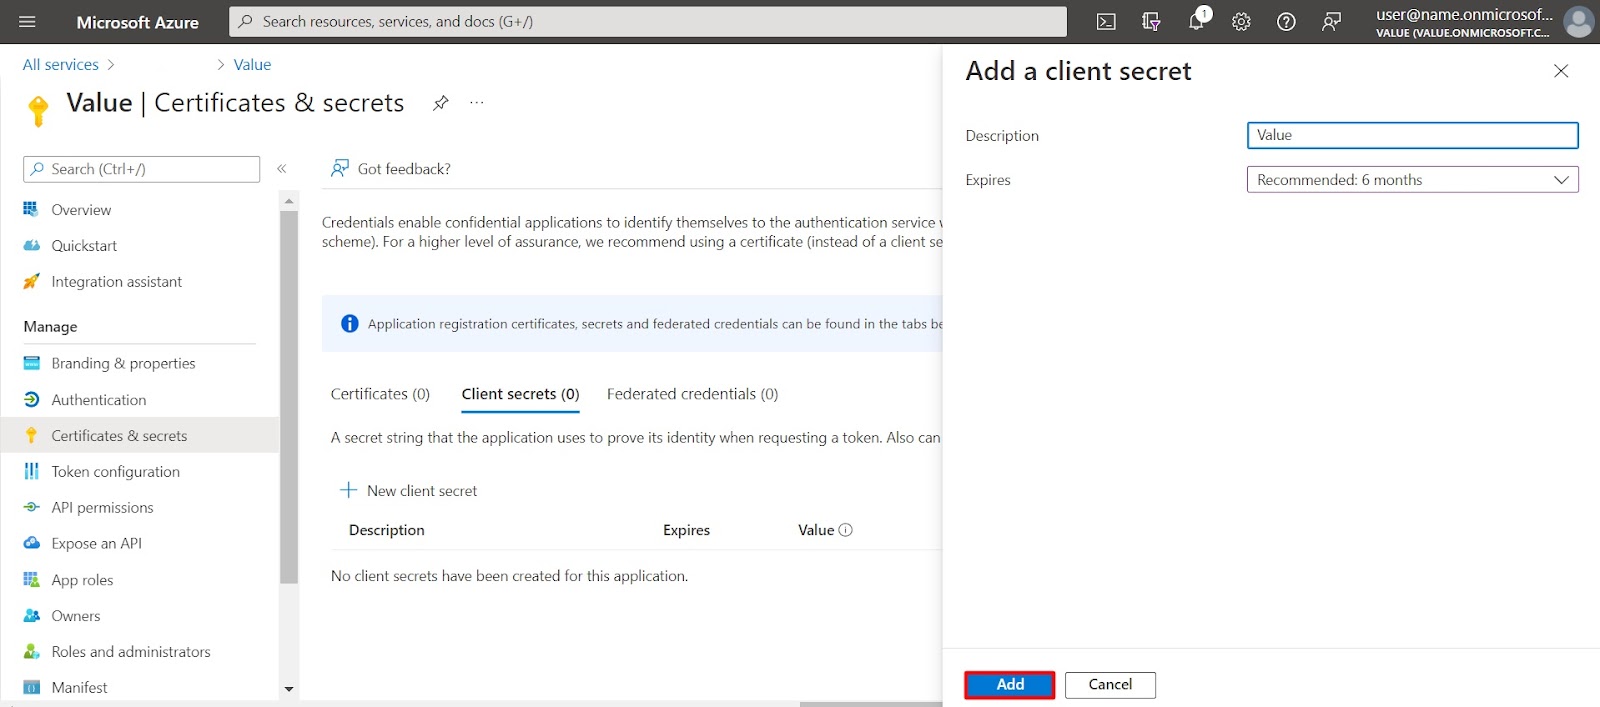
2. Proceed to the Client secrets tab on the Certificates & secrets page; click New client secret.
3. In the popped-out Add a client secret window on the right, enter the description, and select when the secret expires. Once this step is completed, click Add button.
4. When Secret Value is created, copy it to the clipboard. You will need this credential when integrating Microsoft Azure with Binadox.
3. Assign Roles
You need to Assign roles to receive saving and security recommendations and automate your cloud using Binadox rules.
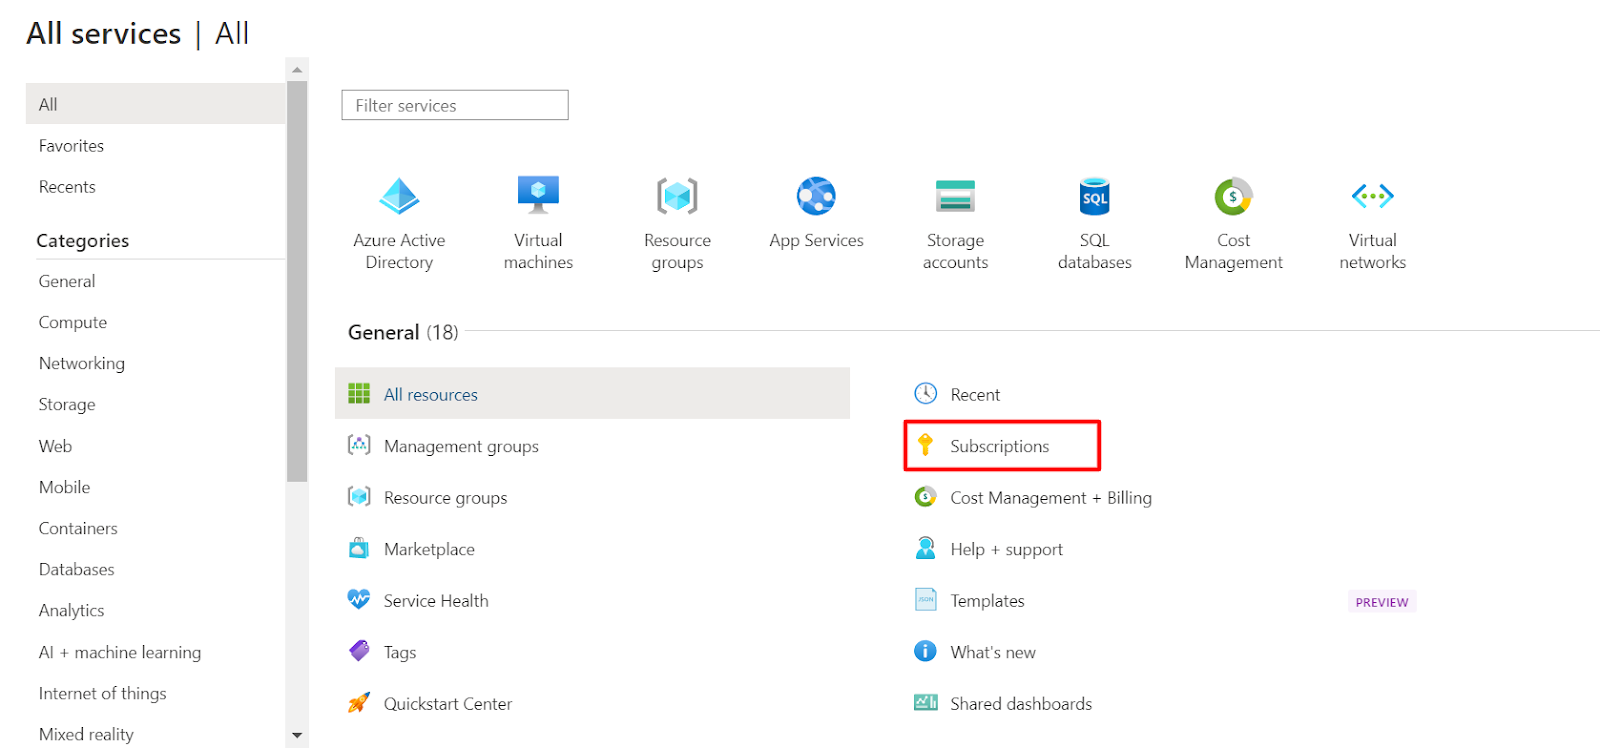
- In the navigation pane on the left, click All services. Proceed to Subscriptions service.
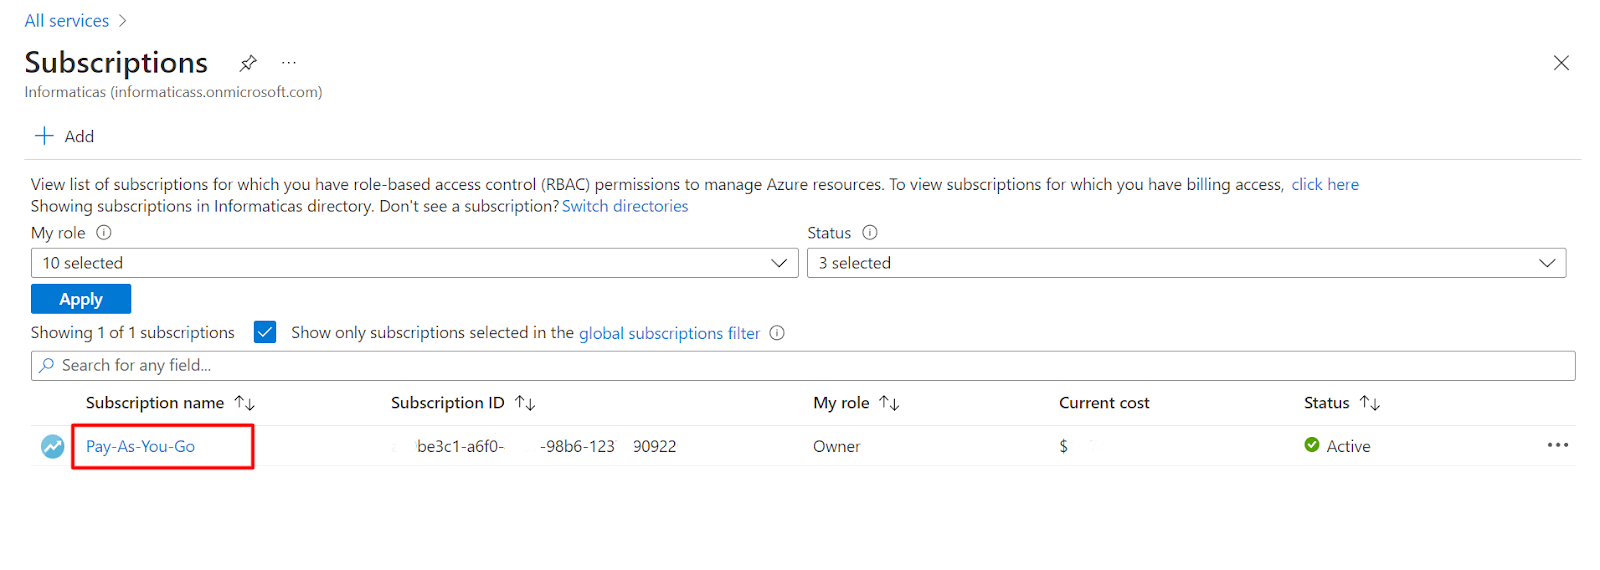
- Select the “Pay-as-you-go” subscription name.
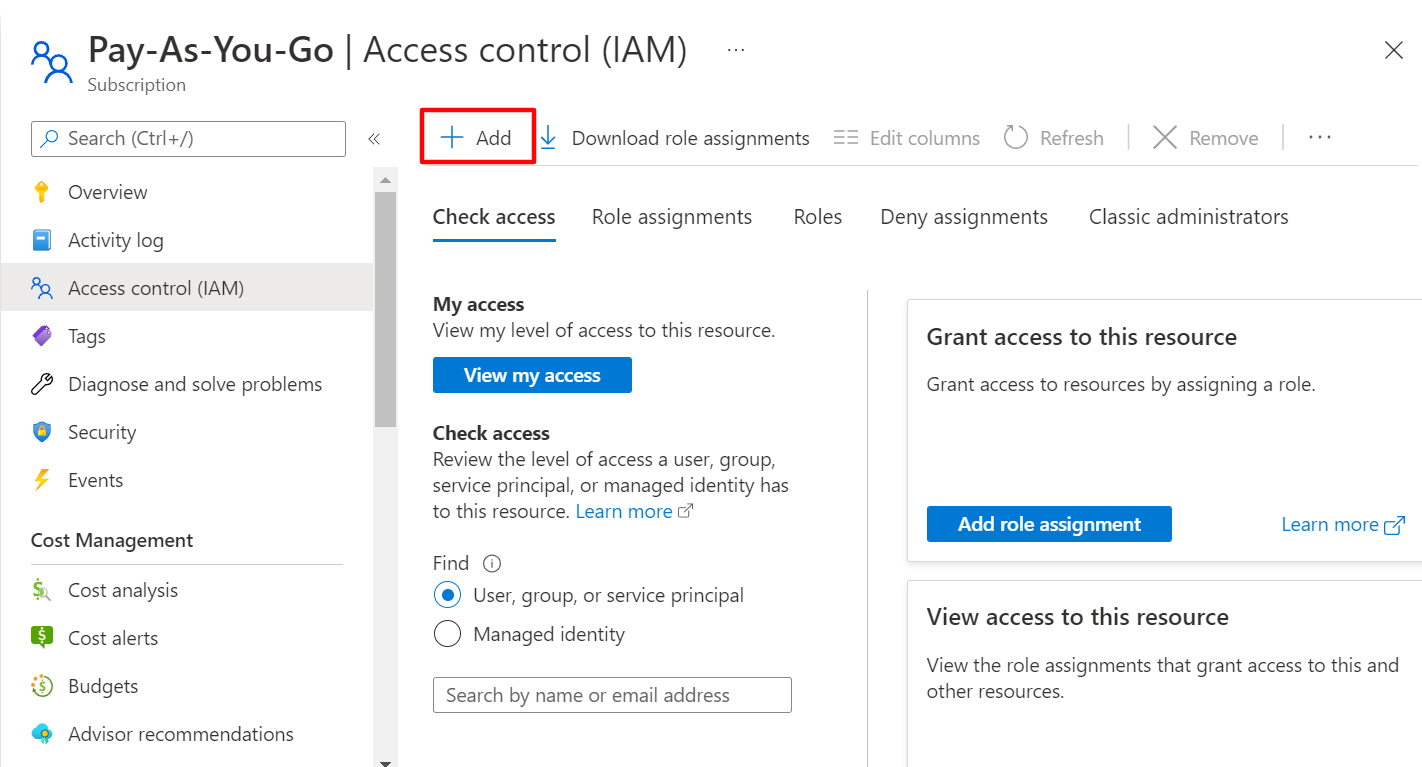
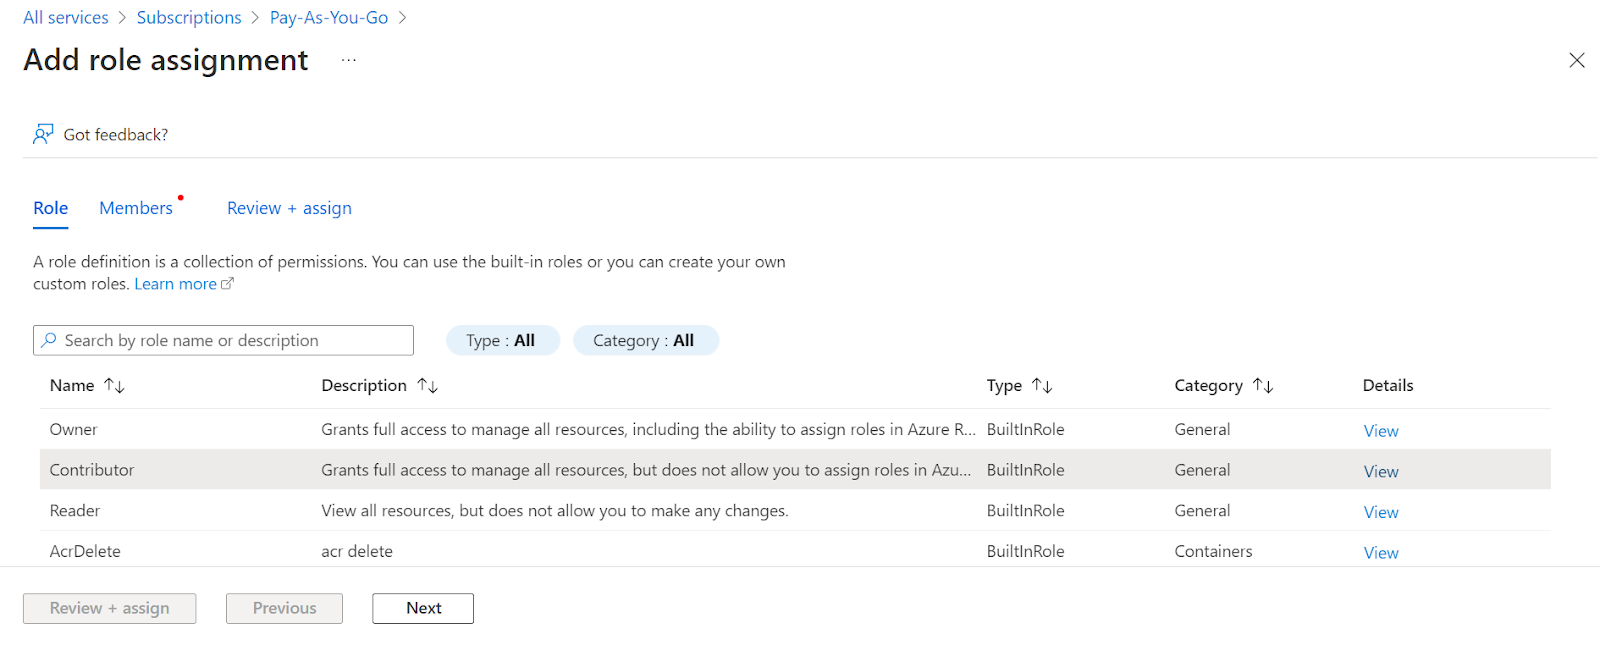
- Once you’re at the “Pay-as-you-go” page, in the navigation pane on the left proceed to the Access control (IAM) section. Click the Add button. In the drop-down list, select Add role assignment.
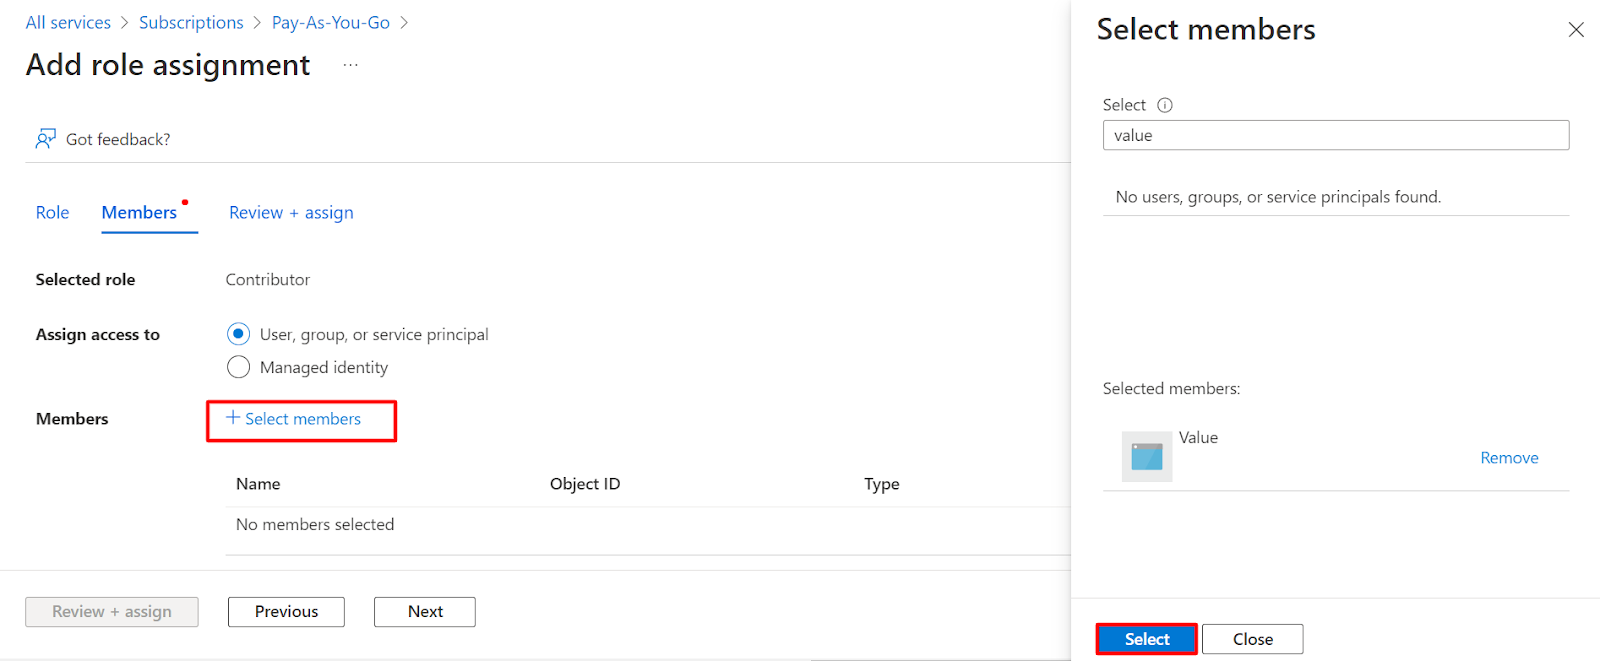
- On the Add role assignment page, select the Contributor line. Proceed to the Members tab. Click the Select members button.
- In the popped-out Select members window on the right, enter the name of the created application (view Clause 1) in the search string. Select the app from the list and click the Select button. Once this step is done, click Review + assign button. You’ll see the success message once the role is assigned.
4. Create Storage Accounts
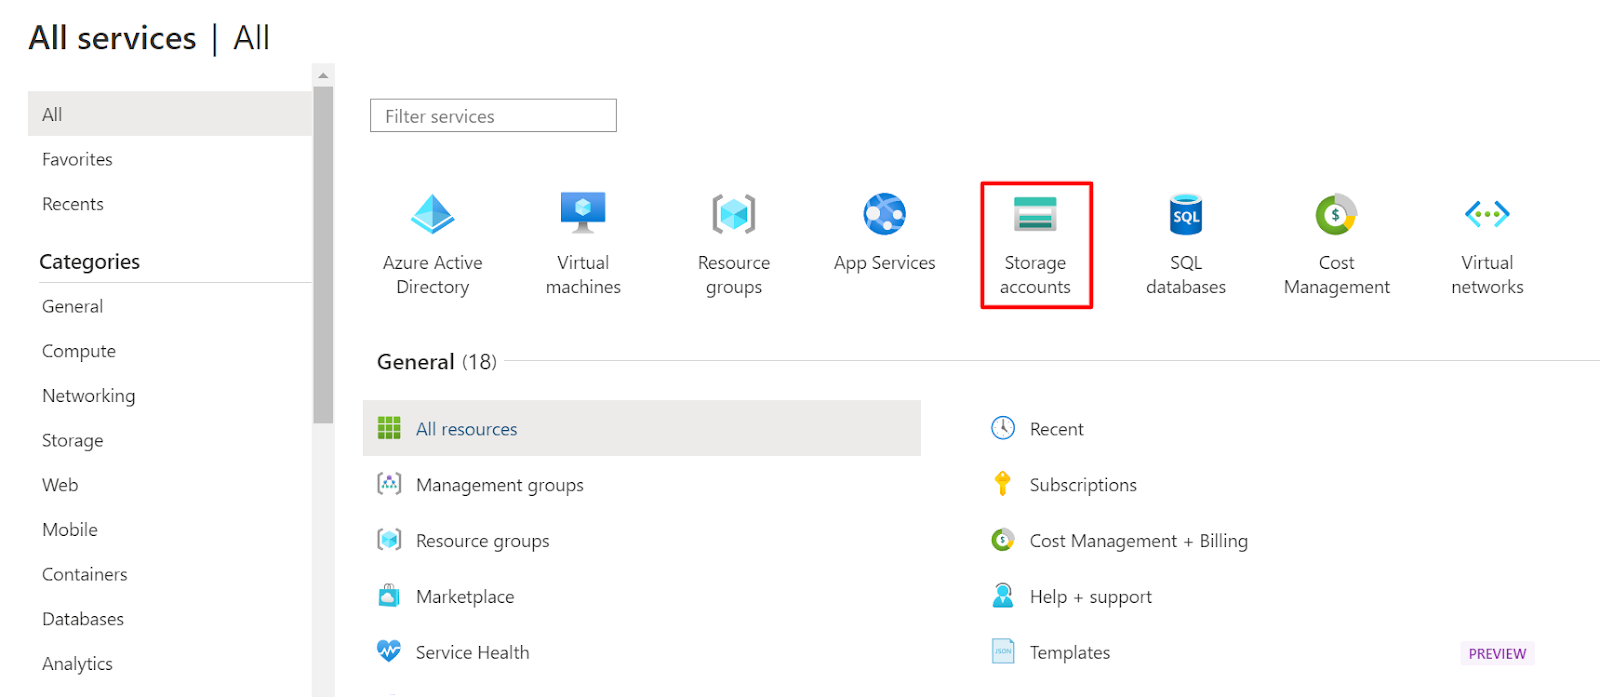
1. Proceed to Storage accounts. To find it, click on the menu button at the top left corner to open a portal menu. In the navigation pane on the left, click All services.
2. In the navigation pane on the left, select Storage. On the Storage page, select Storage accounts.
3. Click the Create button on the top left corner of the Storage accounts page.
4. Create a storage account. To do that follow the steps below:
4.1 First of all, set the parameters in the Basics tab:
- Select Pay-as-you-go subscription;
- Select resource group – BinadoxApp, or create a new one. Enter its name and save it;
- Enter Storage account name;
- Select a region;
- Choose Standard performance;
- Leave default Redundancy data unchanged.
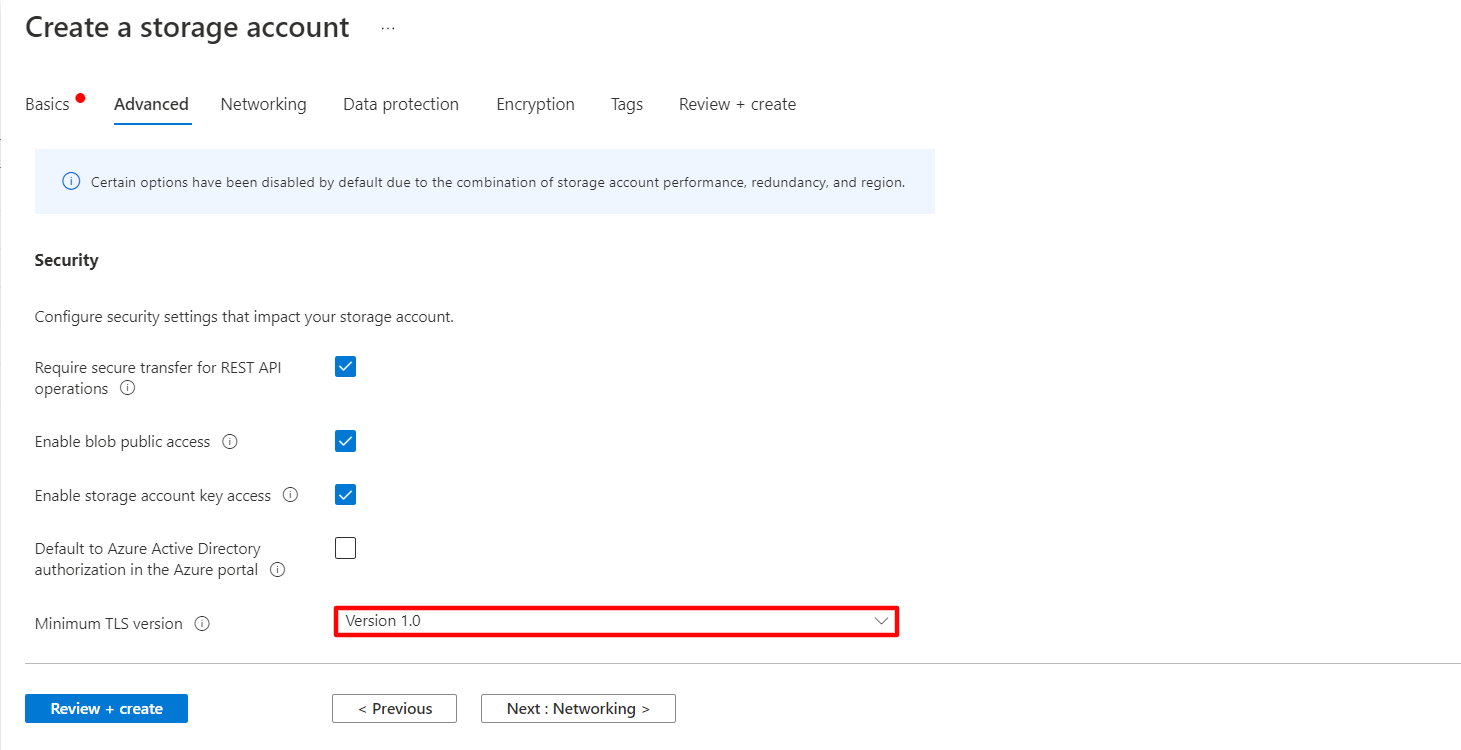
4.2 Then, turn to the Advanced tab:
- Leave all the data unchanged, except one – Minimum TLS version. Select Version 1.0.
4.3 Next, leave the data unchanged in the Networking tab, Data protection tab, and Tags tab.
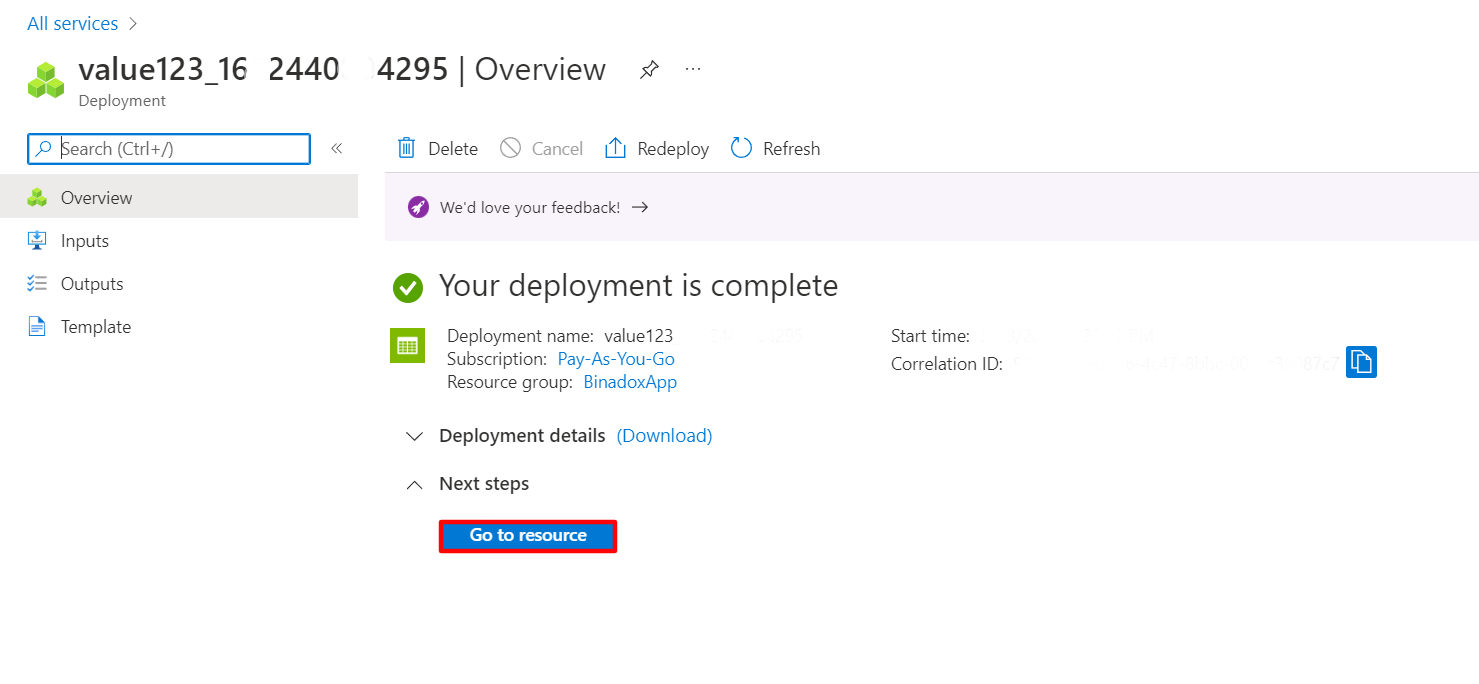
4.4 Scroll down the information in the Review + create tab, review the data, scroll down the page and click Create.
4.5 Once the creation of the Storage account is completed, click the Go to resource button.
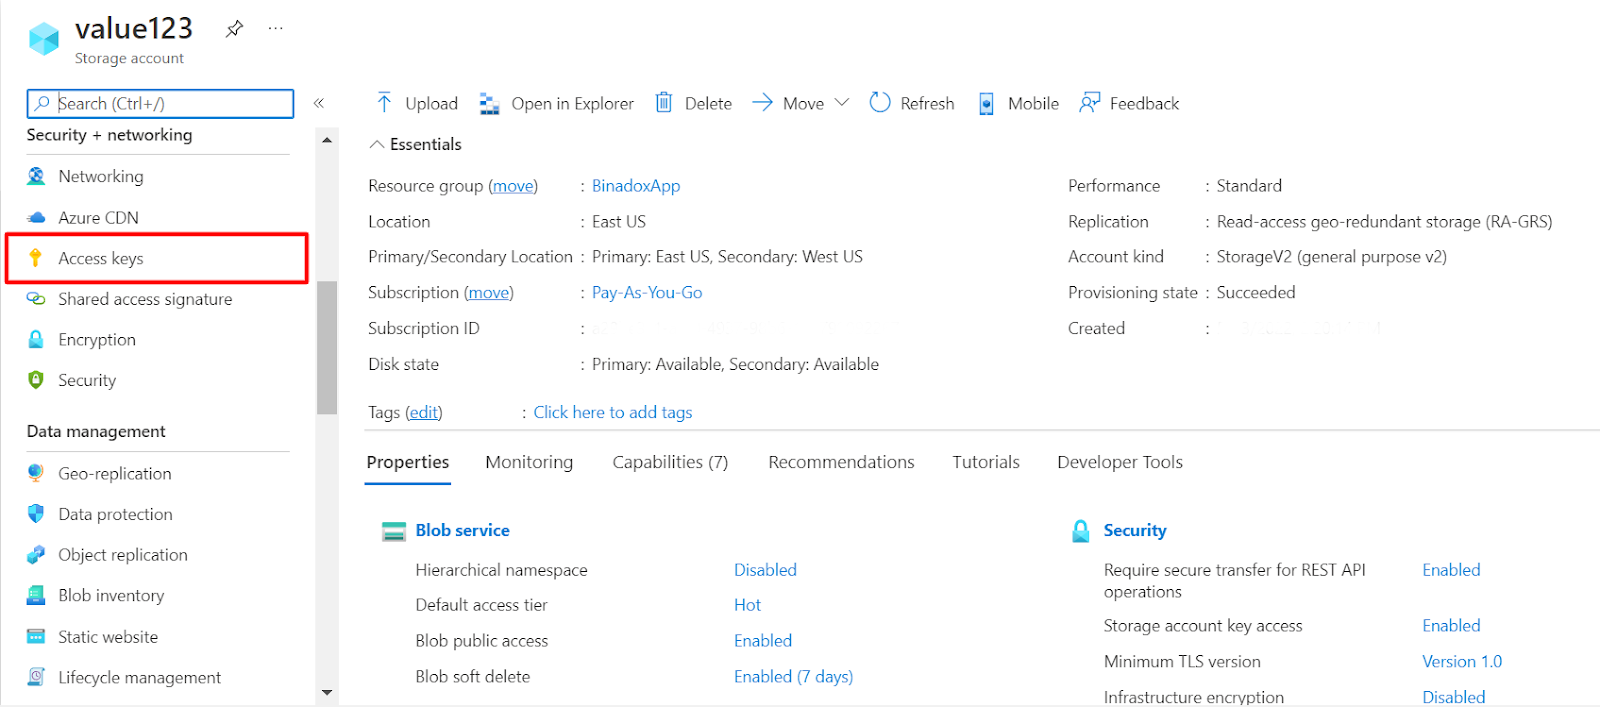
5. Get Access Keys
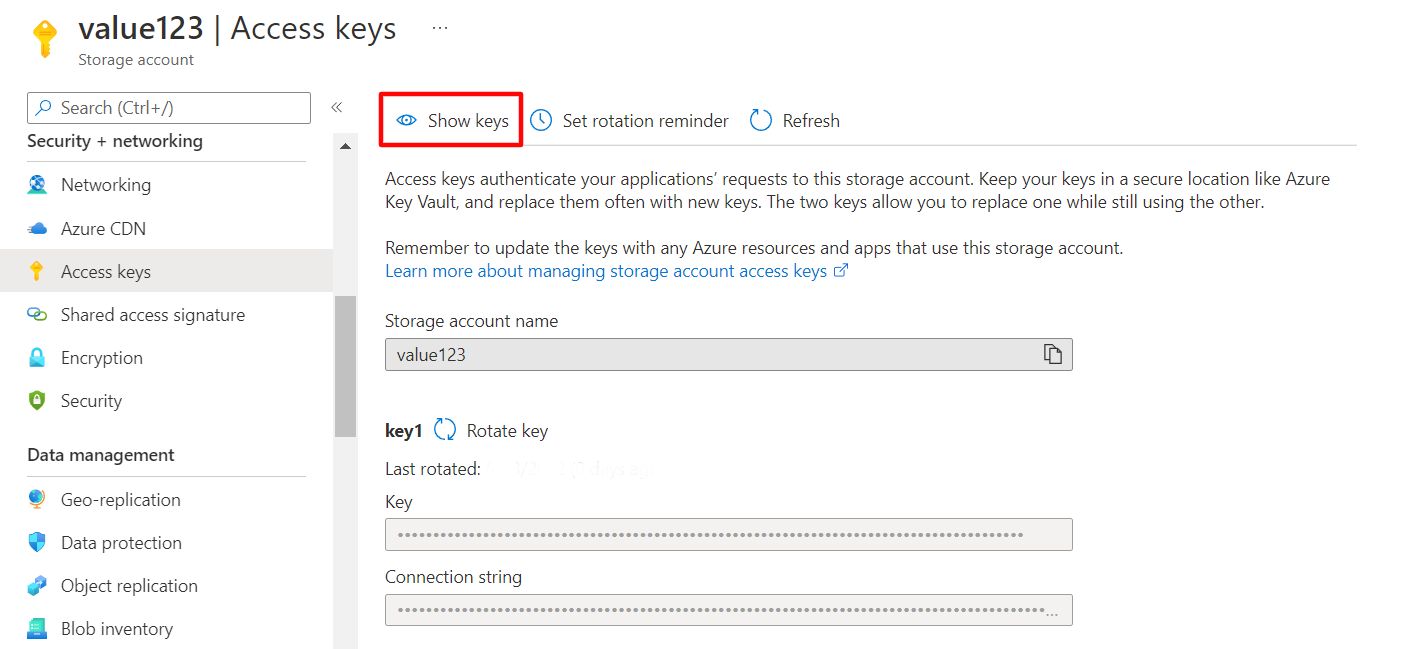
1. In the navigation pane on the left, select the Access keys section.
2. Click the Show keys button on the top left corner of the Access keys page.
3. Copy the Connection string of the Key 1 to the clipboard.
6. Create Containers
1. In the navigation pane on the left, click Containers.
2. Click the Container button on the top left corner of the Containers page.
3. In the popped-out New Container window on the right, enter the name of the container, and select Public access level – Private (no anonymous access). Once this step is completed, click the Create button.
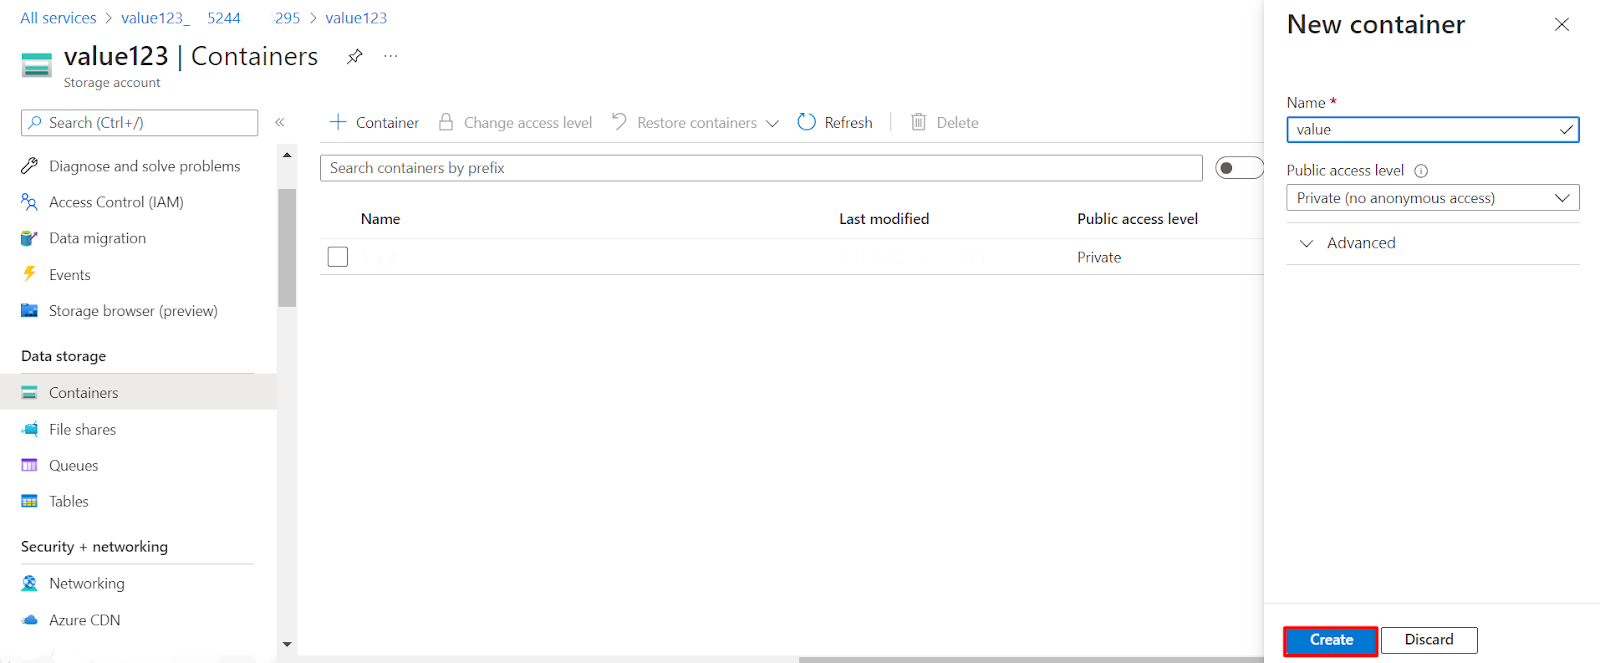
4. Copy the name of the created container to use it for integration with Binadox.
7. Export Billing Information in Cost Management + Billing
1. Click on the menu button at the top left corner to open a portal menu. In the navigation pane on the left, click All services.
2. In the navigation pane on the left, select the All section.
3. Proceed to the Cost Management + Billing page.
4. In the navigation pane on the left, click Exports (in the Settings section).
5. Click Add on the top left corner of the Exports page.
6. On the New Export page:
- Enter the name of the export in Export details.
- Select Actual cost (Usage and Purchases) in Metric.
- Export type – Daily export of month-to-date costs.
- Select the date of the NEXT day.
- Select Use existing storage.

- Select your subscription.
- Select the storage account you’ve created (view Clause 3).
- Paste the name of the newly created container (view Clause 5).
- Create Directory path name.
- Click the Create button.
7. After the export is created, select it and click Run now at the top of the page. After a few seconds, the data will be pulled up.
8. Create New Connection for Microsoft Azure in Binadox
1. Log into your Binadox account.
2. There are two main flows to connect a cloud account:
- In case you have no cloud accounts connected yet, click Home in the navigation pane on the left. Choose a cloud account you want to connect to and click the Connect button.
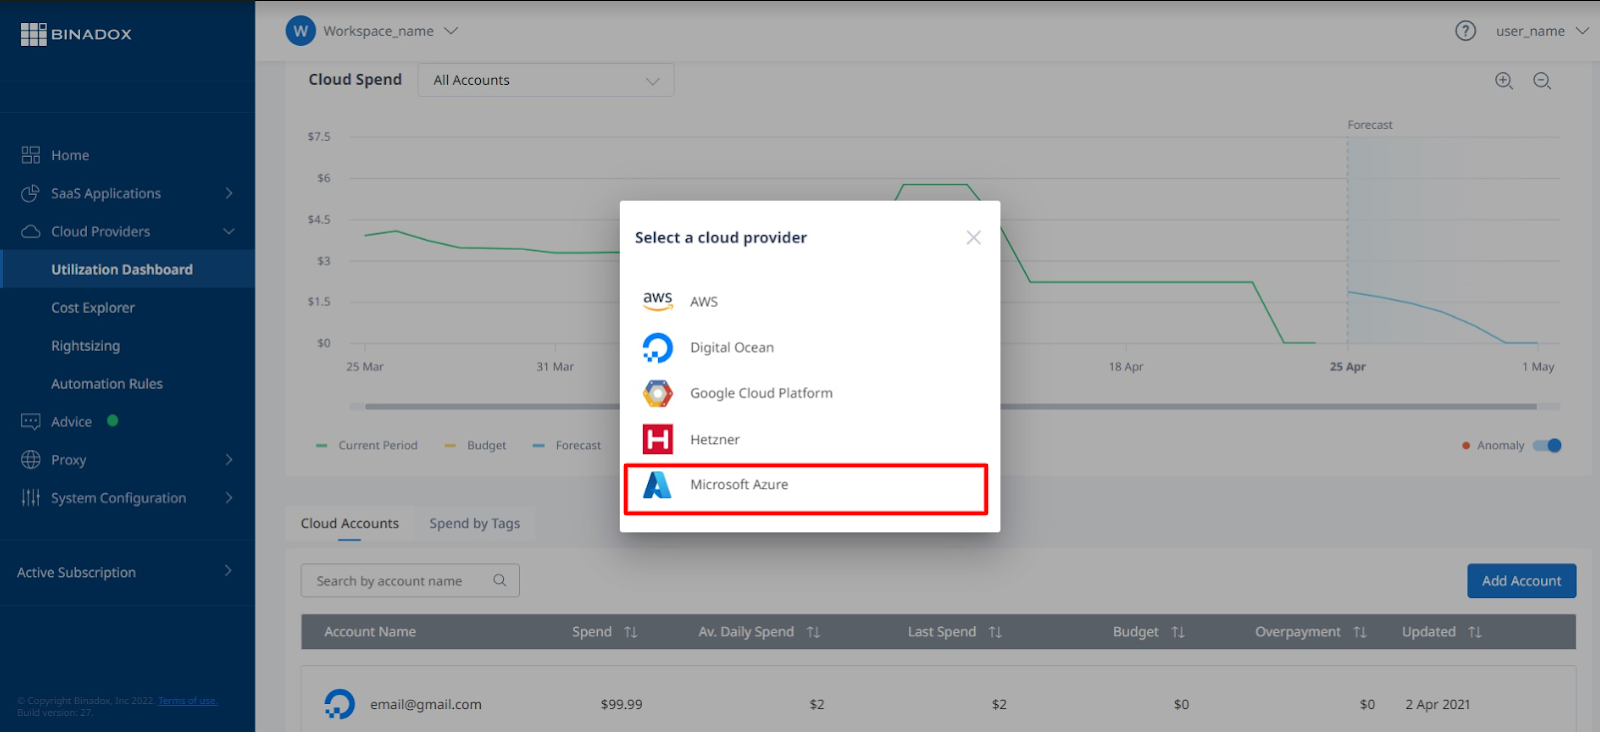
- In case you have connected cloud accounts, click Home in the navigation pane on the left. Select the Cloud providers card and click the Manage button. In the Cloud Utilization Dashboard, click the Add Account button in the Cloud Accounts tab. Click on the Microsoft Azure icon.
3. After taking the previous step, you will be redirected to the Connection page. On the connection page, enter the Application (client) ID, Client Secret Value, Directory (tenant) ID, Connection string, and Container Name into the corresponding fields (see Clauses 1, 2, 4, and 5 ). Click Connect.
4. Microsoft Azure connection with Binadox is established.
Note:
You will be able to view Microsoft Azure cost data for the past 30 days in Binadox immediately after integration.