Jira Integration
This guide provides information on how to integrate Jira, a bug tracking and project management product, with the Binadox multi-cloud SaaS and IaaS usage monitoring and cost optimization platform to receive utilization insights, user data and spend optimization recommendations.
Important:
If your Atlassian account uses two-step verification, email-based OTP is not supported for integration. You must use an authenticator app (TOTP) instead.
Important:
Make sure you have administrator access to your Atlassian account and an active Jira subscription.
Step 1. Get TOTP Secret Key (Seed) from Jira
Log in to your Atlassian account.
Navigate to Account Settings → Security. Click Manage two-step verification.
Click Set up authenticator app and enter your password if prompted.
You will be redirected to a screen with a QR code. Click Can’t scan the code.
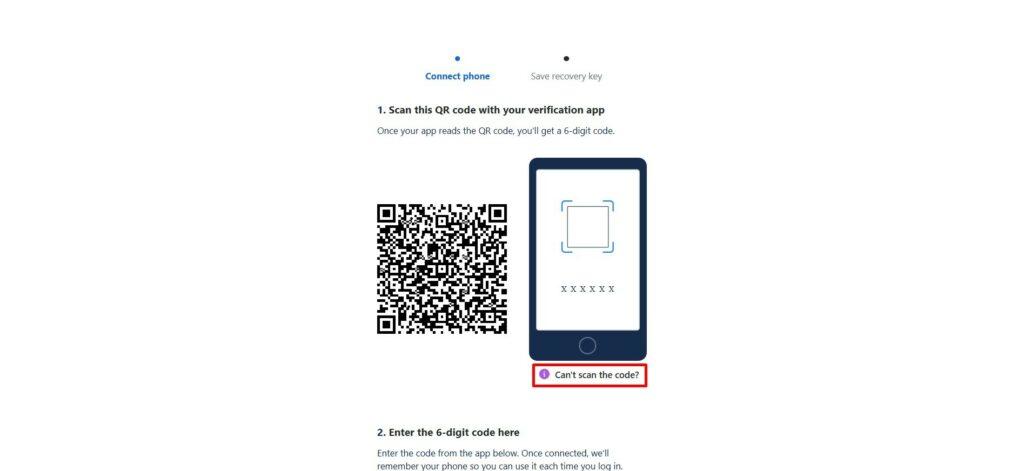
A window will appear with manual setup details:
- Account name — your Atlassian email
- Key — TOTP Secret Key (seed)
- Type — Time-based
Copy the Key (TOTP Secret Key).
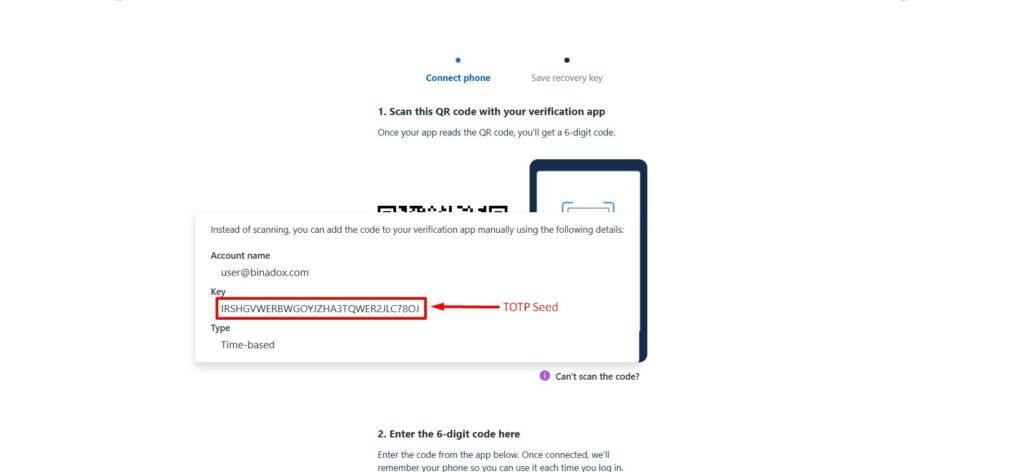
This key will be used later to connect Jira to Binadox.
Step 2. Enable MFA in Atlassian
Return to the QR code screen.
Scan the QR code using your authenticator app (e.g., Google Authenticator, Microsoft Authenticator, or iPhone Passwords app).
After scanning:
- The account will be added to your authenticator app
- A 6-digit verification code will be generated automatically
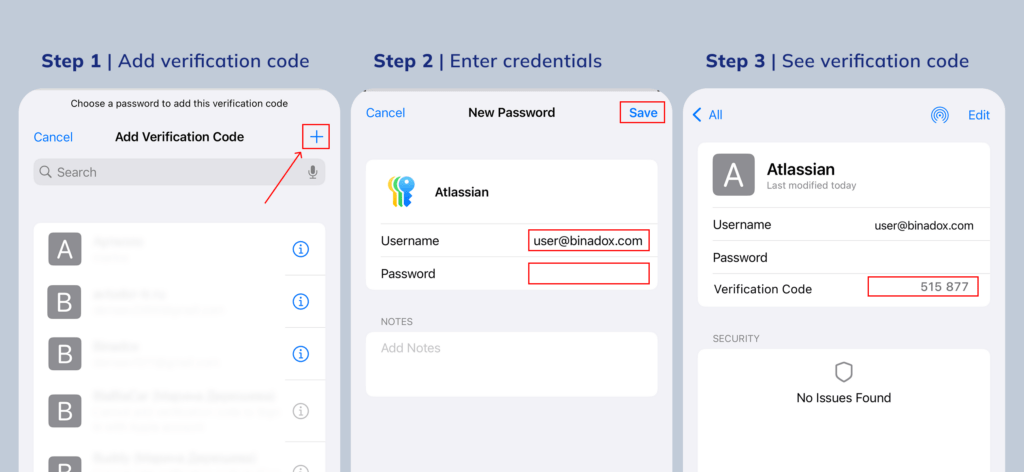
Enter this code on the Atlassian screen and click Connect phone.
Two-step verification (TOTP) will be enabled for your Atlassian account
Note:
The Secret Key is used for integration, while the QR code is used to enable MFA
Step 3. Connect Jira to Binadox
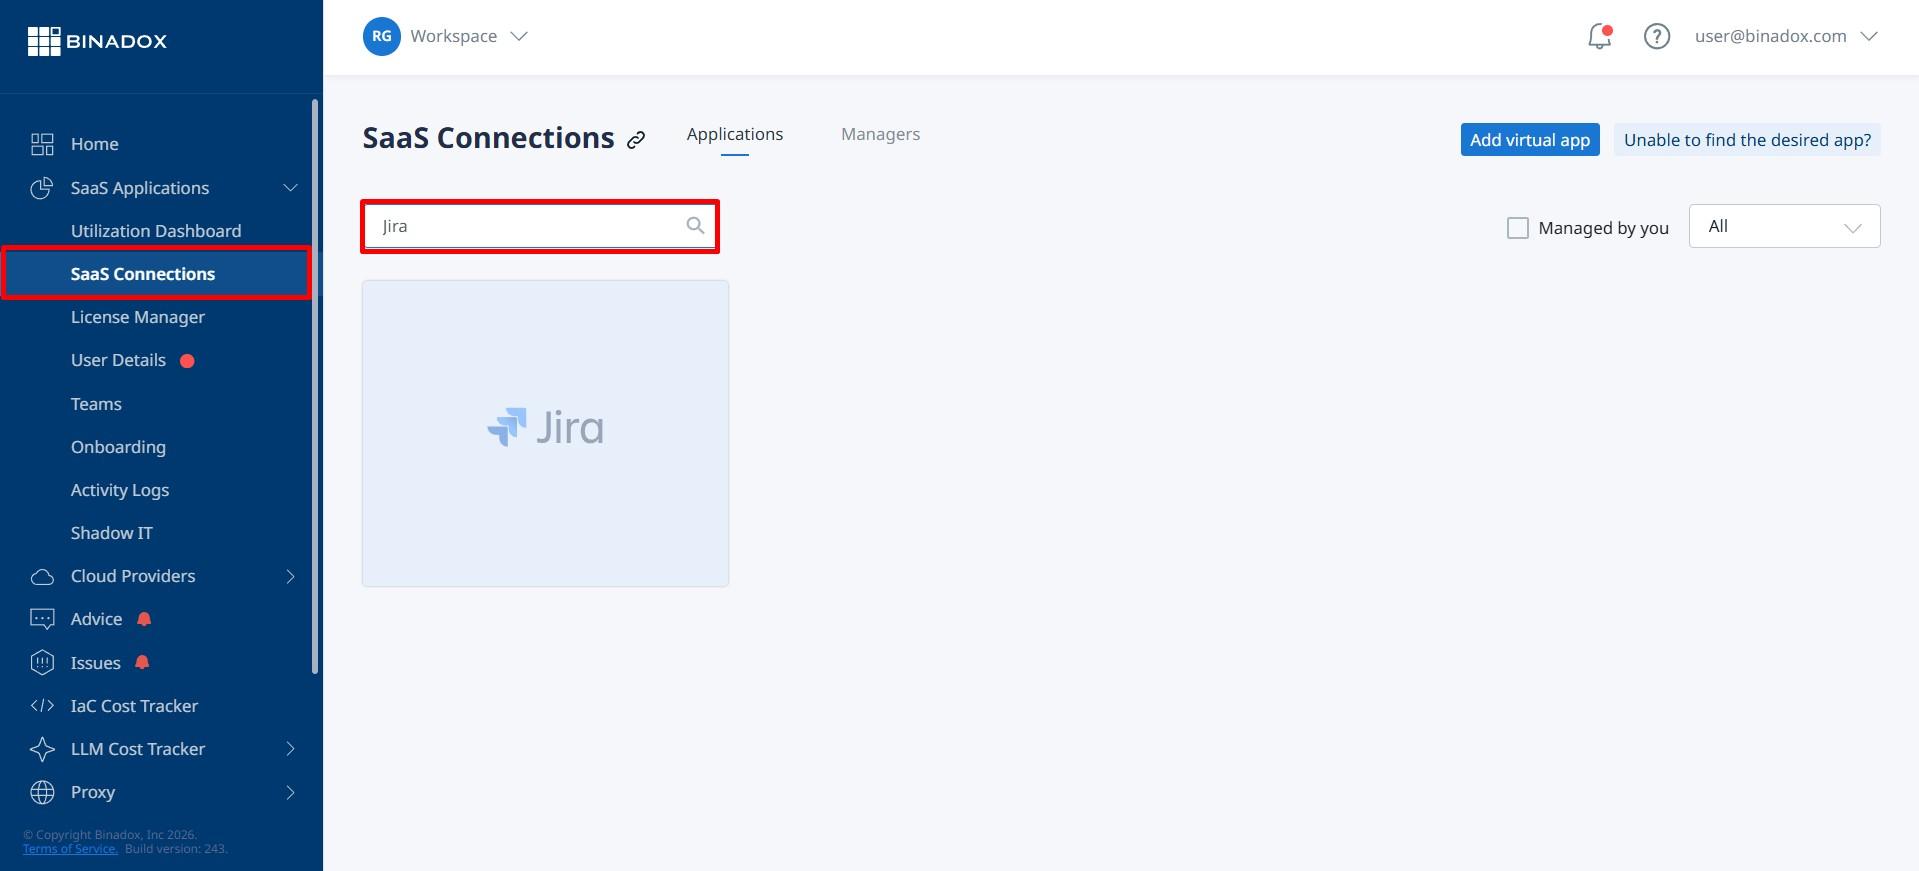
1. Log into your Binadox account.
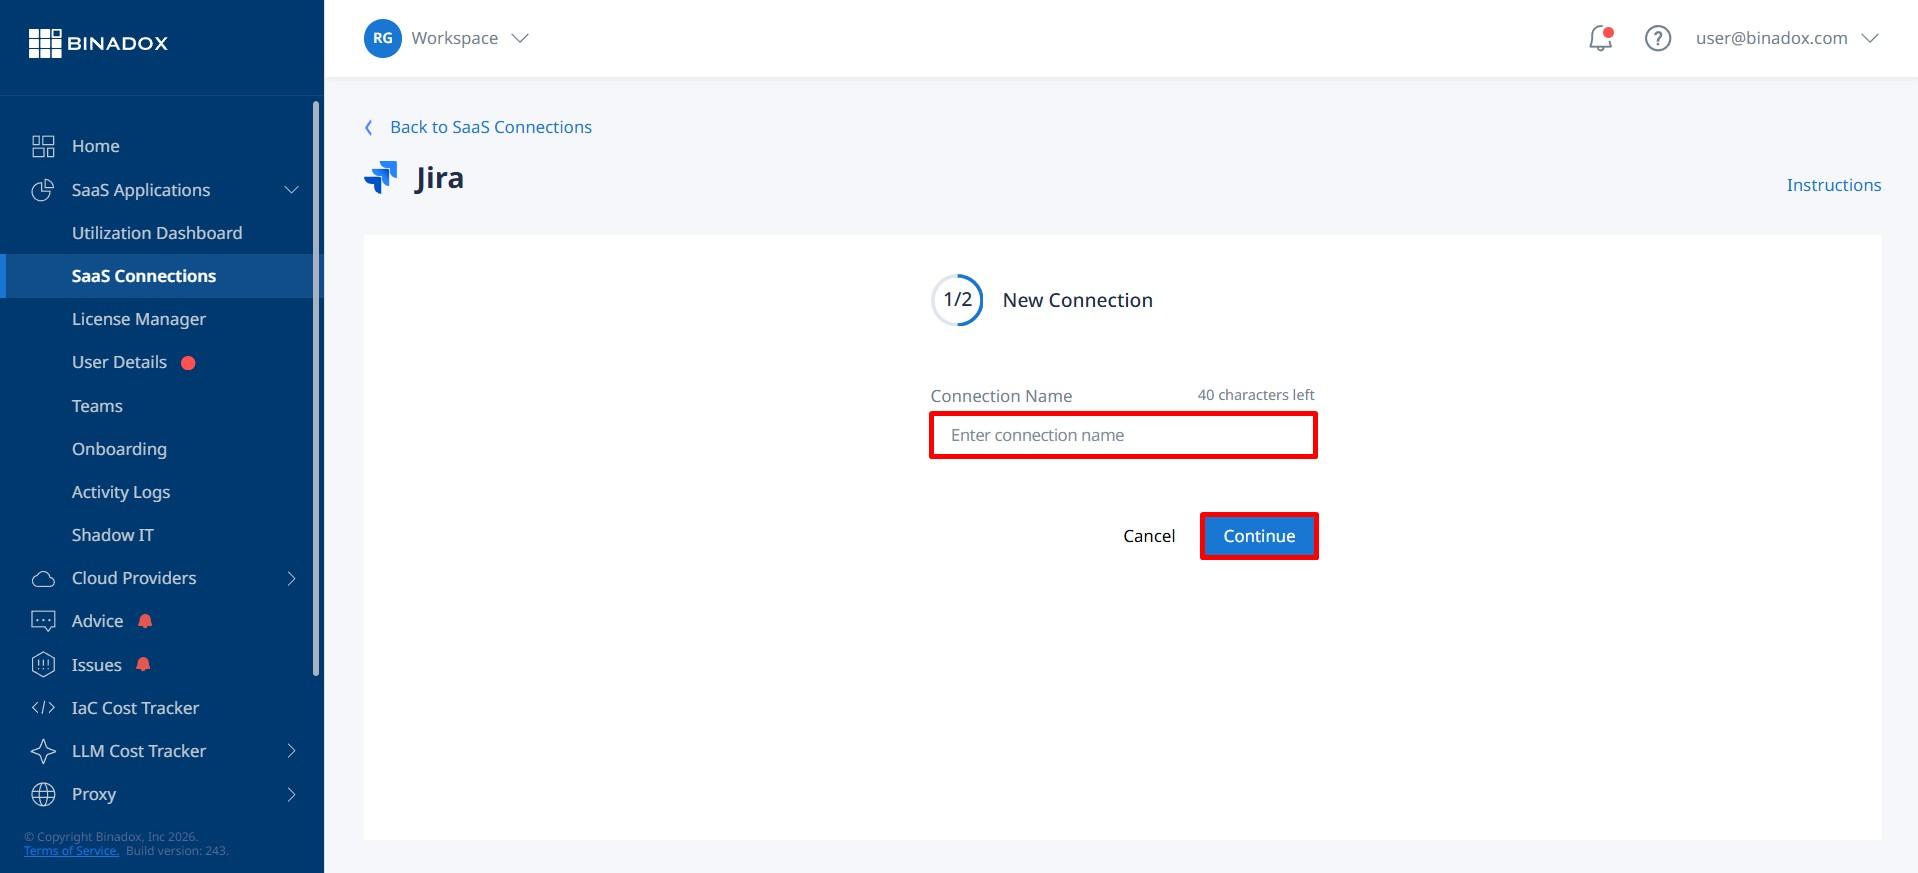
2. In the navigation pane on the left, click SaaS Connections. Click on the Jira icon. To quickly locate the Jira software in the list of supported applications, type in its name in the search bar.
3. Indicate a meaningful connection instance name for further reference and differentiation. Click Continue.
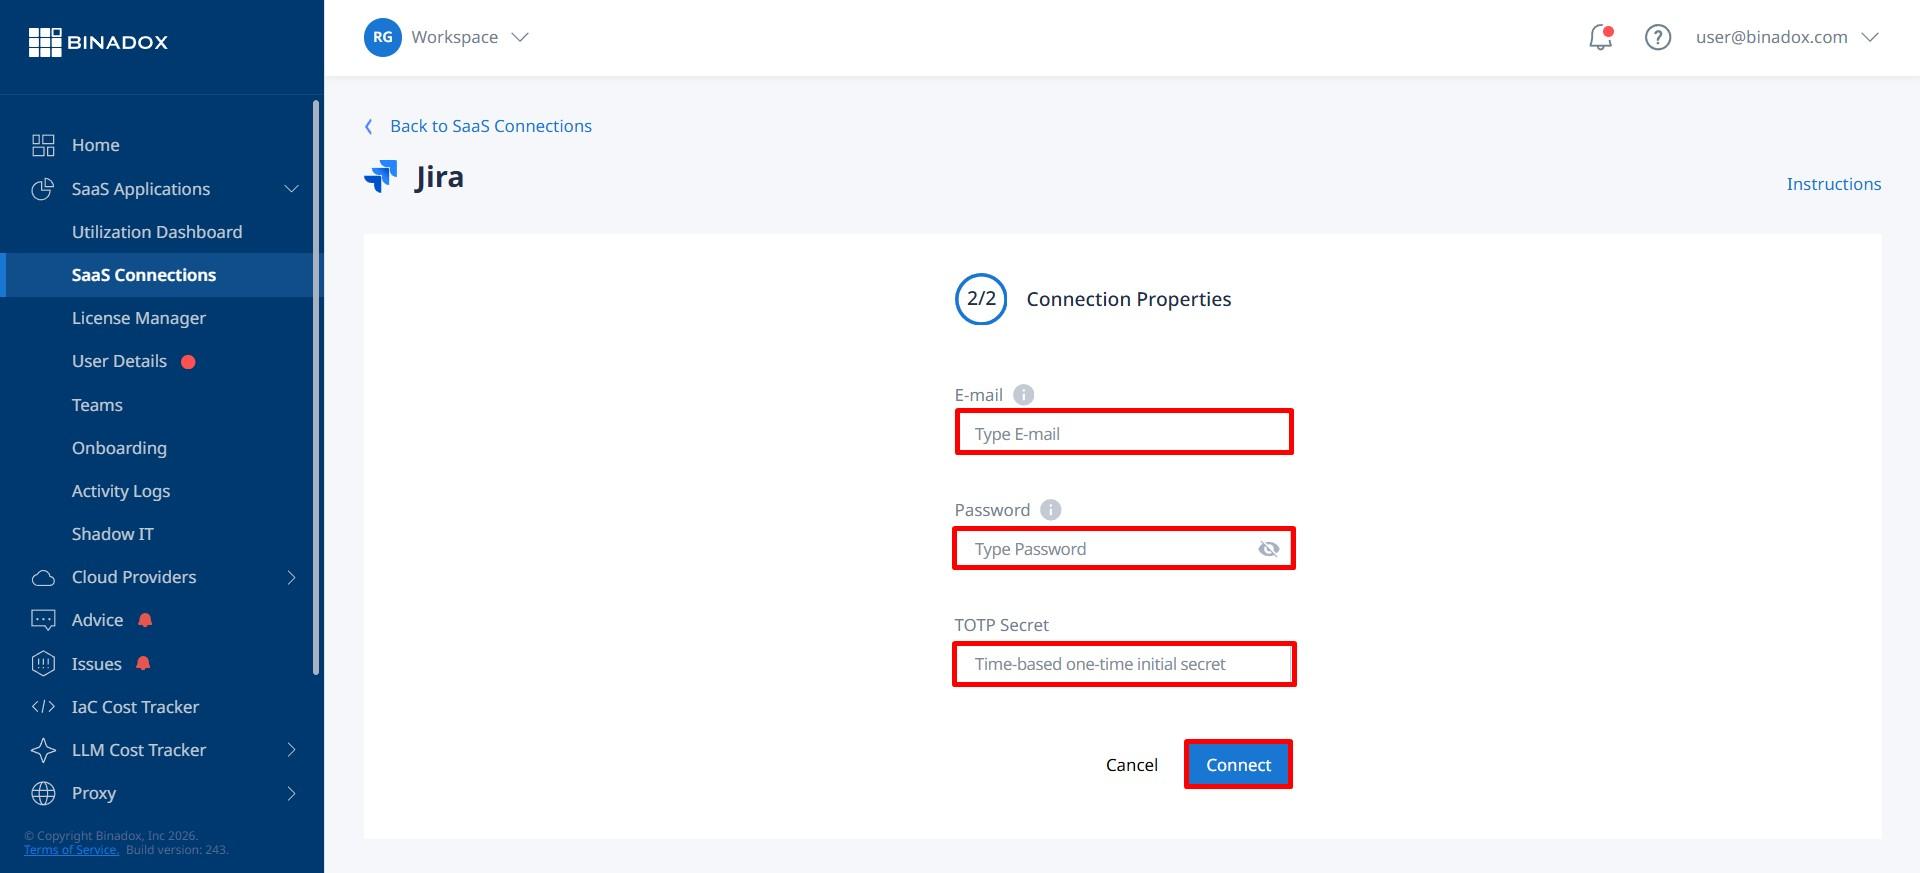
4. Fill in the connection properties. Enter the email address and password of an administrator account.
If two-step verification (TOTP) is enabled, enter the TOTP Secret Key (seed) obtained in Step 1.
Click Connect.
5. Upon successful Jira configuration, the connection status will switch into Connected.