


Sentry Integration
This guide explains how to connect Sentry to Binadox using a Sentry OAuth application. You will create a confidential OAuth application in Sentry, obtain the required credentials, and use them in Binadox to complete the connection. If your organization uses SCIM provisioning, you can also add a SCIM token to get user provisioning data.
Once connected, Binadox reads your Sentry organization membership and license data, so you can track subscription costs, see how many seats are actually in use, and reclaim the ones that are not.
Create Sentry OAuth Application
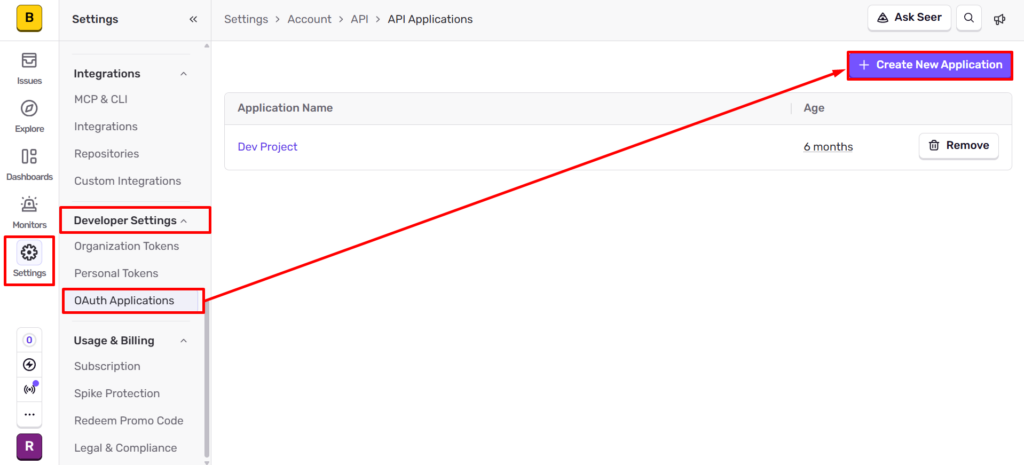
Log in to Sentry and click Settings in the left sidebar. In the Developer Settings section, select OAuth Applications, then click Create New Application.
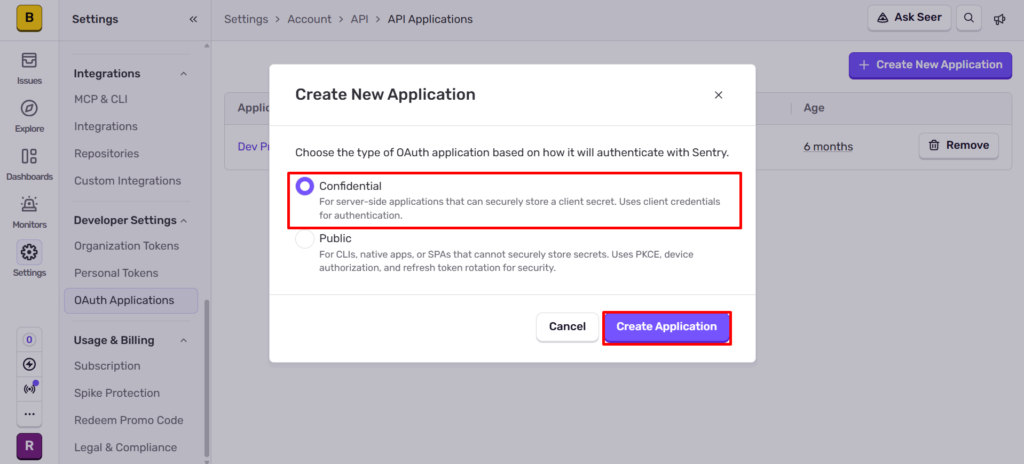
In the Create New Application dialog, select the Confidential application type. Binadox is a server-side application and stores the client secret securely, so the Public type is not suitable here. Click Create Application.
Fill in the application form with the following details:
- Name: Binadox
- Homepage:
https://www.binadox.com/ - Privacy Policy:
https://www.binadox.com/privacy-policy/ - Terms of Service:
https://www.binadox.com/terms-of-service/ - Authorized Redirect URIs:
https://app.binadox.com/api/1/applications/authorize/try
The redirect URI must match exactly, including the protocol and the absence of a trailing slash. Any mismatch causes an error during authorization.
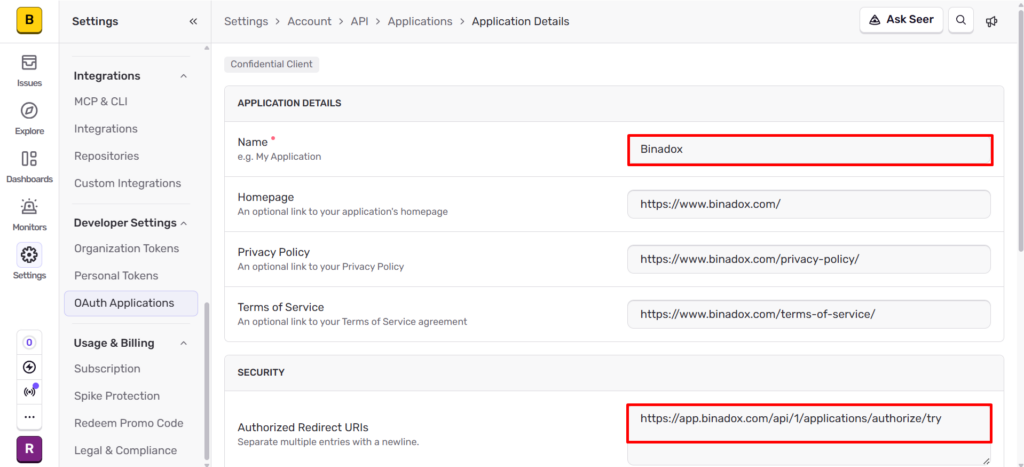
The form saves automatically, so there is no confirmation button to click.
Copy OAuth Credentials
Scroll to the Credentials section of the application page and copy the following values:
- Client ID
- Client Secret
You will need both values to complete the setup in Binadox.
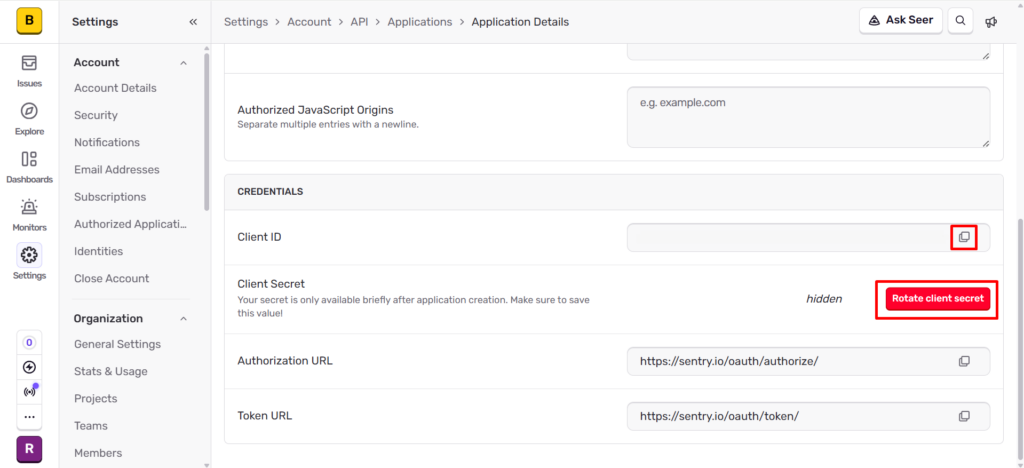
The client secret is displayed only briefly after the application is created. Copy it right away and store it in a password manager. If you missed it or lost the value, click Rotate client secret to generate a new one. Rotating the secret invalidates the previous value, so update it in Binadox afterwards, otherwise the connection stops collecting data.
Get the SCIM Token (optional)
The SCIM token is optional. Add it if your Sentry organization uses SCIM provisioning and you want Binadox to receive provisioning data along with the OAuth data.
Sentry issues SCIM tokens only under these conditions:
- The organization is on a Business or Enterprise plan. The feature is not available on Trial plans.
- SAML2 single sign-on is already set up and configured for the organization. See the Sentry documentation for your identity provider, for example Azure Active Directory SSO.
To generate the token:
- Sign in to sentry.io and select Settings > Auth.
- Under General Settings, select Enable SCIM, then click Save Settings.
- Sentry displays the SCIM Information block containing your Auth Token and SCIM Base URL. Copy the Auth Token.
If you change your organization slug later, update the SCIM configuration values accordingly.
Complete Connection in Binadox
Log into your Binadox account.
In the navigation pane on the left, click SaaS Connections. Click on the Sentry icon. To quickly locate Sentry in the list of supported applications, type in its name in the search bar.
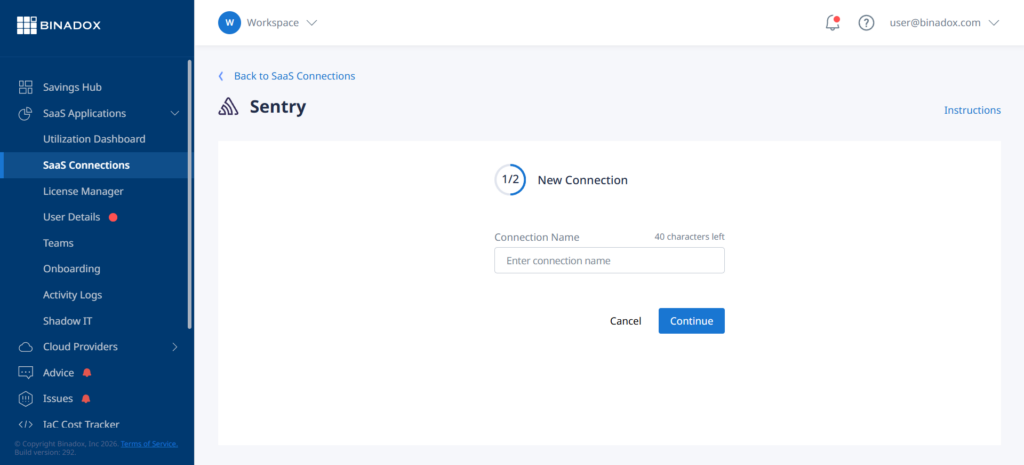
Create a unique connection name for further differentiation. Click Continue.
Enter the Client ID and Client Secret you copied from the Sentry application. If you generated a SCIM token, paste it into the SCIM Token field. Leave the field empty if your organization does not use SCIM.
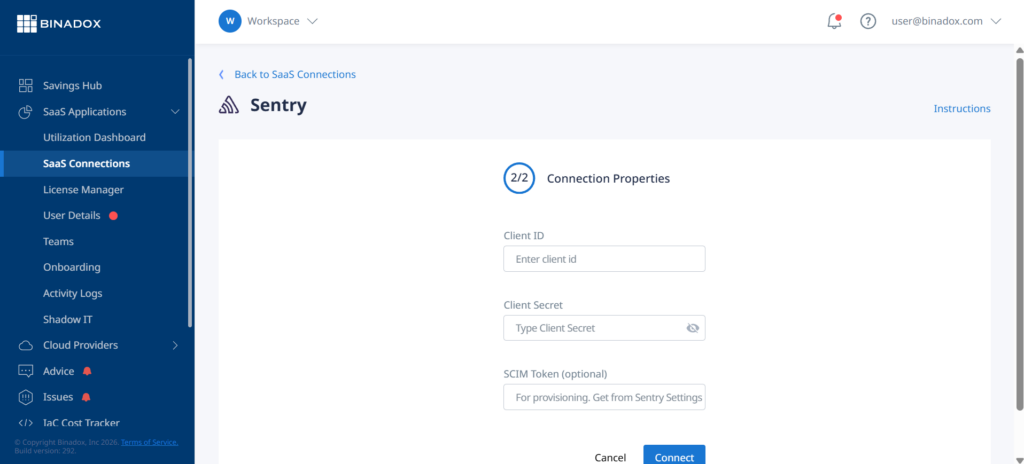
Click Connect and complete the authorization process on the Sentry side.
Upon successful authorization, the connection status will switch into Connected. The first data collection takes several minutes. After that, license and user data appear in the Utilization Dashboard, License Manager, and User Details sections.