



It’s a familiar story for many teams using the cloud: the monthly bill arrives, and it’s significantly higher than anticipated. These unexpected AWS charges can strain budgets and create friction between engineering and finance departments. The complexity of AWS pricing, combined with a lack of visibility into resource usage, often leads to this painful scenario. Understanding the root causes of a sudden AWS bill increase is the first step toward regaining control over your cloud spending.
The pay-as-you-go model is a double-edged sword. While it offers incredible flexibility, it also means that small, unmonitored services can accumulate significant costs over time. From idle EC2 instances to forgotten EBS volumes, the sources of these financial leaks are numerous and often hidden in plain sight. This article provides a practical guide to diagnosing the source of unexpected AWS charges and implementing robust strategies to prevent them from happening again.
Key takeaways:
- Diagnose with Data: Use tools like AWS Cost Explorer and the Cost and Usage Report (CUR) to pinpoint the exact services, regions, and resources driving a sudden AWS bill increase.
- Automate Prevention: Set up AWS Budgets with multiple alert thresholds (e.g., 50%, 80%, and 100%) to receive proactive notifications before you overspend.
- Clean Up Idle Resources: Regularly identify and terminate unused resources like idle EC2 instances, unattached EBS volumes, and unnecessary Elastic IPs, which are common sources of unexpected charges.
- Optimize Data Transfer: Be mindful of data transfer costs, which can be a significant hidden expense. Data transfer in to AWS is almost always free, but data transfer out to the internet or even between different AWS regions incurs charges.
Common Causes of Unexpected AWS Charges
The primary reason for AWS billing surprises is often a simple lack of visibility. When teams can’t easily see which services are being used and by whom, it’s easy to lose track of spending. This problem is compounded by the sheer number of services AWS offers, each with its own unique pricing model.
Idle and Unused Resources
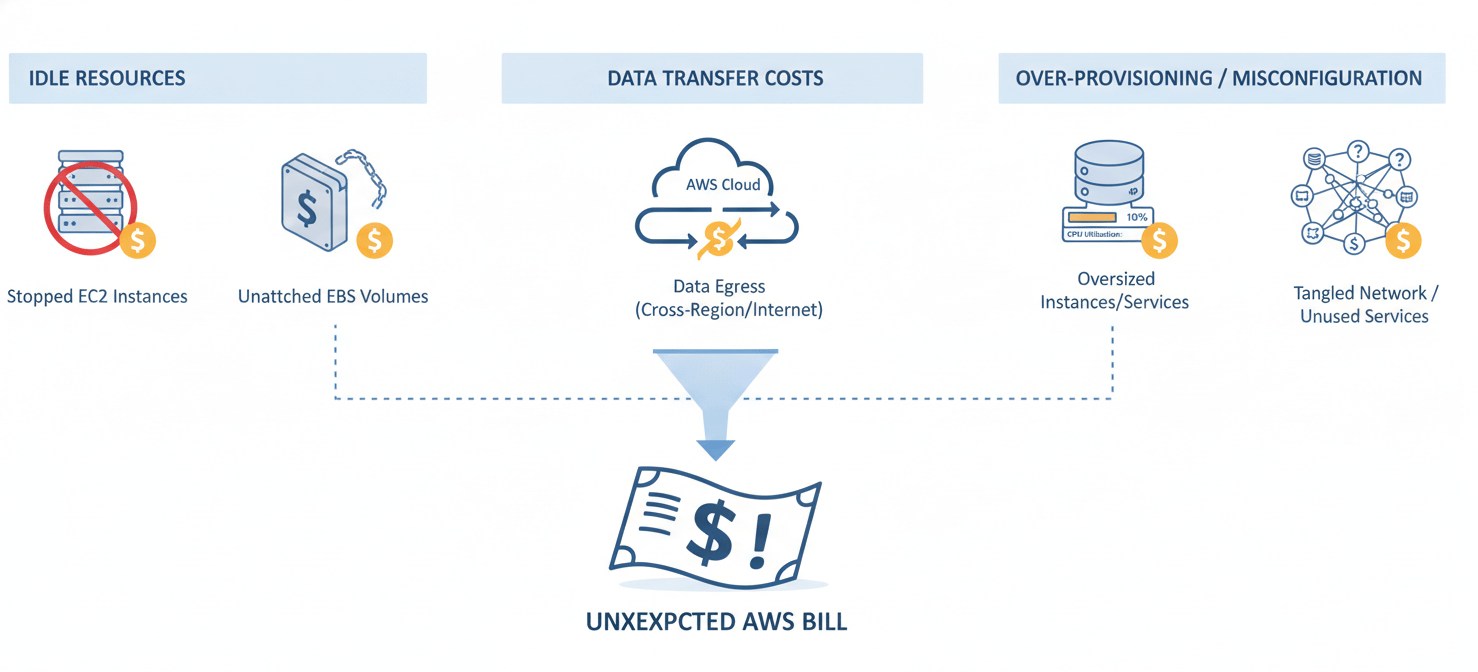
One of the most frequent culprits behind a sudden AWS bill increase is paying for resources that are allocated but not actively used.
- Idle EC2 Instances: Virtual servers that are left running, even at low utilization, incur costs for every hour they are active.
- Unattached EBS Volumes: Elastic Block Store volumes that are not attached to an EC2 instance still incur storage charges. It’s a common oversight to terminate an instance but forget to delete its associated storage volumes.
- Unused Elastic IPs: AWS charges for Elastic IP addresses that are allocated to your account but not attached to a running instance.
Data Transfer Costs
Data transfer is a notoriously tricky area of AWS billing. While inbound data transfer is generally free, outbound data transfer is not. These costs can add up quickly and are often overlooked during initial architecture planning.
- Egress to the Internet: Transferring data from AWS services out to the public internet is a primary source of data transfer charges, typically billed per gigabyte. AWS provides a free tier of 100GB per month for outbound data, but this is easily consumed by production applications.
- Inter-Region and Inter-AZ Transfers: Moving data between different AWS regions or even between different Availability Zones (AZs) within the same region can incur costs. For example, high-availability architectures that replicate data across AZs will see charges for this traffic.
Over-provisioning and Misconfigured Services
Allocating more resources than a workload actually needs is another common path to unexpected AWS charges.
- Incorrect EC2 Instance Sizing: Choosing an instance type with more CPU or memory than required leads to unnecessary spending. This is often done “just in case” but results in paying for idle capacity.
- CloudWatch Logs: While a powerful monitoring tool, CloudWatch costs can escalate due to its complex pricing model, which includes charges for data ingestion, storage, and analysis. Excessive logging from applications can lead to a surprisingly large bill.
- Exceeding the Free Tier: Many users are caught off guard when their 12-month AWS Free Tier expires, or when their usage exceeds the monthly free limits, causing services to start incurring standard charges.
How to Diagnose the Source of a Sudden AWS Bill Increase
When you’re faced with an unexpectedly high bill, the first step is to investigate where the costs are coming from. AWS provides several tools designed to give you the visibility needed to dissect your spending.
Step 1: Use AWS Cost Explorer
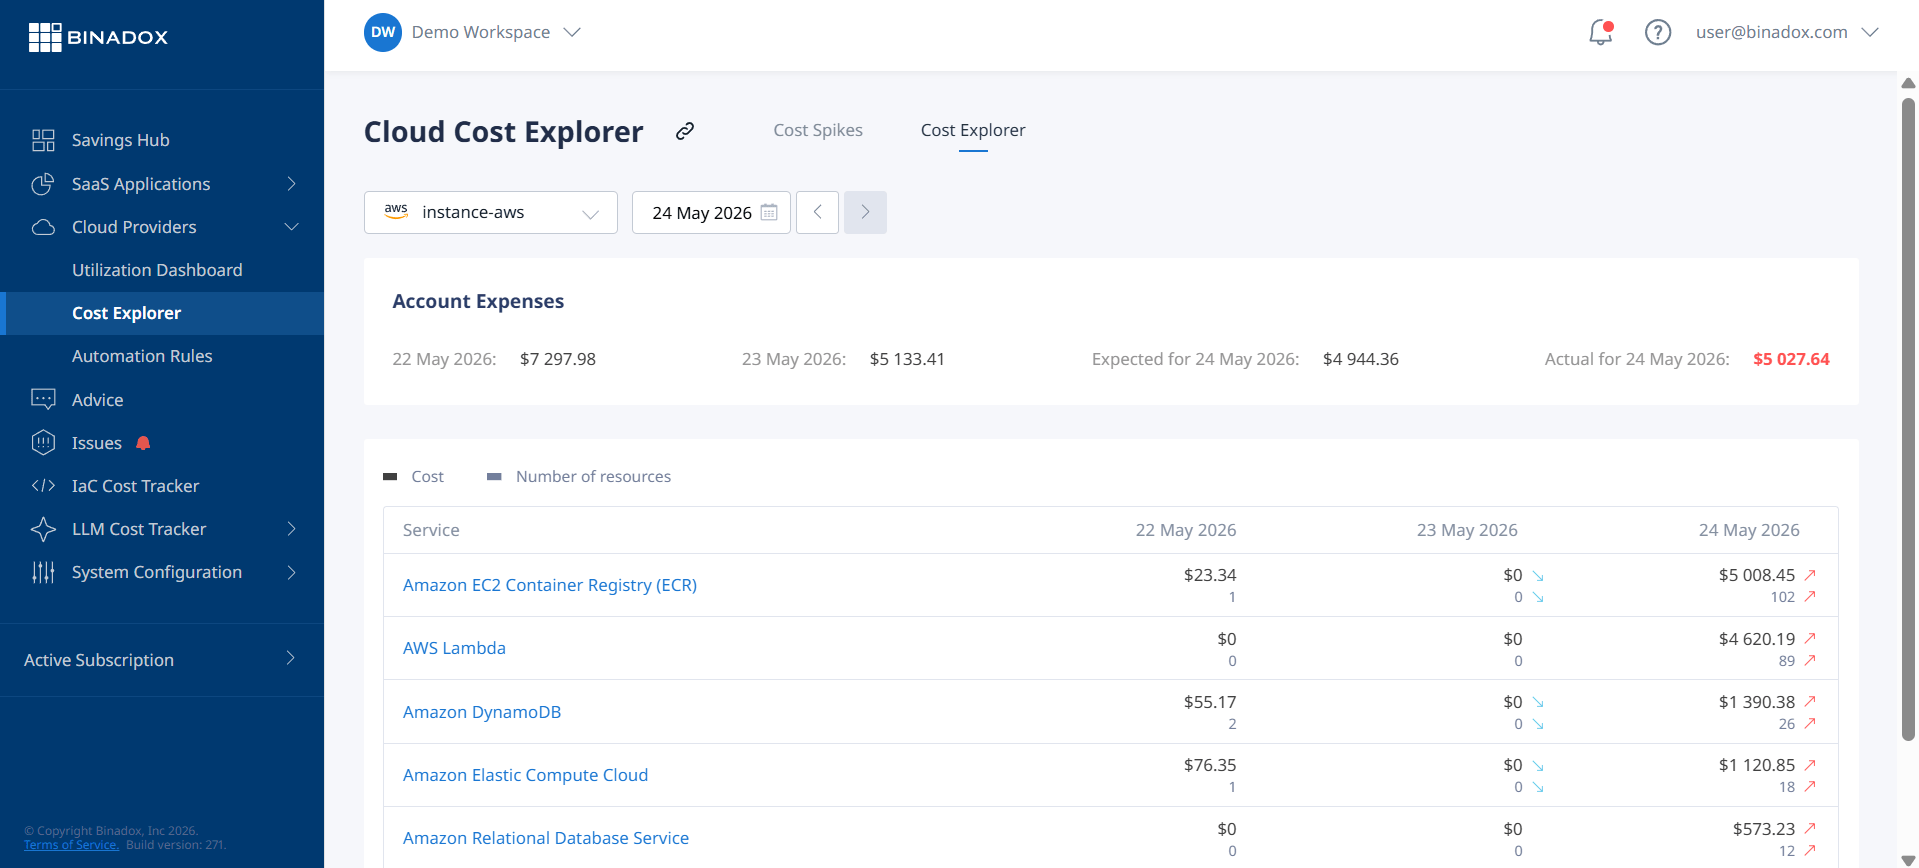
AWS Cost Explorer is your primary tool for visualizing and analyzing your costs and usage. It provides an intuitive interface with graphs and filtering options to help you identify trends and pinpoint cost drivers.
- Enable Cost Explorer: If you haven’t already, you must first enable Cost Explorer in the AWS Billing and Cost Management console.
- Analyze Your Costs: Start by viewing your monthly costs grouped by service. This will immediately show you which AWS service is responsible for the largest portion of your bill. You can then filter further by region, usage type, or tags to narrow down the source.
- Isolate Credits: If you have AWS credits, they can sometimes mask your actual usage costs. In Cost Explorer, you can filter by “Charge Type” and exclude credits to see your raw, unblended costs.
Step 2: Dive Deep with the AWS Cost and Usage Report (CUR)
For the most granular detail, you need the AWS Cost and Usage Report (CUR). This report provides comprehensive data about your costs, including resource-level details.
- Set Up the CUR: You must configure the CUR to be delivered to an Amazon S3 bucket you own. You can choose to have the data aggregated hourly, daily, or monthly.
- Analyze the Data: The CUR is delivered as a CSV or Parquet file, which can be massive. To analyze it effectively, you can load the data into a tool like Amazon Athena, Amazon QuickSight, or a third-party cost management platform. This allows you to run detailed queries to understand costs at the individual resource level.
Step 3: Implement Resource Tagging for Cost Allocation
Without proper tagging, it’s nearly impossible to attribute costs to specific projects, teams, or environments. A consistent tagging strategy is fundamental to financial accountability in the cloud.
- Define a Tagging Policy: Establish a clear and consistent set of tags that all resources must have. Common tags include
CostCenter,Project,Owner, andEnvironment. - Activate Cost Allocation Tags: After applying tags to your resources, you must activate them in the Billing and Cost Management console. Once activated, these tags will appear as filterable dimensions in Cost Explorer and as columns in your CUR, allowing you to group costs by your business categories.
Proactive Strategies to Prevent AWS Billing Surprises
Diagnosing a cost spike is reactive. The real goal is to implement proactive measures that prevent these surprises from occurring in the first place. This involves a combination of automated monitoring, disciplined resource management, and a cost-aware culture.
Set Up AWS Budgets and Alerts
- Create a Cost Budget: Start by creating a monthly cost budget for your entire account. You can set a fixed amount and configure alerts to be sent via email or Amazon SNS when actual or forecasted costs exceed certain percentages of your budget (e.g., 50%, 80%, 100%).
- Use Granular Budgets: For more detailed tracking, create budgets based on specific services, linked accounts, or cost allocation tags. This helps you identify which specific project or team is driving costs.
- Configure Budget Actions: You can configure budget actions to automatically apply IAM policies or stop EC2 and RDS instances when a budget threshold is breached, preventing further overspending.
Leverage AWS Cost Anomaly Detection
While AWS Budgets is great for tracking predictable spending, AWS Cost Anomaly Detection uses machine learning to identify unusual or unexpected spending spikes.
- How it Works: The service analyzes your historical spending patterns to establish a baseline. It then monitors your costs and alerts you when it detects an anomaly that deviates from this baseline.
- Setup: You can set up cost monitors for all your AWS services, specific member accounts, or cost categories in just a few steps. You define an alert threshold (e.g., send an alert for any anomaly with an impact greater than $500), and AWS handles the rest. This provides a safety net to catch issues that a fixed budget might miss.
Implement Regular Housekeeping
Many unexpected AWS charges stem from resources that were created for a temporary purpose and never decommissioned.
- Scheduled Cleanups: Institute a regular process, whether manual or automated, to review and clean up unused resources. This includes terminating stopped EC2 instances, deleting unattached EBS volumes, and releasing unused Elastic IPs.
- Automate with Policies: Use tools like AWS Lambda and Infrastructure as Code (IaC) to enforce policies that automatically delete temporary resources after a certain period.
Deep Dive: Cost Control for Specific AWS Services
While general principles apply across AWS, some services are more prone to cost overruns and have specific optimization techniques.
Amazon EC2 (Elastic Compute Cloud)
As a foundational compute service, EC2 is often one of the largest line items on an AWS bill.
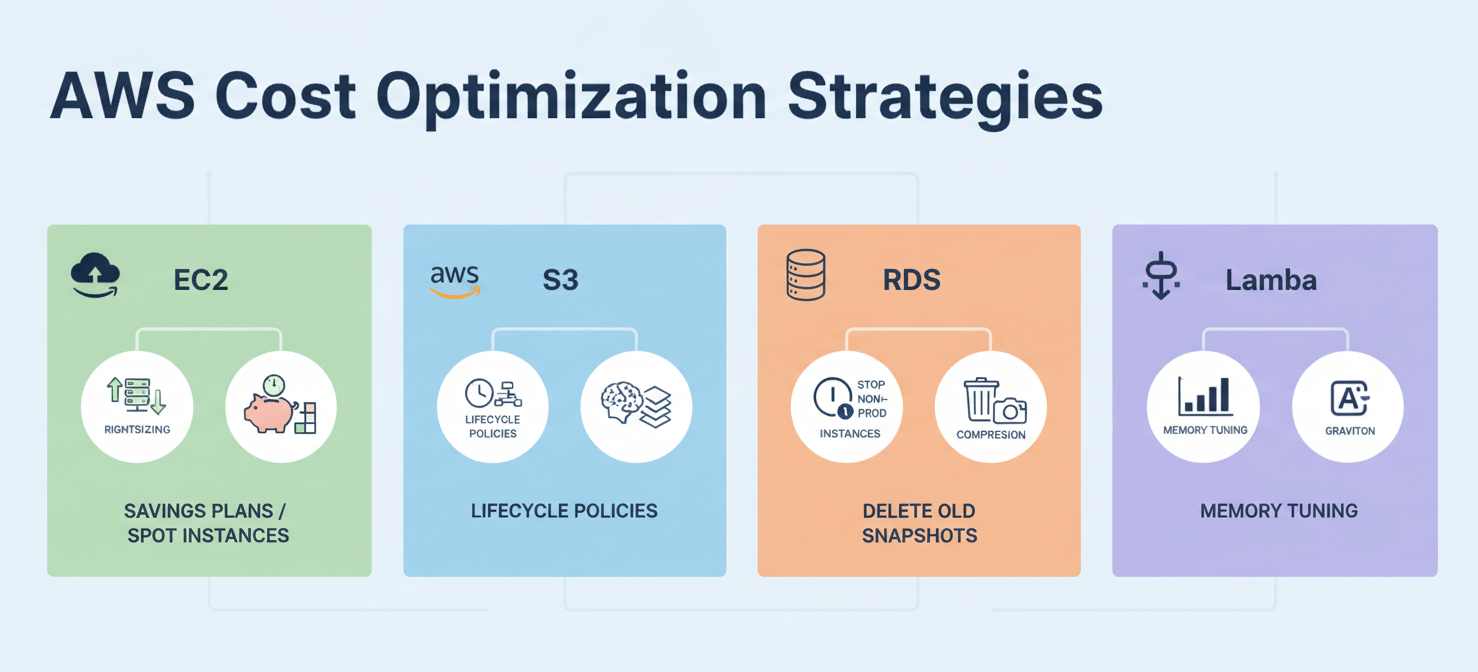
- Rightsizing: Continuously analyze the CPU and memory utilization of your instances. A general rule is that if an instance’s maximum CPU and memory usage stays below 40% over a four-week period, you can likely downsize it to a smaller instance type, saving money without impacting performance. Tools like AWS Compute Optimizer can provide data-driven rightsizing recommendations.
- Use the Right Pricing Model: Don’t rely solely on On-Demand instances. For predictable, long-term workloads, use Savings Plans or Reserved Instances to achieve significant discounts. For fault-tolerant or stateless workloads, consider Spot Instances for savings of up to 90% off On-Demand prices.
Amazon S3 (Simple Storage Service)
S3 storage itself is relatively inexpensive, but costs can accumulate from data transfer, request fees, and using the wrong storage class.
- Lifecycle Policies: Automate the movement of data to more cost-effective storage tiers. For example, you can create a lifecycle policy to automatically transition objects from S3 Standard to S3 Standard-Infrequent Access after 30 days, and then to S3 Glacier Deep Archive for long-term archiving.
- S3 Intelligent-Tiering: For data with unknown or changing access patterns, use the S3 Intelligent-Tiering storage class. It automatically moves your data between frequent and infrequent access tiers based on usage, optimizing costs without operational overhead.
- Data Compression and Formatting: Storing data in a compressed, columnar format like Parquet can significantly reduce storage footprint and lower query costs if you’re using services like Amazon Athena.
Amazon RDS (Relational Database Service)
Managed databases are convenient but can become a major cost center if not managed carefully.
- Rightsizing and Storage Optimization: Similar to EC2, ensure your RDS instances are properly sized for your workload. Monitor CPU utilization and storage to avoid over-provisioning.
- Stop Non-Production Instances: For development and testing databases that are only needed during business hours, use a tool like the Instance Scheduler on AWS to automatically stop them overnight and on weekends, which can reduce costs by up to 70%.
- Delete Unused Snapshots: Automated and manual snapshots can accumulate over time, leading to rising storage costs. Implement a policy to regularly delete old snapshots that are no longer needed for compliance or disaster recovery.
AWS Lambda
While Lambda’s pay-per-use model is cost-effective for many workloads, misconfigurations can lead to unexpected costs.
- Right-size Memory: Lambda pricing is based on memory allocation and execution duration. Allocating more memory also provides more vCPU, which can decrease execution time. Use tools like AWS Lambda Power Tuning to find the optimal memory configuration that balances performance and cost.
- Switch to Graviton: Migrating your Lambda functions to run on Arm-based AWS Graviton2 processors can deliver better performance at a lower cost compared to x86-based functions.
Building a Cost-Conscious Culture in Your Team
Technology and tools are only part of the solution. Lasting cost control requires a cultural shift where cost management becomes a shared responsibility across the organization.
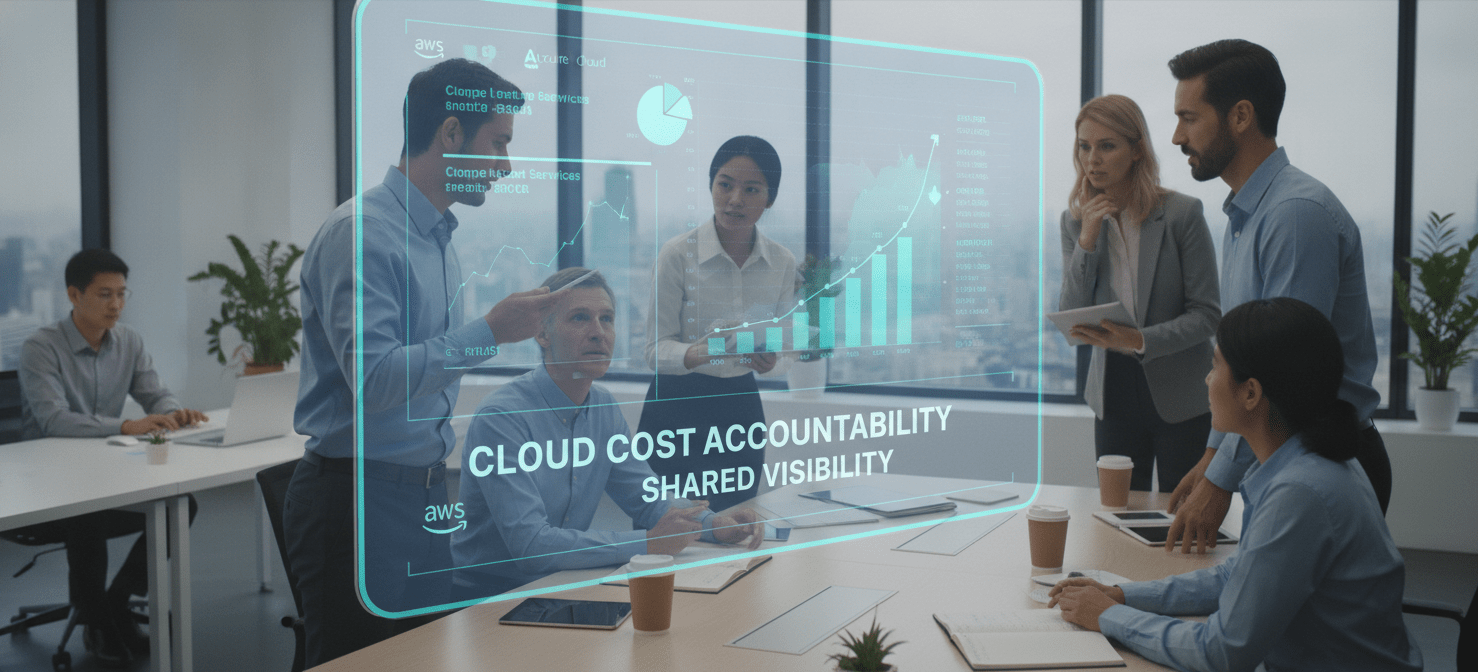
Shared Visibility and Accountability
When engineers are not involved in the cost-saving process, they have little incentive to build cost-effective solutions.
- Provide Access to Cost Data: Give your development teams access to cost management tools like AWS Cost Explorer. When they can see the financial impact of the resources they provision, they are more likely to make cost-conscious decisions.
- Use Cost Allocation Tags: Enforce a strict tagging policy to ensure all costs can be attributed to a specific team or project. This creates accountability and helps teams manage their own budgets.
Integrate Cost into Your Workflow
Cost optimization should not be an afterthought. It should be an integral part of your development and operations lifecycle.
- Regular Reviews: Make cost review a regular part of your team meetings. Discuss spending trends, identify anomalies, and prioritize optimization efforts.
- Automate Governance: Implement automated checks in your CI/CD pipelines to flag potentially expensive infrastructure changes before they are deployed.
Conclusion
Confronting unexpected AWS charges is a rite of passage for many organizations on their cloud journey. The initial shock of a high bill can be frustrating, but it serves as a critical catalyst for establishing financial discipline. By moving from a reactive state of shock to a proactive posture of control, you can transform your cloud spending from a source of anxiety into a predictable and optimized component of your operations.
The key is to treat cost management not as a one-time cleanup project, but as a continuous practice. Use the diagnostic tools at your disposal to understand your spending, implement automated guardrails like budgets and anomaly detection to prevent future surprises, and foster a culture where every team member feels responsible for efficient resource usage. Ultimately, mastering your AWS bill isn’t just about saving money; it’s about building a more robust, efficient, and sustainable cloud architecture. Don’t let the fear of unexpected AWS charges hold you back—instead, use it as motivation to build smarter.
To transform your cloud spending into a predictable and optimized component of your operations, you can schedule a time to discuss your needs or explore how Binadox can help by accessing its free trial.
 7-day free trial