



Managing cloud spending is a significant challenge for any organization using Azure. As your footprint grows, tracking costs across dozens or even hundreds of subscriptions becomes nearly impossible without a proper structure. This is where a robust Azure Management Group Cost Analysis strategy becomes essential. By organizing your subscriptions into a logical hierarchy, you can gain centralized visibility, enforce governance, and hold teams accountable for their cloud consumption.
This guide provides a complete walkthrough of how to leverage Azure Management Groups for effective cost analysis. You will learn how to structure your hierarchy, assign the correct permissions, and use Azure’s native tools to analyze spending at scale. The goal is to move from reactive cost monitoring to a proactive FinOps culture.
Key takeaways
- Management groups provide a hierarchical view of costs across multiple subscriptions, simplifying large-scale analysis.
- Proper setup requires assigning the “Cost Management Reader” role at the management group scope for users who need to view costs.
- A well-designed hierarchy, often mirroring your organization’s structure (e.g., by department or environment), is the foundation of effective cost allocation.
- You can perform a detailed cost analysis in 5 steps using the Cost Management + Billing tool in the Azure portal.
What Are Azure Management Groups?
Azure Management Groups are logical containers that help you manage access, policy, and compliance across multiple Azure subscriptions. Think of them as folders for your subscriptions. Instead of applying settings to each subscription individually, you can apply them to a management group, and those settings will be inherited by all subscriptions within that group.
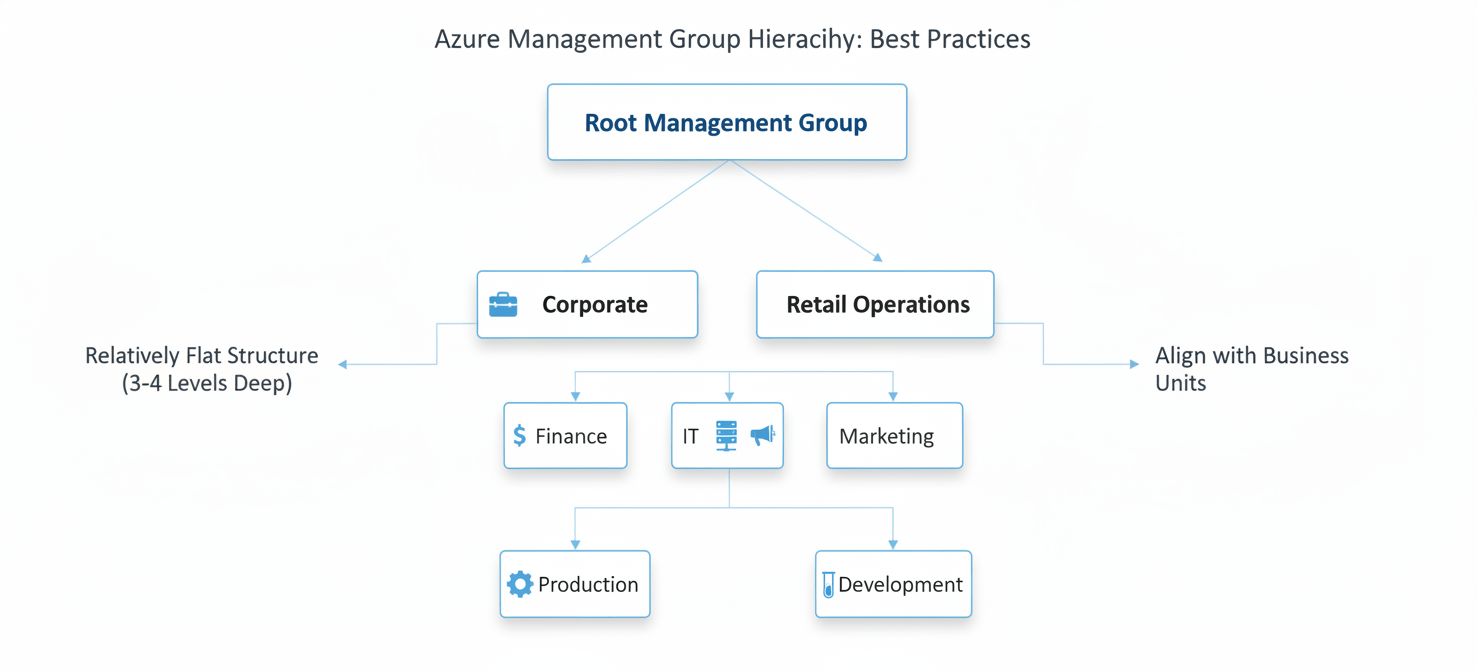
The hierarchy starts with a single top-level “root” management group in your Azure Active Directory (now Microsoft Entra ID) tenant. From there, you can create a hierarchy that reflects your organization’s structure. For example, you might create management groups for different departments like Finance, IT, and Marketing, or for different environments like Production and Development.
This structure is the foundation of enterprise-scale governance in Azure. It allows you to apply policies and access controls consistently, ensuring that all new subscriptions automatically receive the correct governance from day one.
Why Use Management Groups for Cost Analysis?
While management groups are powerful for governance, they are equally valuable for financial management. The primary benefit is centralized visibility. Instead of trying to piece together spending data from individual subscriptions, you can view aggregated costs at any level of your hierarchy.
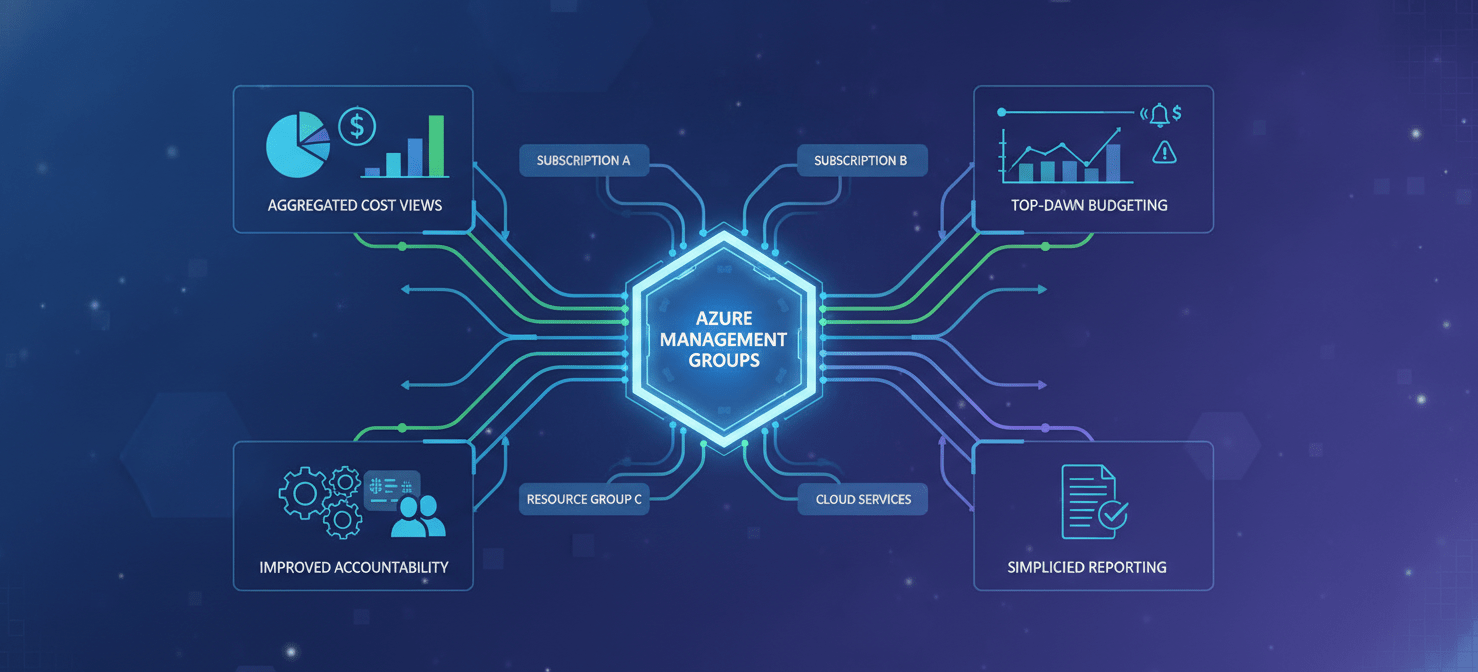
Here are the key reasons to use management groups for cost analysis:
- Aggregated Cost Views: See the total cost for a department, project, or environment by simply selecting the corresponding management group. This simplifies showback and chargeback processes.
- Top-Down Budgeting: Set budgets at the management group level to track spending for an entire business unit. Azure can then send alerts when spending approaches or exceeds the budget, helping you prevent overruns.
- Improved Accountability: When costs are clearly allocated to specific groups, it drives accountability. Teams can see their direct impact on cloud spending and are more motivated to optimize their resource usage.
- Simplified Reporting: Generating high-level financial reports becomes much easier. You can quickly answer questions like, “How much is the entire engineering department spending?” or “What is the month-over-month cost trend for our production environment?”
By aligning your management group structure with your financial reporting needs, you create a powerful framework for understanding and controlling your Azure spend.
Prerequisites for Viewing Costs at the Management Group Level
Before you can perform an Azure Management Group Cost Analysis, you need to ensure the right permissions are in place. By default, users do not have permission to view cost data across multiple subscriptions, even if they are owners of those subscriptions.
Required Permissions
To view costs at a management group scope, a user must have, at a minimum, the Cost Management Reader role assigned at that management group. This role provides read-only access to cost and billing information for all subscriptions within that management group and any nested child groups.
Here are the key roles involved in cost management:
- Cost Management Reader: Can view cost data, budgets, and recommendations.
- Cost Management Contributor: Can do everything a Reader can, plus create and manage budgets and exports.
- Billing Account Contributor: A higher-level role that can manage billing properties in addition to cost management activities.
For most users who only need to analyze costs, the Cost Management Reader role is the most appropriate and follows the principle of least privilege.
How to Enable Cost Viewing
An administrator with User Access Administrator or Owner permissions on the management group must assign the necessary roles.
Here is the process:
- Navigate to Management Groups in the Azure portal.
- Select the specific management group where you want to assign permissions.
- Click on Access control (IAM) in the left-hand menu.
- Click + Add and then Add role assignment.
- Select the Cost Management Reader role.
- Find and select the user, group, or service principal you want to grant access to.
- Click Save.
Once this is done, the assigned user can navigate to the Cost Management + Billing section and select the management group scope to view the aggregated cost data.
Step-by-Step Guide to Azure Management Group Cost Analysis
Once you have the right permissions, you can begin your analysis using the Cost Management + Billing tool in the Azure portal. This tool provides a rich, interactive experience for exploring your cost data.
Step 1: Select the Right Scope
First, navigate to Cost Management + Billing. At the top of the overview page, you will see a “Scope” pill. Click on it to select the management group you want to analyze. This is the most critical step, as it determines the data you will see. You can choose any management group in your hierarchy, from the root down to a specific team-level group.
Step 2: Use the Cost Analysis View
After setting your scope, click on Cost analysis in the left-hand menu. This is your primary workspace for slicing and dicing cost data. By default, it shows the accumulated cost for the current billing period.
You can customize the view in several ways:
- Timeframe: Change the date range to view costs for the last month, last quarter, or a custom period.
- Granularity: Switch between accumulated, daily, and monthly views to see trends over time.
- Group by: This is where the real power lies. You can group costs by various dimensions, such as Service name, Location, or Resource group. This helps you identify the biggest cost drivers.
Step 3: Filter and Group for Deeper Insights
To get more specific, use filters. For example, you can filter by a specific tag, resource type, or subscription. This allows you to narrow down your analysis to answer precise questions.
A common analysis workflow is to first group by Service name to see which Azure services are costing the most. Then, you can add a filter for a specific service (e.g., Virtual machines) and group by Resource group to see which applications are driving that cost.
Step 4: Create and Monitor Budgets
To proactively control costs, create a budget. From the Cost Management menu, select Budgets and click + Add.
When creating a budget, you will:
- Confirm the scope is set to your desired management group.
- Give the budget a name and set a reset period (e.g., monthly).
- Set the budget amount.
- Configure alert thresholds. For example, you can set an alert to be sent when actual spending reaches 80% of the budget.
These alerts are crucial for preventing unexpected overspending.
Step 5: Schedule Data Exports
For more advanced analysis or integration with other systems, you can export your cost data. Select Exports from the menu and create a new export. You can schedule daily or monthly exports of your raw cost and usage data to an Azure Storage account. From there, your finance or data analytics teams can load it into other tools for further analysis.
Best Practices for Structuring Management Groups for Cost Control
The effectiveness of your cost analysis depends heavily on how you structure your management groups. A poorly designed hierarchy can make it difficult to allocate costs accurately. The goal is to create a structure that mirrors how your organization operates and reports on finances.
Align with Your Organizational Structure
The most common and effective approach is to align your management group hierarchy with your company’s organizational chart. You might create top-level groups for major divisions (e.g., Corporate, Retail Operations) and then create nested groups for individual departments or business units.
This approach makes it intuitive to assign costs and provides clear lines of accountability. The finance team can easily see the total Azure spend for the marketing department, for instance.
Separate Production and Non-Production Environments
Another best practice is to create separate management groups for your production and non-production (development, testing, sandbox) environments. This separation is useful for several reasons:
- It allows you to apply different governance policies. For example, you might have stricter policies for production environments.
- It simplifies cost analysis. You can easily compare the cost of running production workloads versus development activities.
- It helps identify waste. High costs in non-production environments often indicate idle or over-provisioned resources that can be optimized.
Keep the Hierarchy Reasonably Flat
While it’s tempting to create a deep and complex hierarchy, it’s best to keep it relatively flat—ideally no more than three or four levels deep. A deep hierarchy can become difficult to manage and navigate. Remember that you can use tags to add more granular detail for cost allocation without needing a complex management group structure.
Advanced Cost Analysis and Reporting Techniques
While the Azure portal provides excellent tools for cost analysis, you can take your reporting to the next level with more advanced techniques.
Leveraging Tags for Granular Allocation
Tags are metadata labels that you can apply to your Azure resources. They are essential for fine-grained cost allocation. For example, you can tag resources with a project name, cost center, or application owner.
Within the cost analysis view, you can group by tag to see a breakdown of costs that cuts across subscriptions and resource groups. To make this effective, you need a consistent tagging strategy enforced by Azure Policy. You can also enable tag inheritance to automatically apply subscription and resource group tags to the resources within them, ensuring comprehensive tagging.
Integrating with Power BI
For creating detailed, custom dashboards and reports, you can connect Azure Cost Management to Power BI. Microsoft provides an Azure Cost Management Power BI App that offers pre-built reports for things like usage by subscription and top cost drivers.
For even more flexibility, you can use the Azure Cost Management connector in Power BI Desktop. This allows you to pull the raw cost data and combine it with other data sources to create holistic reports that meet your specific business needs.
Using Scheduled Exports and Automation
As mentioned earlier, you can schedule regular exports of your cost data to Azure Storage. This opens up possibilities for automation. For example, you could:
- Build a script that ingests the exported data into your company’s financial system.
- Use a data visualization tool other than Power BI to create custom dashboards.
- Run automated analysis to detect cost anomalies or identify optimization opportunities.
Common Challenges and How to Solve Them
Implementing Azure Management Group cost analysis is not without its challenges. Here are some common issues and how to address them.
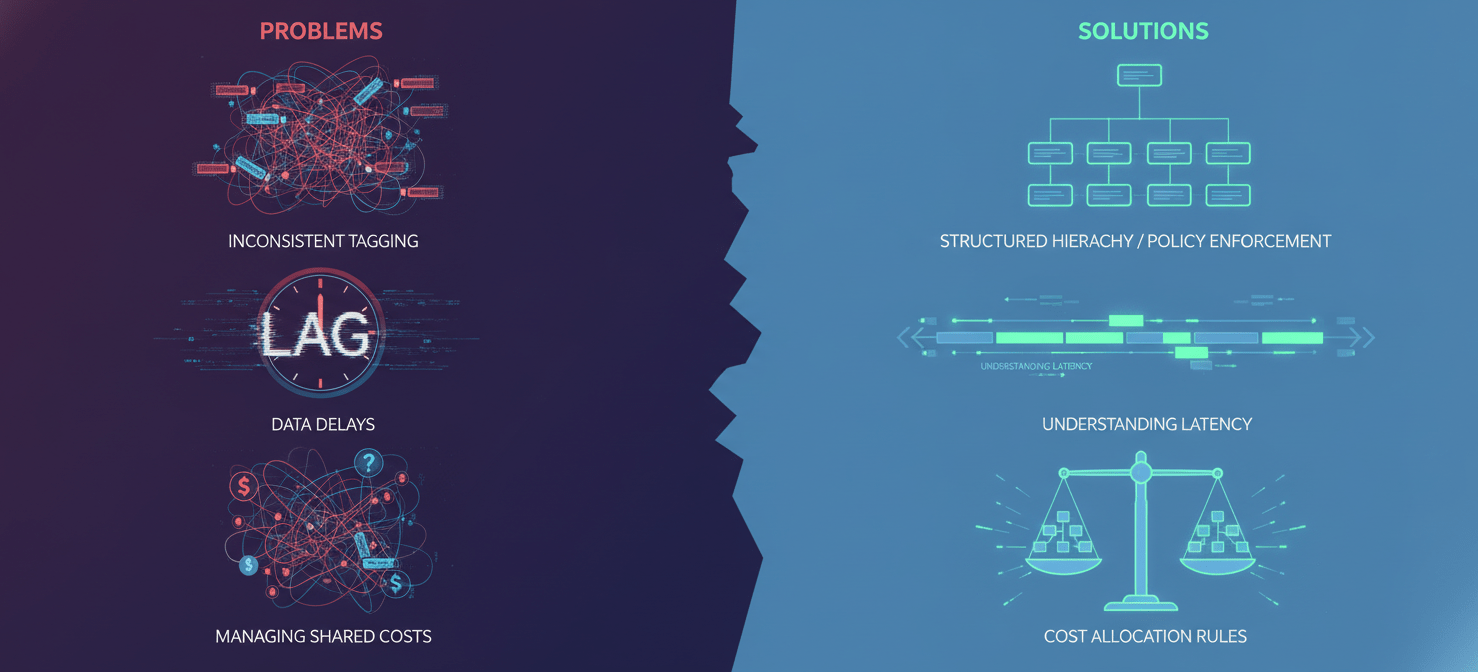
Inconsistent Hierarchy or Tagging
Challenge: If your management group structure doesn’t align with your business or your tagging is inconsistent, your cost allocation will be inaccurate.
Solution: Plan your hierarchy carefully from the start. Work with finance and business leaders to design a structure that makes sense for your organization. For tagging, create a formal tagging policy that defines mandatory tags and their allowed values. Then, use Azure Policy to enforce this policy, preventing the creation of untagged resources.
Delays in Cost Data
Challenge: Azure cost data is not always real-time. There can be a delay of 8-24 hours before usage data appears in Cost Management. This can be frustrating when you’re trying to track costs closely.
Solution: Understand and plan for this latency. For real-time alerting on immediate issues, rely on Azure Monitor alerts for metrics like CPU usage rather than cost alerts. Use cost analysis for trend analysis and budget tracking over hours and days, not minutes.
Managing Shared Costs
Challenge: Some resources, like an ExpressRoute circuit or a shared Azure Kubernetes Service cluster, provide services to multiple applications or departments. Allocating these shared costs can be complex.
Solution: Microsoft Cost Management has a feature for cost allocation that allows you to split the cost of shared services. You can create rules to distribute costs from a source (like a subscription with shared services) to various targets (other subscriptions, resource groups, or tags) based on a percentage or a proportional calculation.
Conclusion
Effectively managing cloud costs is a continuous process, not a one-time project. A well-executed Azure Management Group Cost Analysis strategy is foundational to achieving financial control and efficiency in the cloud. By creating a logical hierarchy, assigning the right permissions, and regularly using tools like Azure Cost Management, you can transform your cost data from a confusing spreadsheet into a clear map of your cloud spending.

This visibility empowers your teams to make smarter decisions, drives accountability, and ultimately allows you to optimize your investment in Azure. The goal isn’t just to see where the money is going; it’s to ensure every dollar spent is delivering maximum value. Neglecting this structure isn’t just a technical oversight; it’s a financial liability waiting to happen.
To truly master your Azure spending and ensure every dollar delivers value, consider starting a free trial of our comprehensive platform or booking a demo to see how we can tailor a solution for your specific needs.
 7-day free trial